Common Laravel Issues and How to Resolve Them
Laravel is considered one of the most powerful and user-friendly PHP web frameworks. Its clean syntax, strong ecosystem, and large community make it a top choice for many developers. However, even experienced Laravel users occasionally encounter issues, especially when setting up a new project or upgrading to a newer version. In this article, we’ll cover some of the most common problems developers face when working with Laravel, along with simple solutions.
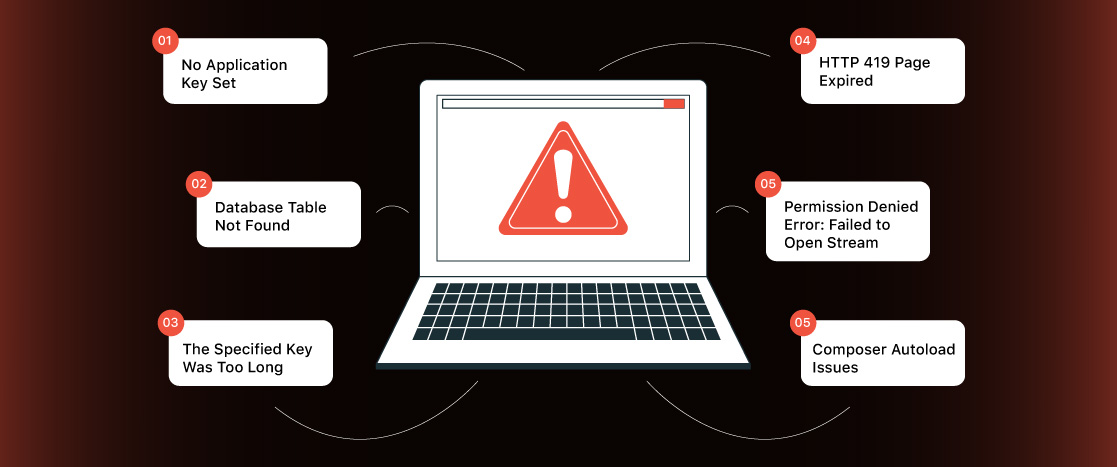
1. No Application Key Set
One of the first problems new Laravel users often face is the “No Application Key Set” error. This usually happens when you clone a Laravel project from a Git repository or set up a new project without using Laravel’s installer CLI, which automatically configures the environment settings.
Laravel uses an application key to protect various parts of your application, like user sessions and encrypted data. This key is a randomly generated string stored in your project’s .env file. It’s important because it encrypts sensitive data, such as cookies and session information. Without this key, Laravel can’t function properly.
The application key isn’t set when you clone a project or manually set up a new Laravel application (for example, by copying files). This causes the “No Application Key Set” error because the .env file, which holds the environment settings, is missing a valid APP_KEY.
To fix this error, you need to generate the application key. Laravel has a built-in command for this:
php artisan key:generateRunning this command will:
- Create a New Key: Laravel will generate a new 32-character random string for the APP_KEY.
- Update the .env File: The command automatically adds the new key to your .env file under APP_KEY.
- Apply the Key: Laravel will now use the key to encrypt and secure sessions and other sensitive data.
Once the key is generated, the error will be gone, and your application will work correctly.
Additional Tips:
- The .env File: The .env file is essential for setting up your Laravel environment. It should be in the root directory of your Laravel project. You can create a new one if it’s missing by copying the .env.example file.
- Running the Command: Make sure you run the php artisan key:generate command from the root directory of your Laravel project where the artisan script is located.
- Local vs. Production: If you’re working on a local environment, don’t share your application key with production environments. For production, ensure the key is securely stored and not exposed to unauthorized access.
Once you’ve set the application key, your Laravel application should run as expected, without the “No Application Key Set” error.
2. Database Table Not Found
Laravel developers encounter a common issue: the “Table Not Found” or “Table Does Not Exist” error. This occurs when Laravel can’t find the database table that your application is trying to use. This problem has several reasons, such as missing migrations or configuration issues. Let’s see how to fix this issue.
- Run Migrations: Laravel uses migrations to create and manage database tables. If you’ve just set up the project or added new migrations, you might have forgotten to run them. Migrations ensure the required tables are created in your database.
To run the migrations and create the tables, use the following command:
php artisan migrateThis will apply to all pending migrations. If you’re working in a development environment and need to reset your database, you can also run:
php artisan migrate:refreshThis command will roll back all migrations and re-run them, which is helpful if you need to rebuild your database schema.
- Check for Typos in the Model: If your model uses a custom table name, ensure the name is spelled correctly. By default, Laravel names the table based on the model’s pluralized and lowercase name. For example, if your model is called Post, Laravel will expect the table to be called Post.
If your table has a different name, you can define a custom name in your model by setting the $table property:
class Post extends Model
{
    protected $table = 'custom_table_name';
}
Be sure to check for typos in the model’s $table property and the table name in the database.
- Verify Database Connection: Another reason for this error could be incorrect database connection settings. Laravel stores the database connection details in the .env file, so it might not connect to the wrong database if the settings are incorrect.
Check these lines in your .env file to ensure they are correct:
DB_CONNECTION=mysql
DB_HOST=127.0.0.1
DB_PORT=3306
DB_DATABASE=your_database_name
DB_USERNAME=your_database_username
DB_PASSWORD=your_database_password
Ensure the DB_DATABASE, DB_USERNAME, and DB_PASSWORD values are correct and the database exists. If you’re using a different database (like PostgreSQL or SQLite), set the DB_CONNECTION to match, for example, pgsql for PostgreSQL.
- Check the $connection Property in the Model: If your app uses multiple database connections, Laravel allows you to set a custom database connection in your model using the $connection property. Ensure this property is set correctly, especially if the model is supposed to use a database other than the default one.
For example:
class Post extends Model
{
    protected $connection = 'another_connection';
}
In this case, Laravel will use the database connection defined in config/database.php under the another_connection key. Make sure the connection name is correct and points to the right database.
- Check Database Table Existence: Sometimes, the problem is not with Laravel but with the actual database. Make sure the table you’re trying to access exists. You can manually check the database using a database management tool (like phpMyAdmin, MySQL Workbench, or Laravel’s built-in Tinker) to confirm it is there. If it’s missing, ensure your migrations have run correctly.
Additional Tips:
- Clear Cache: If you’ve made changes to your migrations, models, or database settings and the error persists, try clearing Laravel’s cache:
php artisan config:clear
php artisan cache:clear
php artisan view:clear
- Check for Table Prefix: If your app uses a table prefix (e.g., prefix_users), make sure your migrations and models include this prefix.
- Check Database Permissions: Ensure that the database user in your .env file has the correct permissions to access the database and tables.
Following these solutions, you can fix the “Table Not Found” or “Table Does Not Exist” error and run your Laravel application smoothly.
3. The Specified Key Was Too Long
When upgrading from older versions of Laravel (pre-5.4) to a newer version, you might encounter the “Specified Key Was Too Long” error. This happens because Laravel changed the default character set used in newer versions.
In the latest versions, Laravel defaults to using the utf8mb4 character set, which supports a broader range of characters, including special characters and emojis. However, older versions of MySQL (before version 5.7) may not fully support utf8mb4 for indexing, leading to this error when creating indexes on string columns.
The problem is that utf8mb4 requires more space for each character (up to 4 bytes), which can cause the index length to exceed the maximum limit in older versions of MySQL. By default, Laravel uses 255 characters for string columns, and with utf8mb4, this can be too long for MySQL versions 5.6 and below.
To fix this and make your application work with older versions of MySQL, you must change the default string length used for indexing. Here’s how you can do that:
- Open the App\Providers\AppServiceProvider.php file in your Laravel project.
- In the boot method, add the following code:
use Illuminate\Support\Facades\Schema;

public function boot()
{
    Schema::defaultStringLength(191);
}
This code sets the default string length to 191 characters, compatible with older MySQL versions. The length of 191 characters ensures that the index length doesn’t exceed the maximum allowed limit when using utf8mb4.
Notes:
- MySQL 5.7 or higher: If you use MySQL 5.7 or newer, this issue is automatically handled, and you don’t need to change the string length. MySQL 5.7+ supports utf8mb4 for indexing without any issues.
- Consider Updating MySQL: It’s a good idea to update MySQL to version 5.7 or later. Newer versions better support utf8mb4 and have more efficient indexing, which will prevent this problem from occurring.
After you make this change and run your migrations, the “Specified Key Was Too Long” error should be fixed, and your application should work correctly without issues related to string indexing.
4. HTTP 419 Page Expired
The HTTP 419 “Page Expired” error often occurs when submitting a form in Laravel. This issue is typically caused by missing or invalid CSRF tokens, which are used to prevent cross-site request forgery (CSRF) attacks.
Laravel includes CSRF protection by default for all POST, PUT, PATCH, and DELETE requests. When a form is submitted, Laravel checks for a valid CSRF token to ensure the request is legitimate and comes from your application. If the token is missing or invalid, Laravel will respond with a 419 “Page Expired” error, indicating that the request is not secure.
Here are two main ways to fix this issue:
- Add CSRF Token to Forms: If you’re using Blade templates, include the CSRF token in every form that sends data via POST, PUT, PATCH, or DELETE. Laravel provides a simple directive for this: @csrf. This directive generates a hidden input field containing the CSRF token.
Example of adding the CSRF token in your form:
<form method="POST" action="/submit">
    @csrf
    <!-- Form fields -->
</form>
Always place the @csrf directive inside the <form> tags. When the form is submitted, Laravel will check that the CSRF token sent with the request matches the one stored in the user’s session. If they don’t match, the request will be rejected with the 419 error.
- Exclude the Route from CSRF Protection (if needed): Sometimes, you may not want CSRF protection for specific routes, such as when dealing with external APIs or non-standard POST requests. In such cases, you can exclude specific routes from CSRF protection by adding them to the $except array in the VerifyCsrfToken middleware.
To do this, open the app/Http/Middleware/VerifyCsrfToken.php file and add the route you want to exclude in the $except array:
protected $except = [
    'your/route',
];
For example, you can add the relevant route here if you’re working with an API or a third-party service that makes POST requests without a CSRF token.
Important: You should carefully disable CSRF protection for specific routes. If you disable CSRF protection for routes that handle form submissions or sensitive data, your application may become vulnerable to CSRF attacks. Only use this method when necessary, and ensure the route is secured in other ways.
Additional Tips:
- Session Expiry: The 419 error can also happen if the user’s session has expired, mainly if the form is submitted after a long period of inactivity. If your application has a short session timeout, you might want to extend it so that users have more time to submit forms without encountering this error.
- Browser Cookies: Ensure that the user’s browser accepts cookies. Laravel uses cookies to store the CSRF token, so if cookies are blocked or not appropriately set, the 419 error may occur.
- Ajax Requests: If you make AJAX requests, ensure the CSRF token is included in the request headers. You can add the CSRF token to AJAX requests by setting it in the X-CSRF-TOKEN header like this:
$.ajax({
    url: '/submit',
    method: 'POST',
    data: { /* form data */ },
    headers: {
        'X-CSRF-TOKEN': $('meta[name="csrf-token"]').attr('content')
    },
    success: function(response) {
        // Handle success
    }
});
This ensures the token is included, and Laravel will verify it.
Following these steps, you can fix the 419 “Page Expired” error and ensure your Laravel forms are securely submitted.
5. Permission Denied Error: Failed to Open Stream
This error typically occurs when Laravel doesn’t have the correct permissions to write to specific directories, such as storage or bootstrap/cache. This is a common issue in Linux-based environments, where file and folder permissions are strictly enforced for security reasons.
Laravel must store logs, cache, and other temporary files in the storage and bootstrap/cache directories. Without the proper permissions, Laravel won’t be able to write to these directories, causing errors. This issue often occurs when deploying the application to a server, especially if the directories were created manually or the web server’s user doesn’t have the correct permissions.
To fix this, you need to set the correct permissions for the required directories. Use the following commands to adjust the file and folder permissions:
- Set Permissions for the Storage Directory: Run this command to give the web server write permissions for the storage directory and all its subdirectories:
sudo chmod -R 775 ./storage- Set Permissions for the Bootstrap Cache Directory: Run this command to give the web server write permissions for the bootstrap/cache directory:
sudo chmod -R 775 ./bootstrap/cacheThese commands recursively apply for the necessary permissions, allowing the webserver to read from and write to these directories.
Explanation of Permissions:
- 775: The number 775 sets the following permissions:
- The first digit (7) gives the owner (typically the user who owns the file) read, write, and execute permissions.
- The second digit (7) gives the same permissions to the group.
- The last digit (5) gives read and execute permissions to others but not write permissions. This ensures that only authorized users and groups can modify files.
Additional Considerations:
- Web Server User: Ensure that the web server (e.g., Apache or Nginx) is running under a user that is part of the group with these permissions. For example, the web server may run as the www-data user. If the web server user is not the owner or part of the group, you may need to change the ownership of the directories.
To change the owner of the directories to the web server user, run:
sudo chown -R www-data:www-data ./storage
sudo chown -R www-data:www-data ./bootstrap/cache
- Security: While setting permissions to 775 is usually fine, in highly secure environments, you may want to use more restrictive permissions or ensure the correct user and group ownership. You could also use ACLs (Access Control Lists) for finer control. Consider the security implications, especially if your application is publicly accessible.
- Clear Cache: After updating the permissions, you may need to clear Laravel’s application and configure the cache to ensure the changes are correctly applied. Run these commands:
php artisan cache:clear
php artisan config:clear
By setting the correct permissions for the storage and bootstrap/cache directories, Laravel can write logs, cache files, and other necessary data, resolving the error.
6. Composer Autoload Issues
When you install or update Composer dependencies in a Laravel project, you might encounter issues with autoloading classes or services. This can lead to errors where Laravel can’t find a class or service, even though it’s present in your project.
Laravel uses Composer to manage dependencies and automatically load classes through autoloading. The vendor/autoload.php file generated by Composer is responsible for loading all the classes in your project. However, the autoloader might not properly reflect the changes after installing or updating dependencies, causing autoloading errors.
This could happen due to:
- Missing or outdated autoload files.
- Newly added classes, services, or packages that aren’t autoloaded yet.
- Changes in composer.json that require the autoloader to be regenerated.
To fix autoloading issues, you can regenerate Composer’s autoload files to ensure all the necessary classes are loaded correctly.
- Regenerate the Autoload Files: Run this command in your terminal to regenerate Composer’s autoload files:
composer dump-autoloadThis command will:
- Rebuild the vendor/autoload.php file.
- Re-scan all the classes and files in your project to update the autoloader.
- Ensure that all new classes, namespaces, and updated dependencies are autoloaded properly.
- Optimize Autoloading (optional): To improve performance, you can optimize the autoloading process, especially in production environments. This makes the autoloader more efficient by converting PSR-4 autoloading into class-map autoloading.
To optimize the autoload files, run:
composer dump-autoload --optimizeThis creates a more efficient autoload map, speeding up class loading, particularly in production.
Additional Considerations:
- Clear Laravel Cache: If autoloading problems persist after regenerating the autoload files, try clearing Laravel’s cache. Laravel stores various configurations and services that might interfere with autoloading. Use these commands to clear the cache:
php artisan config:clear
php artisan cache:clear
php artisan route:clear
- Check composer.json for Errors: Check your composer.json file for mistakes if the issue continues. Attention to the autoload section, especially if you’ve added custom namespaces or paths. You can also validate your composer.json by running:
composer validateThis will check for any issues in your composer.json file that could affect autoloading.
- Reinstall Dependencies: If autoloading issues persist, try deleting the vendor directory and reinstalling the dependencies by running:
rm -rf vendor
composer install
This will ensure all dependencies are reinstalled from scratch and the autoloader is correctly regenerated.
By running composer dump-autoload and following these additional steps, you should be able to resolve autoloading issues and ensure that Laravel loads all classes and services in your project correctly.
Conclusion
Laravel is a robust PHP framework, but like any tool, it comes with its challenges. These common issues often appear, especially when starting or upgrading to a new version. The errors discussed in this article are some of the most frequent ones faced by both beginners and experienced developers. Fortunately, they are usually easy to fix with troubleshooting and a basic understanding of Laravel’s core features.
Remember that encountering these issues is a normal part of the learning process. Every developer faces them at some point. So, don’t get discouraged if you run into these errors. Follow the solutions provided, and you’ll be back on track quickly!

