- Introduction
- What Causes the Link You Followed Has Expired Error to Appear?
- How To Fix "Link you followed has expired" error in WordPress?
- Frequently Ask Questions
- What does it mean your link has expired?
- How do I fix a missing stylesheet in WordPress?
- How do I manually install a WordPress theme?
- Where do I find functions.php in WordPress?
- Final Words
Introduction
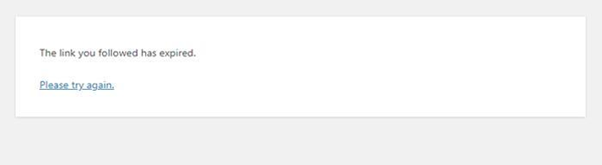
Suppose You logged in to your pc today, visited your website landing page, and tried to upload themes, plugins, or files to WordPress. All of a sudden, the message appears, “the link you followed has expired.” What will you do now?
Wait..! you don’t need to panic. Read this article carefully to fix this error in a couple of minutes.
This error occurs because the file you upload is larger than the default WordPress upload size limit.
The core issue for beginners is that this error does not show any description. Thus, it becomes challenging for newbies to deal with the situation.
There are many methods to resolve the error “The link you followed has expired.” In this article, we will learn about all these methods in detail.
What Causes the Link You Followed Has Expired Error to Appear?
The error the link you followed has expired can occur for different reasons.
- One tries to upload custom files, themes, or plugins via the admin panel.
- The file is incompatible with your PHP version.
File Limit Restriction
Most WordPress hosting providers have default settings that limit the size of the file, which you may upload with the WordPress admin dashboard. So, whenever you try to upload a file beyond this limit, It happens because the file size is large or the uploading process will take more time than the maximum execution time allowed. The error will be displayed to you, as shown below: The link you followed has expired. Please try again.
You may quickly get the maximum allowed file size by visiting the WordPress dashboard and then navigating to Media–>Add New. You may see in the below picture the default WordPress file size limit to upload.
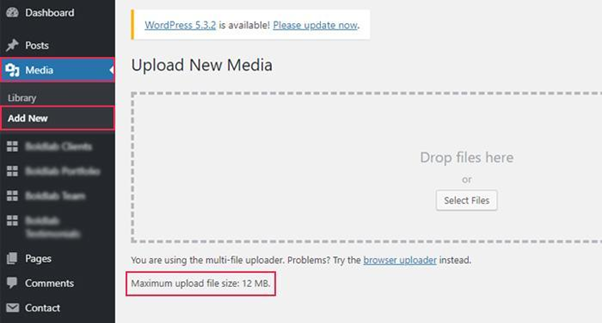
Default upload limit depends on the web hosting provider. Few WordPress hosting companies even offer up to 128MB maximum upload size limit.
Generally, this limit is relatively low in smaller packages of shared hosting. Hence, this limitation may cause issues in uploading themes and plugins.
Limited Execution Time
Sometimes, the maximum upload size limit is sufficient, but still, users face the same issue. In this case, you will again receive the error. The link you followed has expired. Please try again. It happens because the maximum execution time is limited.
The max execution time attribute of Php.ini file in Php is the maximum amount of time a script or process is allowed to run before it is terminated. If the process is not completed in the allowed time, then it will be terminated.
Before WordPress version 4.9.5, the error in the above cases used to be shown as Are you sure you want to do this. Please try again.
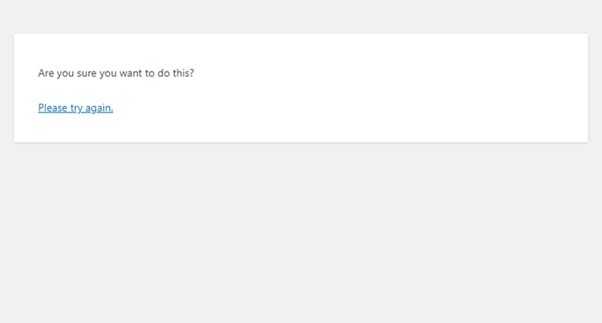
This error also seems frustrating as it also doesn’t show any descriptions. But you may easily troubleshoot these errors with a few steps mentioned below.
Incompatible PHP
This error can also occur when you try to upload a theme file that is not compatible with the PHP version of your WordPress. If you try to upload an outdated theme or plugin, you will face a compatibility issue.
Devrims platform doesn’t restrict the users to change the Php version or set their desired upload size limit, execution time, max memory limit, or any other attributes related to your server and application because we give you complete freedom.
How To Fix “Link you followed has expired” error in WordPress?
There are numerous methods to solve this type of error. You can either create a child theme or use a child theme plugin. Before coming to solutions to this error, it is highly recommended to take a complete backup of the website and use a child theme.
We are going to use these methods to solve the error.
- Edit functions.php file
- Edit .htaccess file
- Edit php.ini file
- Update PHP Version
- Contact Hosting Company
Let’s explore each solution one by one:
Edit Functions.php file
If you add a few lines of code in the functions.php file, you can change max execution time limits. You can change it via using these parameters post_max_size, max_execution_time, and upload_max_size. Let’s see what these parameters are.
- upload_max_size: It demonstrates the maximum file size you’re allowed to upload.
- post_max_size: It contains the maximum size for all the post’s data, including images and text.
- max_execution_time: It depicts the full-time script is executed before termination, even if it’s incomplete.
Let’s explore options of editing functions.php file in detail.
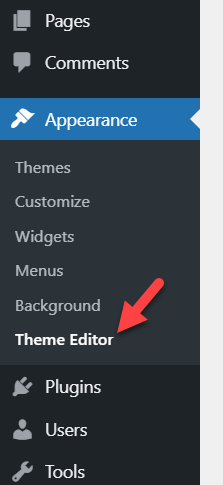
1- Edit functions.php with Theme Editor
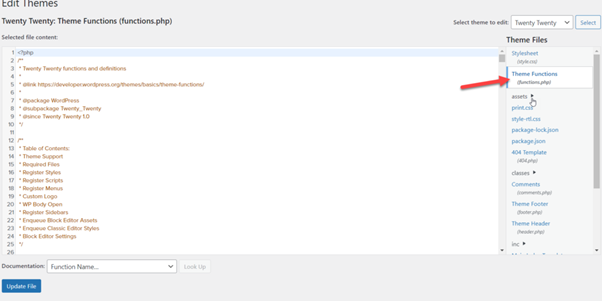
Go to your WordPress admin dashboard and navigate Appearance >> Theme Editor.
You can see the theme name and the files you can edit on the right side.
You may check the theme name and files you need, as shown below.
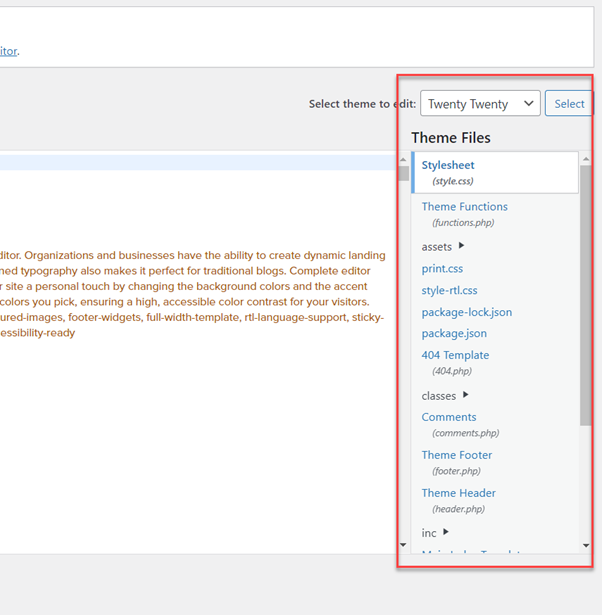
By default, WordPress will load the style.css. Look for the functions.php file and select it.
Now, copy the below code to change upload_max_size, post_max_size and max_execution_time attributes. You can change the values of any below attributes like upload_max_size from 120M to 250M or any other number as per the requirements.
@ini_set( 'upload_max_size' , '120M' );
@ini_set( 'post_max_size', '120M');
@ini_set( 'max_execution_time', '330' );
Now paste the above code at the end of the functions.php file and then update the file.
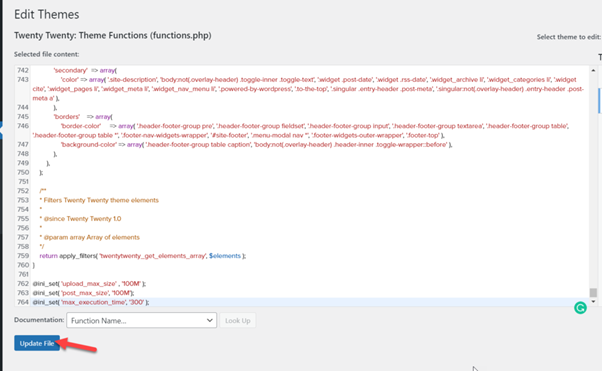
That’s it! By increasing the limits, you fix the leading causes of the “Link you followed has expired” error in WordPress.
2- Edit functions.php with a plugin
If you are not a technical person and do not feel comfortable editing theme files, you may use a plugin. “Code snippets’ ‘is a great plugin to add code, and it’s completely free.
Install and activate the plugin on your WordPress website.
- Click on Plugins > Add New
- Search for Code snippets
- Click on Install Now
- Click on Activate
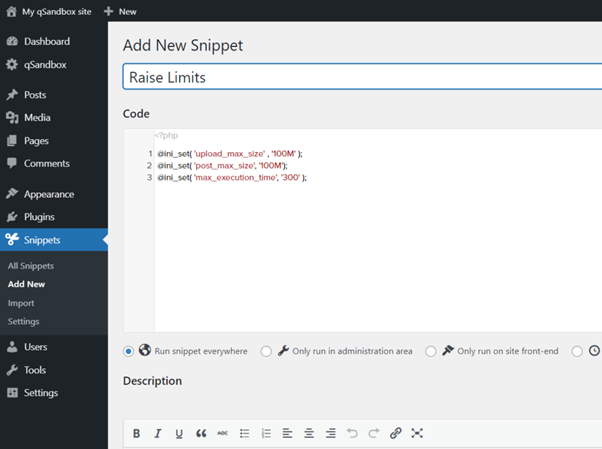
After that, you will see the plugin’s settings on the left-hand side. Under Snippets, click Add New.

Just name the snippet and paste following code:
@ini_set( 'upload_max_size' , '100M' );
@ini_set( 'post_max_size', '100M');
@ini_set( 'max_execution_time', '300' );
It should be noted here that they are just referenced values. You will have to adjust your values according to your requirements.
Now save the setting to code that can be executed on the server-side.
Hence this is the way you may avoid the “Link you followed has expired error.”
Note: Increasing limits by editing functions.php file is the easiest method. But it has a drawback. If you change the WordPress theme, it will return to the default limits. So, it will be better to use other methods to solve this error.
Edit .htaccess file
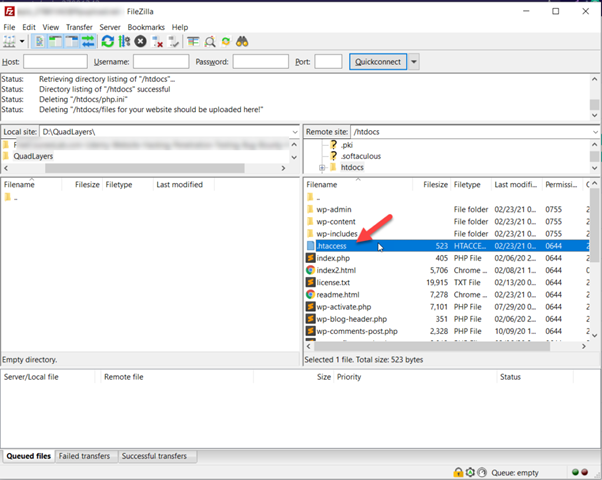
You can get rid of the “The link you followed has expired” error in WordPress by editing the .htaccess file. You will need an FTP client or dedicated file manager plugin. For demonstration FTP client method is being discussed:
Now first locate your .htaccess file. You can find the file in your application root directory. You will face a similar window on your screen.
Now we will explore options with the .htaccess file.
1- Increase Limit
Very first possibility is to increase limits as shown below: now, copy the below code:
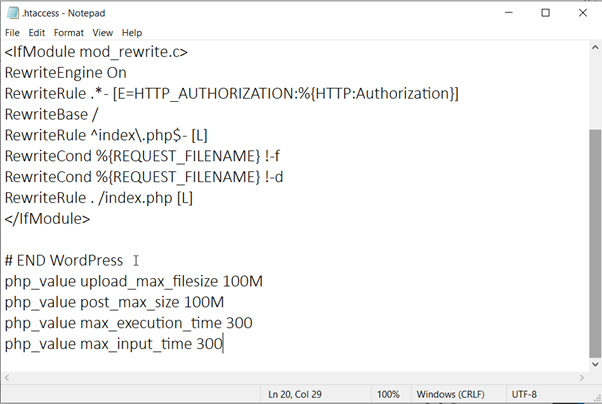
php_value upload_max_filesize 120M
php_value post_max_size 120M
php_value max_execution_time 120
php_value max_input_time 120
The above code is for reference. It would help if you ideally changed these values according to your requirements.
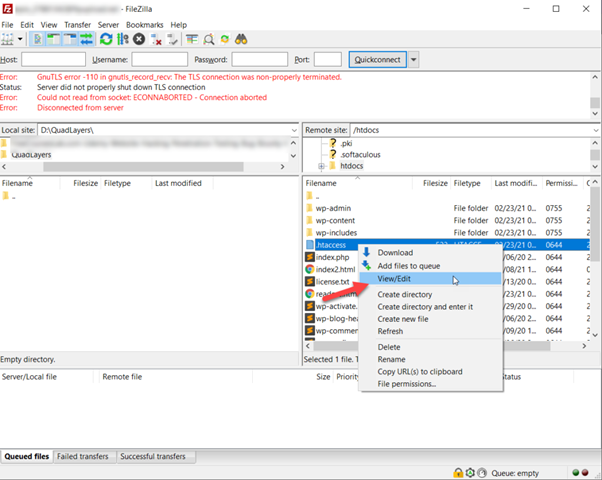
Now let’s paste these values in the .htaccess file. To edit the file, right-click on it and press View/Edit.
FileZilla will now open the file on the text editor you installed earlier. Paste the code previously copied into the footer and save.
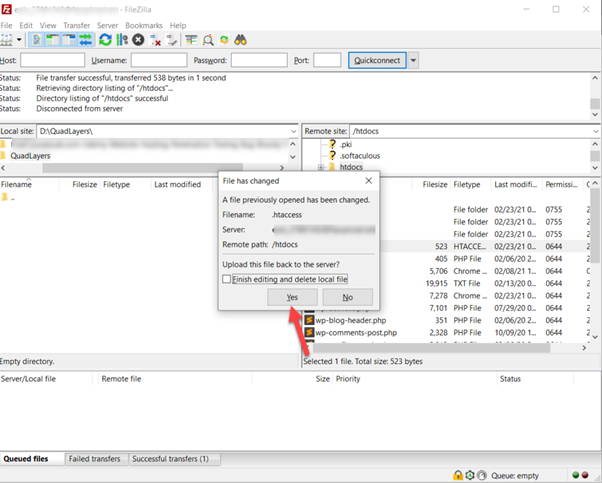
Now, upload this file back to the server and choose yes in the popup dialog box.
In this way, by increasing data transfer and file uploading limits, you can eliminate the “Link you have followed expired” error.
Editing PHP.Ini file
Besides the above two options, you can also edit the php.ini file. WordPress and PHP use php.ini files as configuration files. You may increase limits with the help of this file, and you may edit the existing php.ini file and create a new one.
First of all, check the root directory if the php.ini file exists. To edit it, you should have it on your server. Another option is to open a text editor and paste code from below:
upload_max_filesize = 120M
post_max_size = 120M
max_execution_time = 350
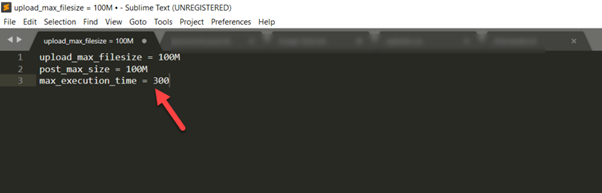
Now, save the file and call it php.ini
As you have now created a php.ini file, you should upload it to the website’s root. You may perform this action using the FTP client through the panel’s file manager, or you may even use a dedicated file manager plugin. For now, we will use the FTP client for demonstration.
After establishing a connection between server and FTP client, navigate to the public_html folder and upload the php.ini file you created…

In this way, you have updated default settings of upload_max_size, post_max_size, and max_execution_time. Please double-check that the file name is correct and upload it to the right destination. Otherwise, it won’t work.
Updating PHP Version
If the WordPress installed version is not compatible enough with your PHP version, you will have difficulty running your website smoothly. If your website’s PHP version is outdated, you may face an error “the Link you followed has expired.” WordPress recommends using PHP 7.4 or higher versions and MySQL 5.6 or MariaDB 10.1 for good performance.
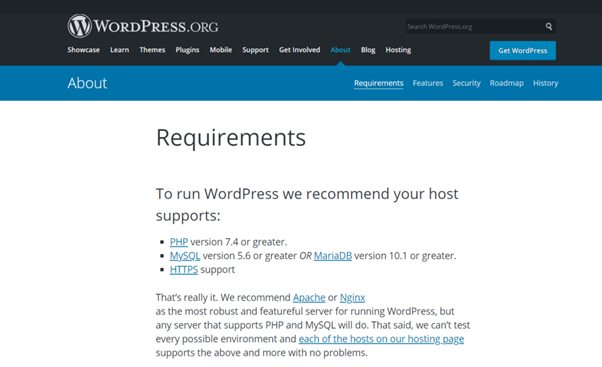
If the WordPress installed version is not compatible enough with your PHP version, you will have difficulty running your website smoothly. If your website’s PHP version is outdated, you may face an error “the Link you followed has expired.” WordPress recommends using PHP 7.4 or higher versions and MySQL 5.6 or MariaDB 10.1 for good performance.
With Devrims, you can run multiple Php versions on a single server and change the application Php version in one click.
- Login to your Devrims platform using your credentials.
- Go to your desired server from the main server listing of Devrims Dashboard.
- Go to Services > Custom Services
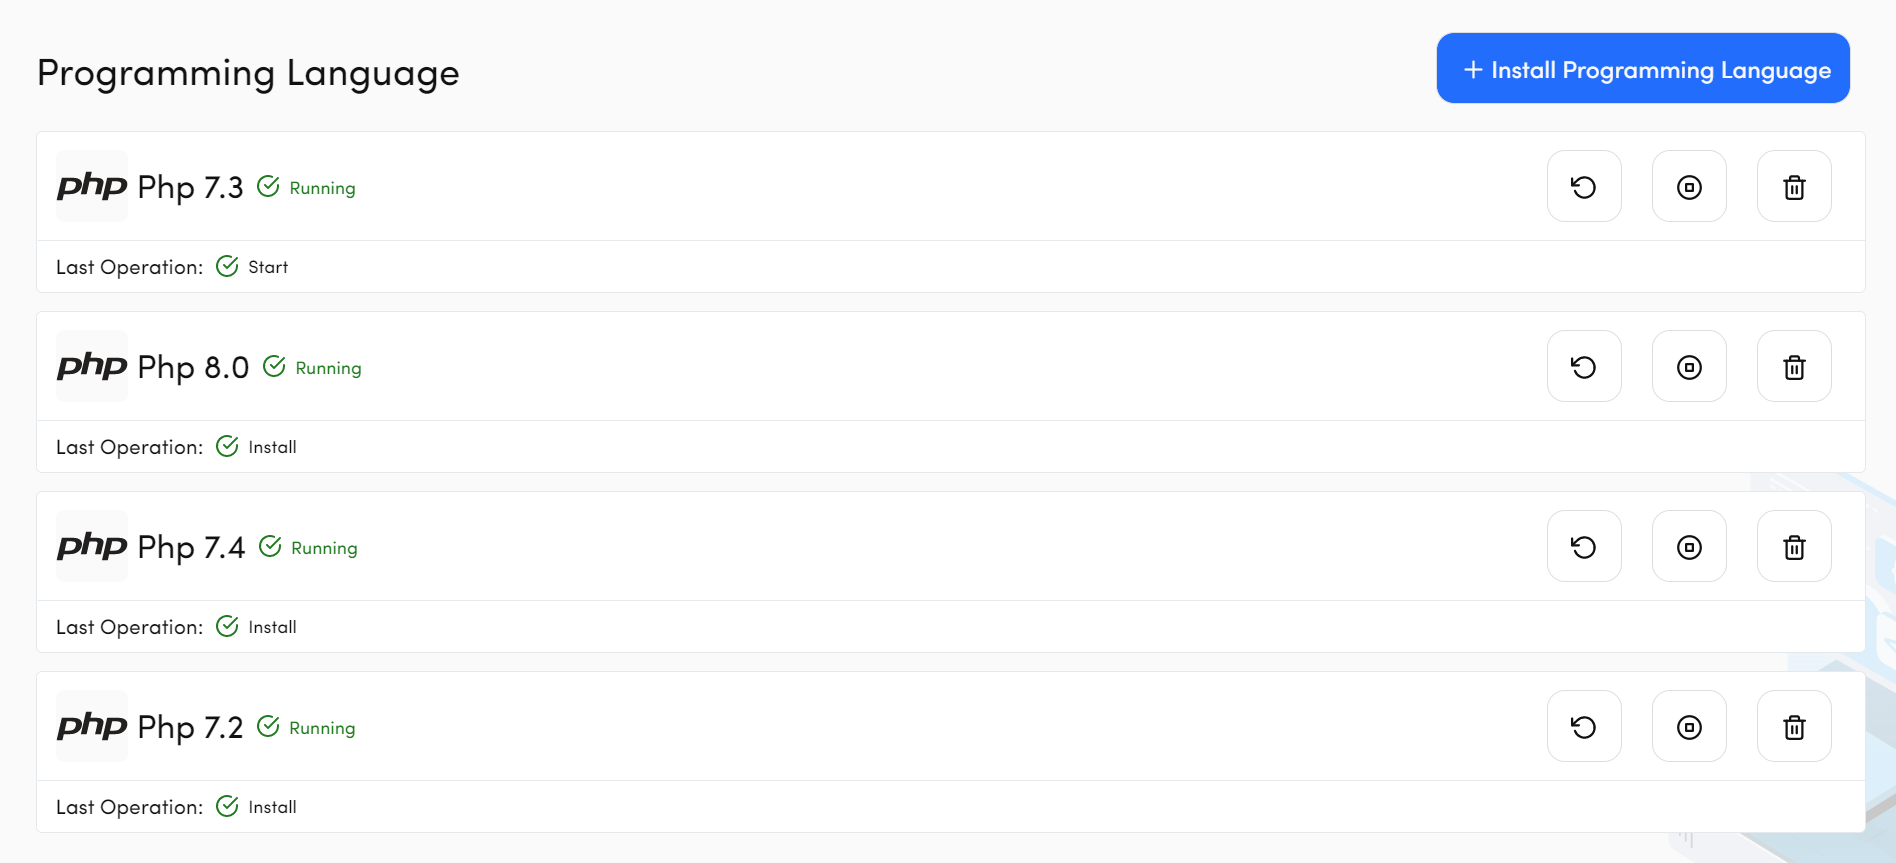
- Click on Install Programming Language, select your desired Php version, and click Apply.

After the successful installation of the new Php version, you can see a list of different Php versions running simultaneously on a single server which can be later used according to the application requirement.
Our server will start operating on the chosen PHP version within a few seconds.
After reading this, you can analyze that changing the PHP version is easy, but you may always contact us if you find it difficult.
Troubleshooting
Troubleshooting is one of the easiest methods to fix any WordPress error. There is no need to worry about errors while working with WordPress. Because WordPress is doing a good job by telling the exact reason for error occurrence.
You can analyze the problem with troubleshooting and solve it easily and quickly.
Getting errors is normal, and a developer cannot avoid them. The majority of WordPress errors can be resolved in a few minutes. Also, you can set a backup to restore your website before an error occurs.
Contact Hosting Company
If none of the above solutions help you fix the “Link you followed has expired” error on your WordPress site, you should contact your web hosting provider. Their support team will help you solve the issue and adjust the server restrictions.
Frequently Ask Questions
What does it mean your link has expired?
Your link has expired, an error in WordPress that you may experience while uploading files, themes, or plugins from the admin panel. The reason for this error is the size limit defined by your web host.
How do I fix a missing stylesheet in WordPress?
A missing stylesheet error occurs in WordPress when the style.css file is misplaced. Move the style.css file into the theme folder or re-install the theme correctly to fix this error.
How do I manually install a WordPress theme?
Go to your WordPress dashboard and navigate to Appearance >> Themes. Now, click on add a new button and search for the required theme. You will see an install button there; click on it.
Where do I find functions.php in WordPress?
Go to the project directory and open the themes folder inside the wp-content folder. Then open your theme_name folder, you will find the functions.php file there.
In the project directory, go to wp-content/themes/[the name of your theme].
Final Words
The methods discussed above are the best to get rid of the “The link you followed has expired” error. However, we suggest that you use FTP for larger file uploads in the future.
If WordPress failure notice occurs or you cannot fix this error yourself, we suggest contacting your hosting provider.
Commonly, few hosting providers put limitations on upgrade versions. So, you may always contact their customer support.


Related Tutorials