The Adobe Web Setup Wizard used for installing Magento 2 themes and extensions is no longer available in versions 2.3.6 and higher. That means developers need to use the robust Magento 2 Command Line Interface (CLI) for daily management of online stores. While the CLI efficiently executes tasks like cache clearing, indexing, and module management, the massive library of available commands can be confusing and overwhelming.
In this blog, we will provide a comprehensive command reference to ease the frustration of hunting down the right Magento 2 CLI syntax. We’ll cover the basics of CLI usage for standard store maintenance then explain how developers can create custom commands to enhance their workflow further. Managing Magento 2 stores via CLI can become an intuitive and time-saving process with this.
What is Magento 2 CLI?
The Magento 2 CLI is a powerful text-based tool that allows developers and administrators to control and manage a Magento store. The Magento 2 CLI provides a set of commands to interact with and configure the Magento application.
It is located in the bin directory of Magento installations and can be accessed by running the Command:
$ php bin/magento
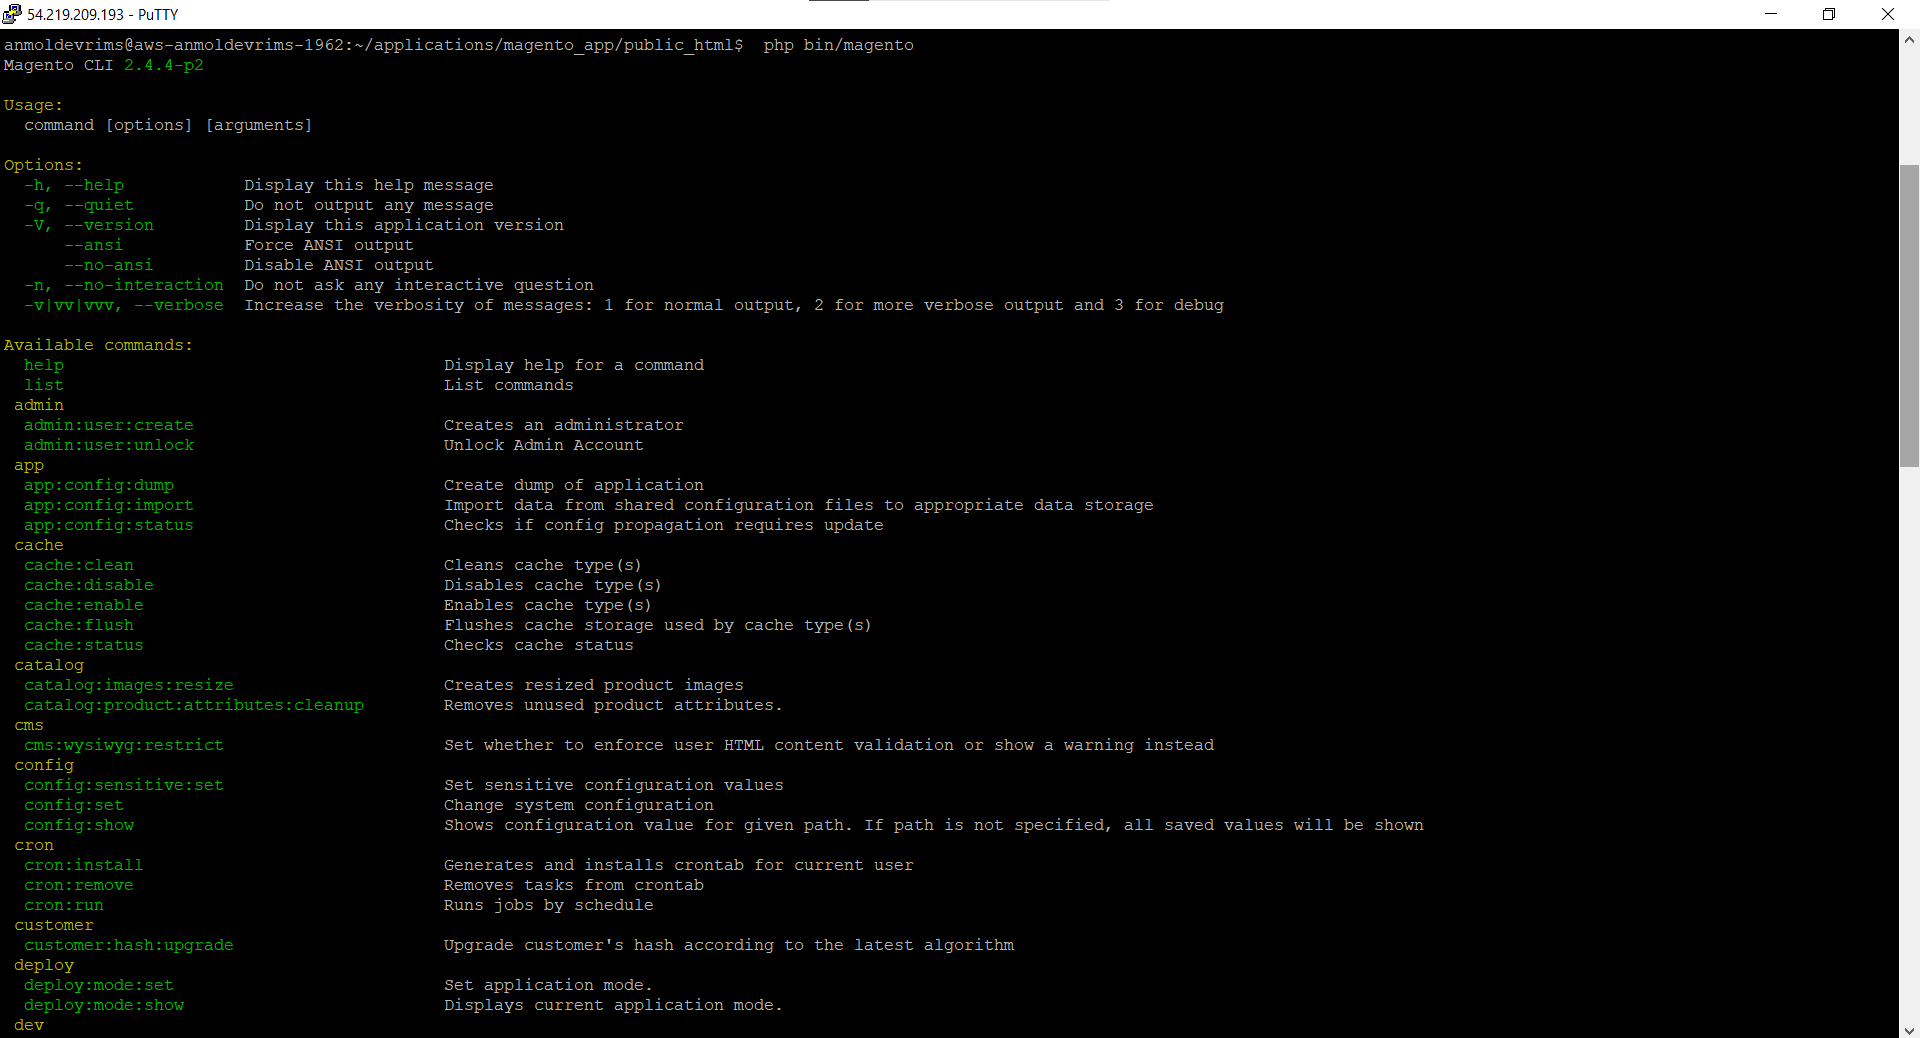
This will display the available commands for installation, caching, module management, and more. For example, the cache:clean Command will clear cached files to reveal changes made to the site.
Requirements
Check out our Magento 2 installation on the localhost guide, where all requirements are mentioned.
Magento 2 CLI Command Naming Convention
Magento 2 CLI commands follow a specific syntax of Command [options] [arguments] to perform actions on the Magento system. The Command is structured in a group:subject:action format to organize related functions.
For example,
$ bin/magento setup:static-content:deploy
It is a command where setup is the command group for installation and upgrade actions, static content is the subject obtained to static files, and deploy is the action to distribute static content.
Some common command groups include setup for installation tasks, config for system configuration, cache for cache management, and indexer for index management. Subjects drill down into specific areas like static content, upgrades, or reindexing. Actions define what to do, such as deploy, set, or clean.
In summary, Magento 2 CLI commands are organized logically using groups, subjects, and actions. Options and arguments provide additional controls. Following this, a standardized naming convention helps developers intuitively construct commands to manage different Magento 2 system aspects.
How to Use Magento 2 CLI to Advance Your Workflow?
You can perform various tasks using Magento 2 CLI to advance your workflow. Let’s explore some of them here.
Install Magento 2
Magento 2 brings immense power and customization to ecommerce sites, but first, you need to set it up and run smoothly. The Magento 2 CLI provides a simple installation command setup:install to perform this task. It prompts for information like the database and admin credentials while configuring key parameters like base URL, language, currency, and timezone.
For example:
$ bin/magento setup:install
–base-url=https://example.com
–db-host=localhost
–db-name=magento
–db-user=magento_user
–db-password=************
–admin-firstname=anmol
–admin-lastname=lohana
–admin-user=anmol
–admin-password=***********
–language=en_US
–currency=USD
–timezone=America/Chicago
–use-rewrites=1
This will install Magento 2 with the database, admin user, locale, and URL settings. The Command will handle the heavy lifting of system configuration, database setup, and connecting all the pieces.
Configure Magento 2 Corn
The backend of every Magento 2 store runs an automated clockwork organizing important maintenance routines. The cron scheduler enables Magento to regularly clear cache, update indexes, process orders, and perform other key tasks automatically in the background.
Therefore, setting cron is essential for Magento’s performance and reliability. The Magento CLI simplifies cron configuration via two commands:
$ bin/magento cron:install
It will generate the necessary cron script and schedule them to run automatically at regular intervals on the server.
$ bin/magento cron:run
It will manually trigger Magento cron jobs as needed. It’s perfect for testing new cron jobs or catching up on missed tasks.
Manage Magento 2 Indexers
The indexers transform raw database records into optimized data structures, powering lightning-fast storefront queries. Proper indexer management is essential for scaling.
The Magento CLI simplifies indexer administration through key commands:
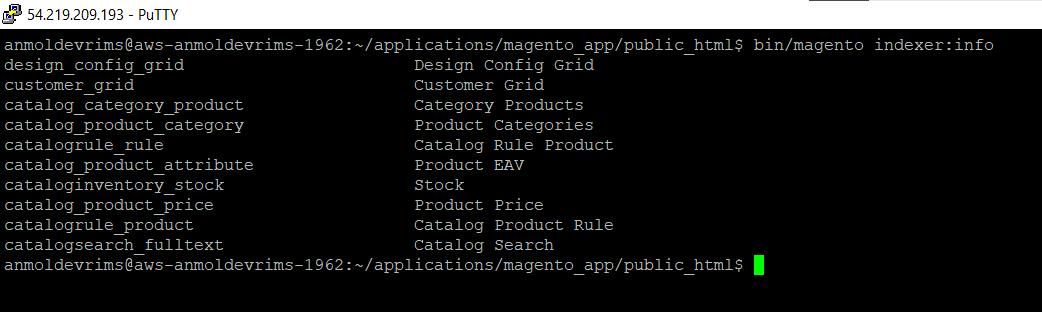
To scan the current index status, reporting live indexing mode, and which indexers need reindexing, the Command is:
$ bin/magento indexer:info
To configure real-time or scheduled indexing based on workload, the Command is:
$ bin/magento indexer:set-mode
To manually rebuild the entire index on demand after significant store changes, the Command is:
$ bin/magento indexer:reindex
Developers can monitor and manage the indexer’s health with these three helpful commands.
Configure Magento 2 Security Features
Security is essential for any ecommerce platform, but protecting a Magento 2 store can seem chaotic. The wide range of protections like reCAPTCHA, two-factor authentication, and password management can overwhelm developers.
However, the Magento CLI compresses security configuration down to simple commands:
$ bin/magento security:recaptcha:disable-for-user-login
It will toggle reCAPTCHA on/off for admin login pages to balance usability and bot protection.
$ bin/magento security:tfa:reset
It will reset two-factor authentication when users lose access to their second factor.
These are just two examples from the extensive security command group covering all backend protection.
Deploy Static View Files
Magento’s limitless templates, blocks, and assets must convert into optimized static files to power high-performance storefronts. This static file deployment unlocks the full-speed potential of Magento’s front end.
The CLI streamlines deployment with the commands that aggregate CSS, JavaScript, HTML, and other static assets into cacheable files configured for production.
For example:
$ bin/magento setup:static-content:deploy
It will deploy static content globally for all locales and themes.
$ bin/magento setup:static-content:deploy en_US --exclude-theme Magento/luma
It will deploy only in English and exclude the Luma theme.
Manage Magento 2 Operation Mode
Magento application can run with various modes, which are Production Mode, Developer Mode, Maintenance Mode, etc; each can be used for specific needs. The CLI simplifies mode management through the deploy:mode:set Command. For example, to configure production mode, run this Command:
$ bin/magento deploy:mode:set production
It will toggle all performance and security best practices for live stores. Additional options like maintenance or developer modes optimize for specific use cases.
Configure Maintenance Mode
Routine maintenance on live stores often requires blocking access to tweak designs, content, and layouts. The Magento CLI provides a maintenance mode to disable the front end while working on the backend gracefully.
You can activate maintenance across all store views and display a customizable maintenance page to visitors by running the Command:
$ bin/magento maintenance:enable
It will enable maintenance for all IPs. If you want to exclude a specific IP, run this Command:
$ bin/magento maintenance:allow-ips 192.168.0.1
Maintenance mode prevents public access during updates while the CLI handles the hectic work of blocking requests and whitelisting exceptions.
Manage Magento 2 Modules and Extensions
Magento’s huge marketplace of third-party modules and extensions enables incredible store customization, evidenced by the platform’s widespread adoption.
The Magento CLI simplifies module management through key commands. Like, you can see the list of currently active extensions by running this Command:
$ bin/magento module:status --enabled
The structured flags provide insight into sprawling module environments.
Additional commands like module:disable and module:uninstall provide control overactive modules. Simultaneous actions give developers power over hundreds of extensions at once.
Manage Magento 2 Cache
You can easily improve your Magento store’s performance with Magento’s complex cache management system. The CLI provides insight and control over cached assets powering high speeds.
You can scan page layouts, blocks, translations, and other cache types by running the Command:
$ bin/magento cache:status
It will return you a diagnostic snapshot of what is cached and where.
You can flush the caches site-wide or for specific types by running the Command:
$ bin/magento cache:clean
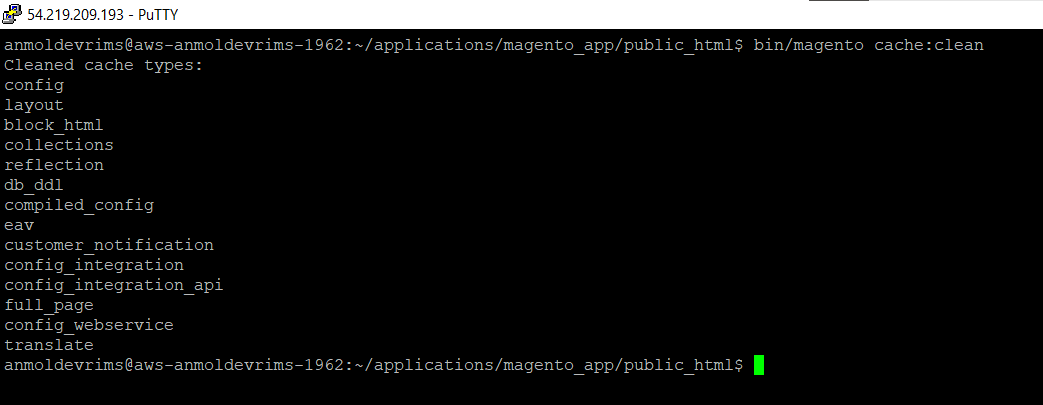
It’s perfect for revealing new changes blocked by outdated caches.
For example:
$ bin/magento cache:clean layout block_html full_page
It will clear the cache of selective layout, block, and full-page caches.
Create New Admin Users
Magento 2 CLI allows you to manage and create new admin users without logging in to the admin panel. You can use the command admin:user:create and enter other details like name, username, email, and password to create a new admin user.
$ bin/magento admin:user:create

--admin-user alohana

--admin-password password123

--admin-email [email protected]

--admin-firstname anmol

--admin-lastname lohana
Developers have gained unlimited versatility in admin user management with CLI access.
Add a custom Magento 2 CLI Command
Follow these simple steps to add a custom Magento 2 CLI Command.
Create a basic Magento 2 Module
Connect your server with the PuTTY CLI and log in with your SSH credentials. After that, create a custom Magento 2 module with a module.xml file that will declare the module name, version, schema, and other metadata and a registration.php file to register the module with Magento.
Create a di.xml File
The di.xml configuration enhances integrating a custom CLI command into Magento. This declarative file will notify Magento about the new Command.
It works by augmenting Magento’s command list and injecting a new “CustomCommand” into the arguments.
For example:
<?xml version="1.0"?>


<config xmlns:xsi="http://www.w3.org/2001/XMLSchema-instance" xsi:noNamespaceSchemaLocation="urn:magento:framework:ObjectManager/etc/config.xsd">

<type name="MagentoFrameworkConsoleCommandList">

<arguments>

<argument name="commands" xsi:type="array">

<item name="CustomCommand" xsi:type="object">DevCustomModuleConsoleCommandCustomCommand</item>


</argument>

</arguments>

</type>

</config>
This maps “CustomCommand” to the command implementation class.
When Magento assembles the CLI command list, it will find the new “CustomCommand” and load the linked class.
The di.xml connection visually represents how extensions can tap into and enhance core Magento functionalities.
Create a Command Class
The command class brings the power in the custom CLI command. This PHP class extends Magento’s CLI Command foundation with the unique command logic.
Create a command class file called CustomCommand.php inside the app/code/<vendor>/<module>/Console/Command directory of your custom module that contains the following code:
<?php

namespace DevCustomModuleConsoleCommand;

use SymfonyComponentConsoleCommandCommand;

use SymfonyComponentConsoleInputInputInterface;

use SymfonyComponentConsoleOutputOutputInterface;

class CustomCommand extends Command

{

protected function configure()

{

$this->setName('dev:helloworld');

$this->setDescription('Custom command example.');

parent::configure();

}

protected function execute(InputInterface $input, OutputInterface $output)

{

$output->writeln("Hello World");

}

}
These two lines of code set a name and description to identify the Command:
$this->setName('dev:helloworld');
$this->setDescription('Custom command example.');
This method contains the CLI command actions.
$output->writeln("Hello World");
This will write “Hello World” when you run the Command. The input argument provides access to passed CLI flags and options.
The class enables infinite automation possibilities through PHP. Complex workflows can be scripted into easy CLI access.
Clear Magento 2 Cache, Register the Module, and Recompile Code
The command class is built, but the integration is still pending. Magento must load the new code and wire up dependencies.
This initialization requires:
- cache:clean – Flushing generated caches so new classes are discovered
- setup:upgrade – Registering the module’s XML configurations
- setup:di:compile – Generating factories for injected classes
Run the commands:
$ bin/magento cache:clean

$ bin/magento setup:upgrade

$ bin/magento setup:di:compile
This will blow up the new command logic and hooks defined in di.xml. The CLI commands finalize integration into the Magento codebase.
This lifecycle illustrates the predictable pathway for activating custom modules. Caches, configurations, and compilers work in harmony.
Test your custom Magento 2 CLI Command
You are done with creating a new custom command for Magento 2, and it is ready to use. Verify it by running the Command to get the complete list of available commands.
$ bin/magento list
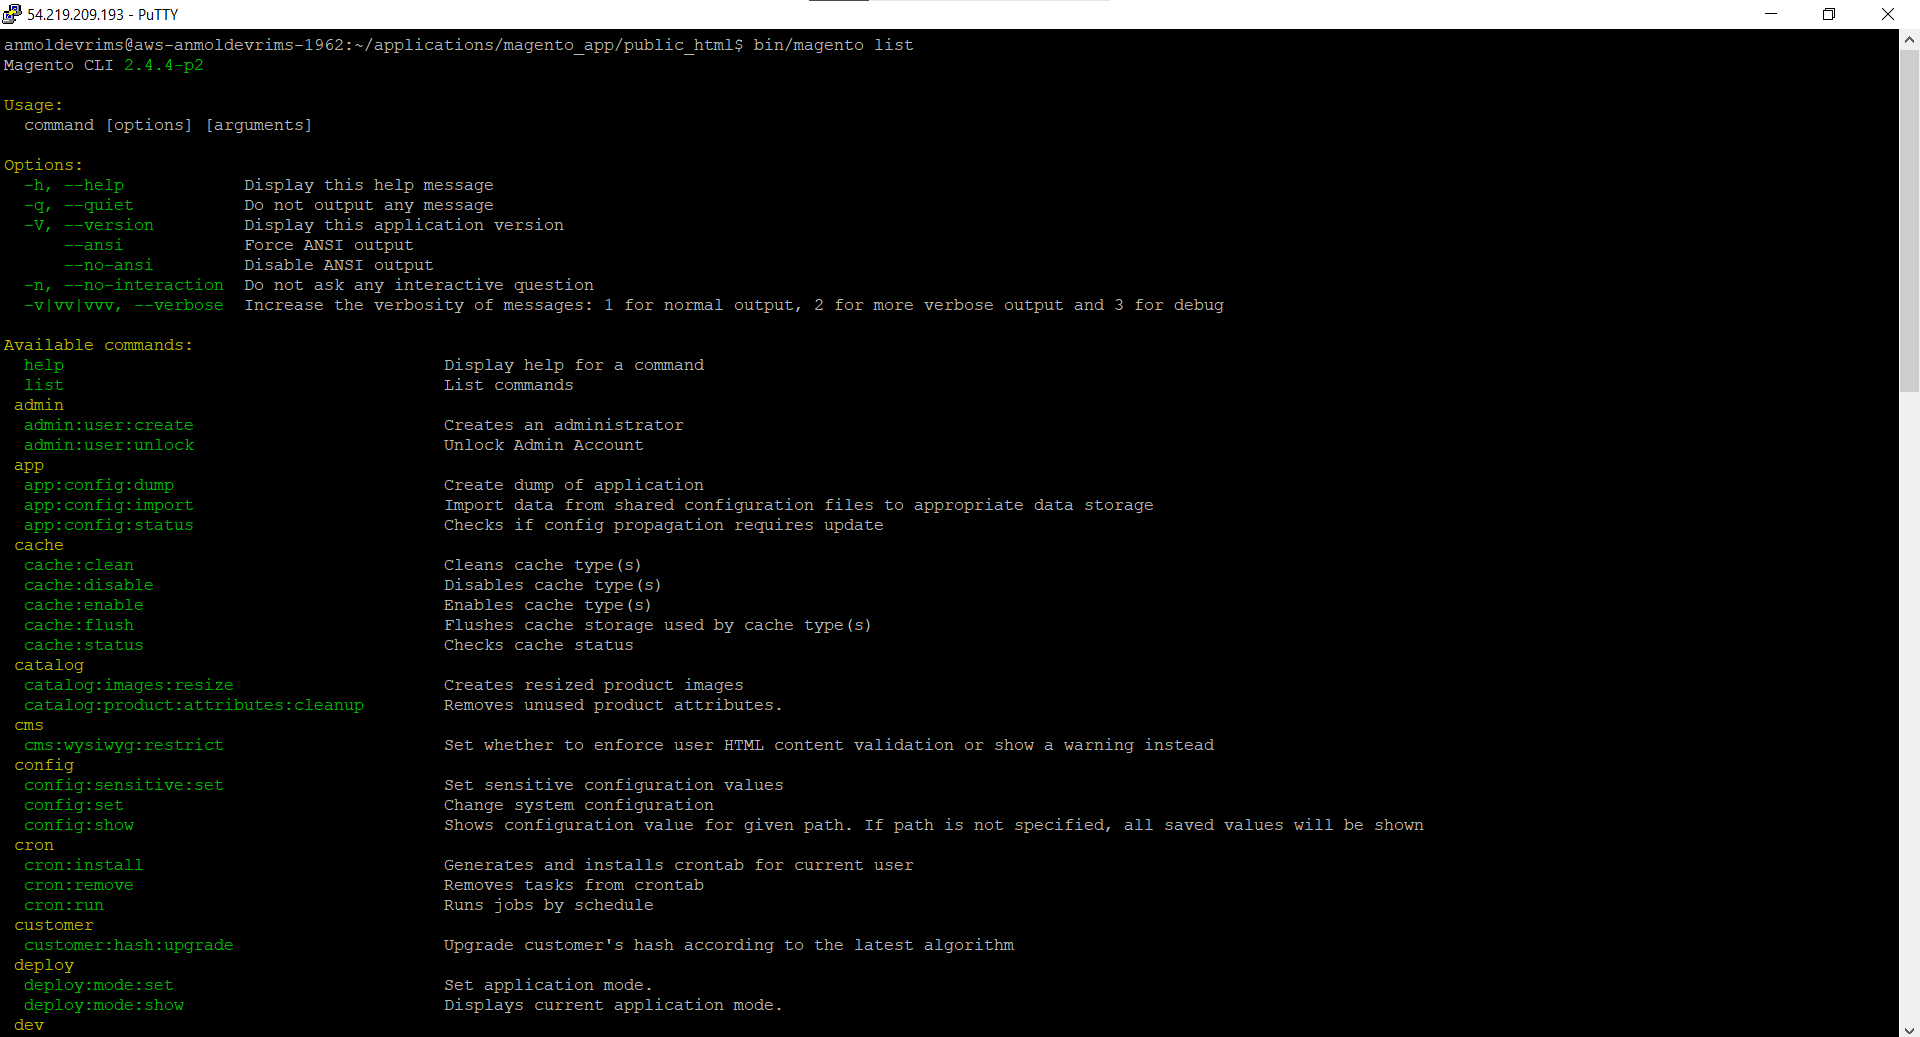
Then, test the custom command by running it in the CLI.
$ bin/magento dev:helloworld
If it is added successfully and working correctly, then it will return the output.
Conclusion
Mastering the Magento 2 command line interface unlocks powerful capabilities for store administrators and developers. This can be frustrating initially, but the structured commands become intuitive with some practice. This robust text-based interface efficiently manages caching, indexing, module installation, and other critical administrative tasks.
Anyone can leverage the CLI to control critical aspects of their Magento store with the proper foundation, like optimized managed Magento Hosting and server access. Devrims provides you with fully optimized hosting with 24/7 technical support.
Explore our pricing plans now!


Related Tutorials
10 Best Free Magento 2 Themes and Templates for a Responsive Online Store (2025)