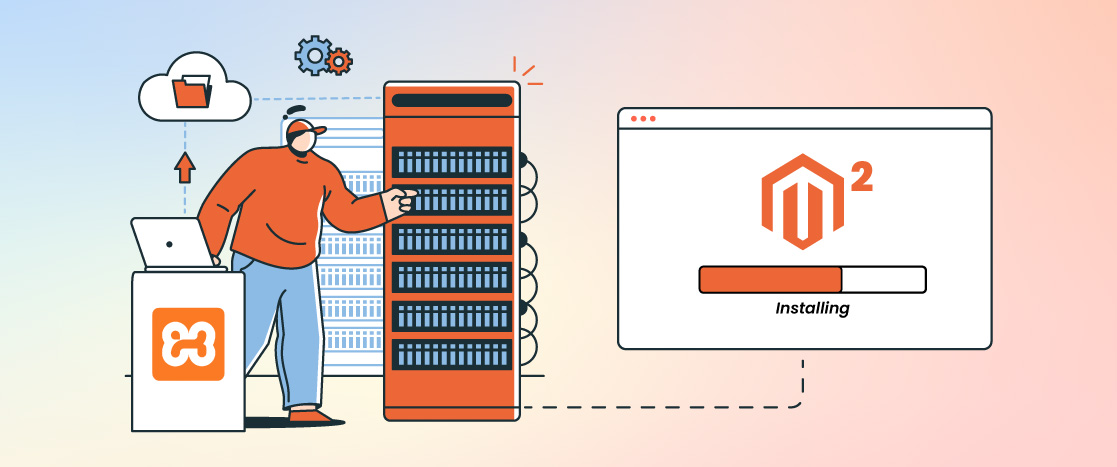
Are you ready to set up Magento 2 on your localhost using the XAMPP server but unsure where to start? Whether you’re new to Magento or an experienced developer looking for a quicker installation process, this step-by-step guide is for you. Installing Magento 2 with XAMPP gives you a local testing environment where you can experiment and fine-tune your store without affecting your live site.
In this guide, we’ll show you how to use Composer to install Magento 2 on localhost. Composer helps manage dependencies and libraries, making the installation process faster and easier. By the end, you’ll have Magento 2 running smoothly on the XAMPP server, ready for development, testing, and optimization.
Let’s get started and set up your local Magento store so everything works perfectly before going live!
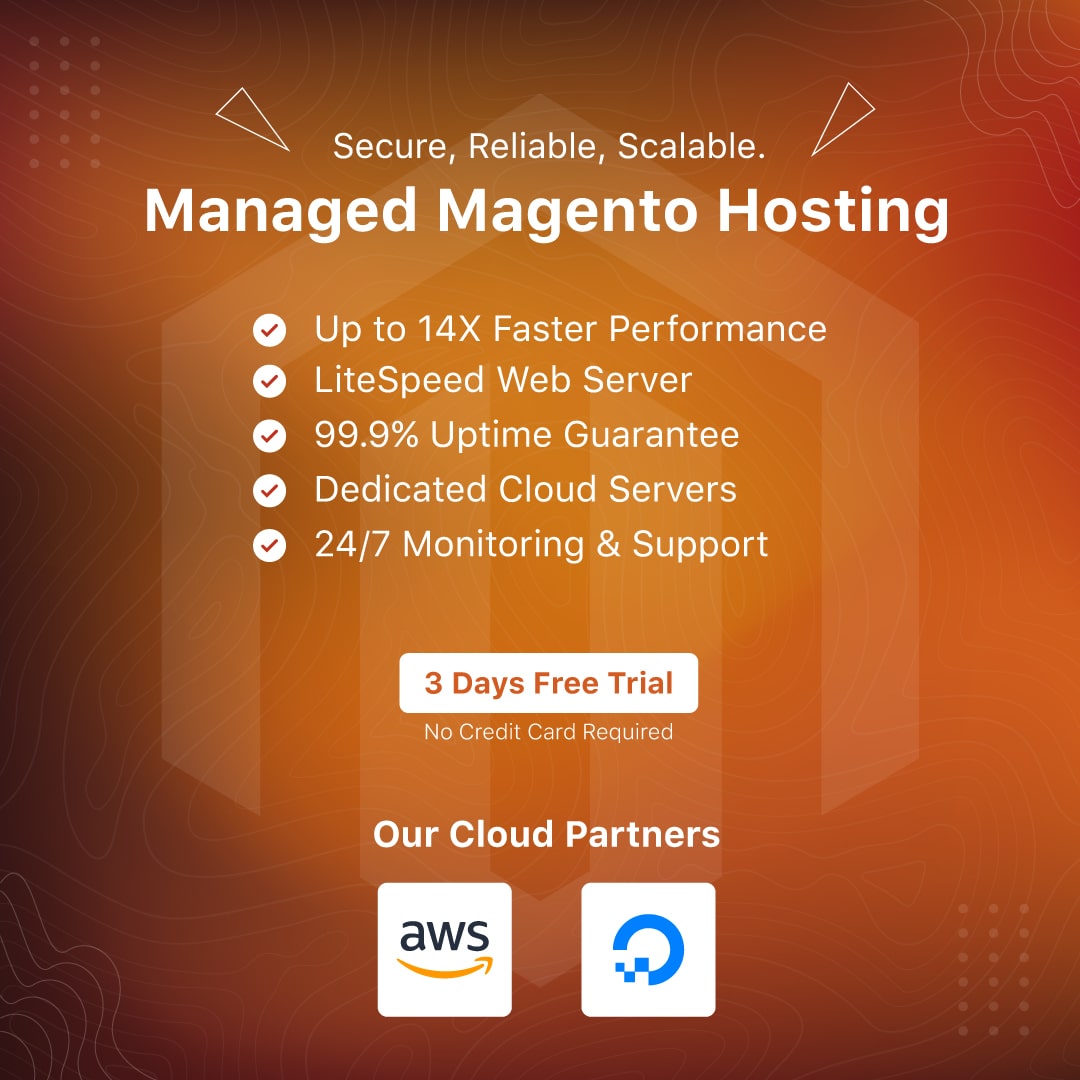
Is Downtime and Slow Speed Hurting Your Sales?
Enjoy 99.9% uptime with the most advanced LiteSpeed Hosting, powered by top cloud partners AWS and DigitalOcean.

Why Do You Need to Install Magento 2 on Localhost?
Regarding designers and developers, it’s always a good idea to set up Magento 2 on Localhost. Here are a few use cases for creating a Magneto 2 setup on your Windows machine:
- If a new version, feature, or safe patch is launched, you can create a test environment to check if it’s stable enough for your websites.
- Sometimes, you have to make some changes as per client requirements. If you change a production site (or live website), there’s a good chance that something might not work as expected. However, by creating a staging environment on localhost, you can make modifications, test them, and correct any issues. If everything works fine, you can upload it on the live server.
- Setting up Magento locally allows you to test and work on different versions.
Benefits of Installing Magento 2 on Localhost
Installing Magento 2 on localhost offers several benefits for developers, business owners, and teams working on ecommerce websites. Here are some of the key advantages:
- Cost-Effective: Running Magento 2 on localhost eliminates the need for an expensive hosting plan and development cost, which is beneficial when starting or testing.
- Offline Work: With Magento 2 installed locally, you can work offline on your website without an internet connection. This is perfect for remote work or testing.
- Safe Testing Environment: A localhost setup allows you to test new features, extensions, and configurations without impacting your live website. This way, any issues can be fixed before going public.
- Risk-Free Customization: Customizing your website locally helps reduce the risk of breaking your live site. You can make, test, and adjust changes safely before applying them to the live version.
- Improved Performance: Localhost environments run faster than remote servers because there’s no network delay. This speeds up testing and development.
- Better Security: Running Magento 2 on localhost keeps your store safe from unauthorized access and hacking attempts, as it’s not exposed to the internet. Follow the best security tips for the Magento store.
- Easy Backup and Restoration: It’s easy to back up and restore your website on localhost. This is helpful if you need to troubleshoot or recover from any issues.
Installing Magento 2 on localhost provides a flexible, secure, and cost-effective way to develop and test your e-commerce website before launching it live.
Magento 2 Installation Requirements
Specific requirements must be met to install Magento 2 on your server successfully. Therefore, before initiating the Magento 2 installation process, ensure your system meets all these requirements.
These are the requirements:
- Apache/Ngnix 2.2 or 2.4 version
- PHP 7.4.x or 8.1.x version.
- MySQL/MariaDB 5.6.x, 5.7.x, or MariaDB
- Elasticsearch 7.6.x or higher
Have you heard about the new tech stack powered by the OpenLiteSpeed web server? Learn all about it in this guide on the LOMP tech stack.
Enjoy Unlimited Freedom with Flexible Pay-As-You-Go Billing
We offer 30+ data centers globally and 50+ 1-Click Features without any upfront charges or usage commitment. Get started with zero upfront costs!

How to Install Magento 2 on Localhost via XAMPP Server (Step-by-Step)
Follow all the steps below to install Magento 2 using the XAMPP Server.
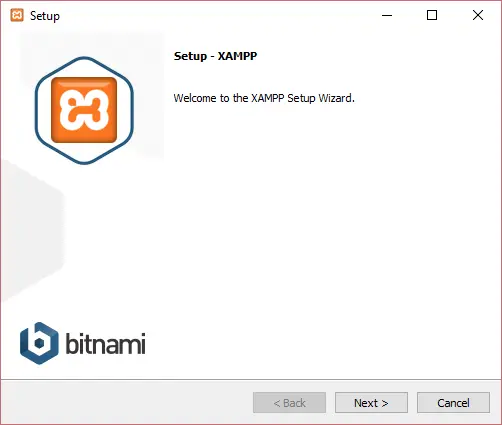
Install and Setup the XAMPP Server
To install and set up the XAMPP Server, follow these instructions.
- First, you need to download XAMPP software; for that, go to the Apache Friends site and download the XAMPP software version compatible with your OS and meets your specific requirements.

- After downloading it completely, run the software to install it on your system.
- Click on the Next button.
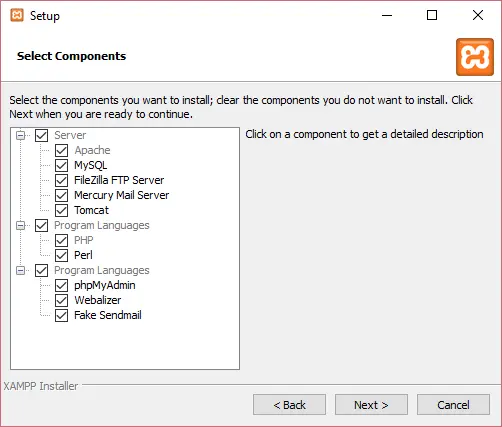
- Next, go with the default selection shown in the image and click on the Next button.
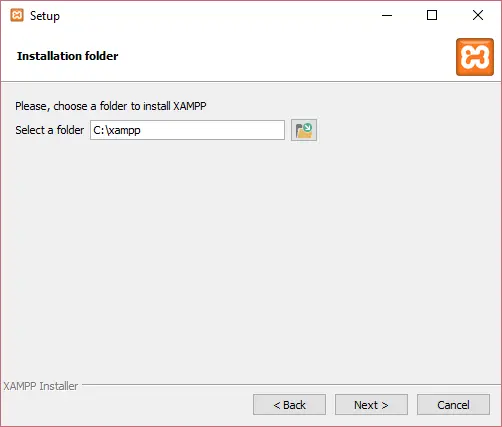
- The default location is C:xampp, but you can choose your preferred installation folder. Once you have made your selection, click on ‘Next.’
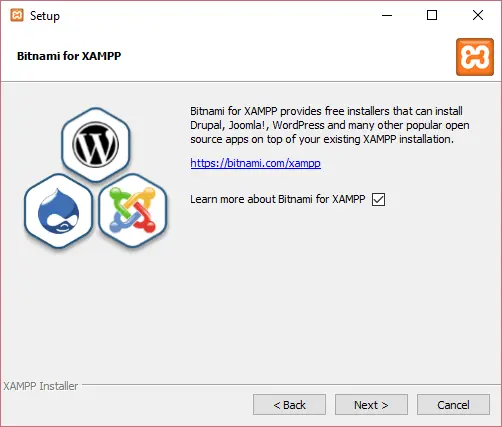
- Click the ‘Next’ button.
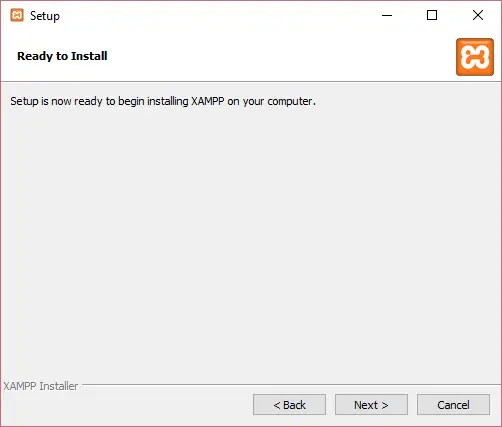
- The setup is now ready to install. Please click the ‘Next‘ button.
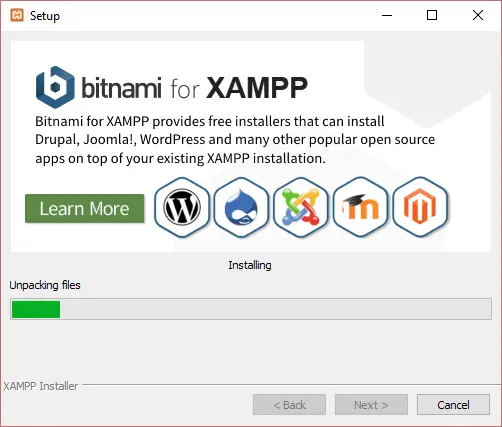
- Please wait as the setup wizard installs XAMPP on your computer. Once the installation is complete, the setup will be initiated.
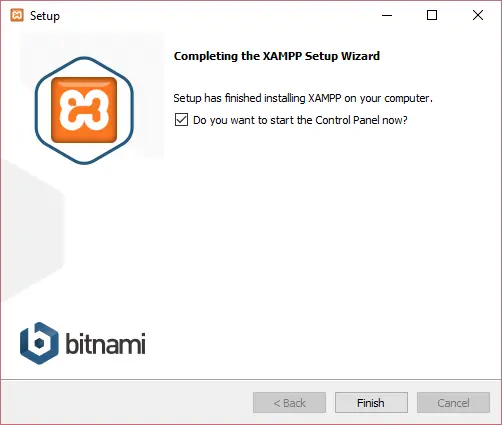
- After completing the setup, you will see the following message: “Do you want to start the Control Panel now?“You can proceed by clicking the “Finish” button to exit the setup and access the XAMPP control panel.
Configuring XAMPP
Follow these steps to configure XAMPP for Magento 2 installation.
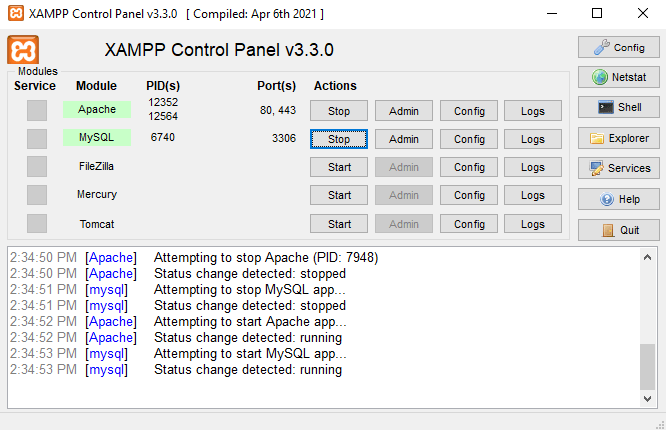
Start XAMPP
- Launch the XAMPP control panel.
- Start the Apache and MySQL services by clicking the “Start” button next to each service.
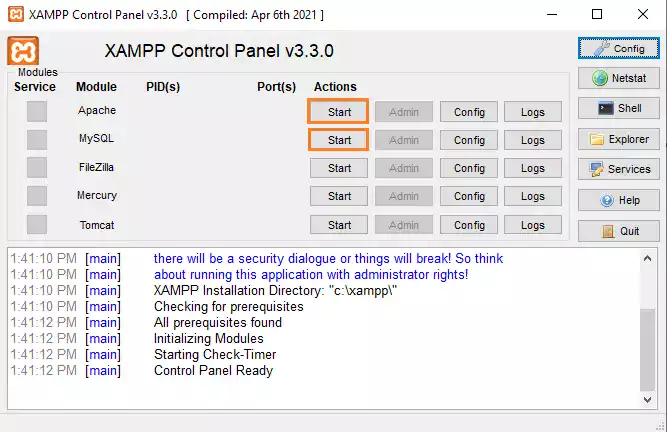
- Ensure that the status indicator for both services changes to “Running.”
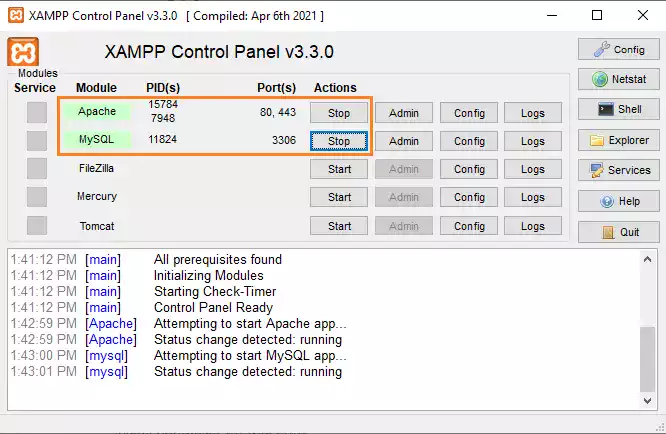
The green indicator means it is running.
Configure PHP
- Click on the “Config” tab in the Apache section of the XAMPP control panel.
- Locate the option for the PHP (php.ini) file and open it using a text or code editor.
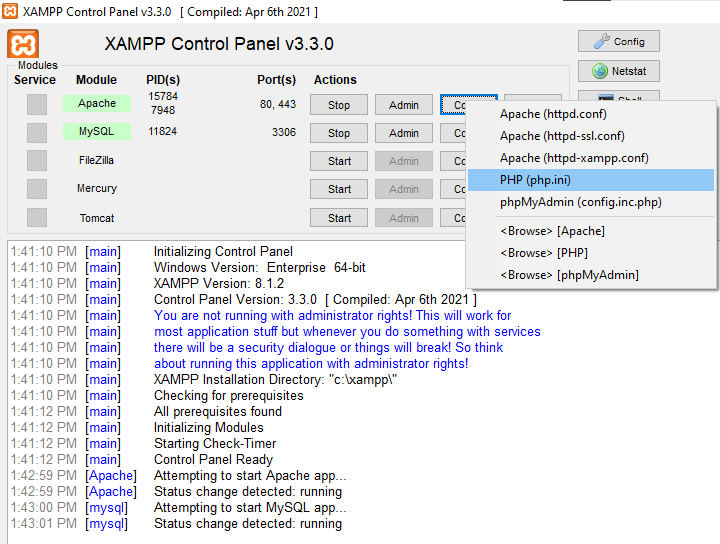
- Inside the PHP (php.ini) file, find the following options and remove the semicolons before each row:
;extension=gd

;extension=intl

;extension=soap

;extension=sockets

;extension=sodium

;extension=xsl
- Additionally, extend the memory to 4G by modifying the value of the memory_limit variable:
- memory_limit = 4G
- Once you have finished editing the file, save it and close the editor.
- Finally, restart both Apache and MySQL services.
- Ensure that both options are running correctly.
Let it run.
Create a database with phpMyAdmin
- To create a database with phpMyAdmin, open your browser and enter/access the URL http://localhost/phpmyadmin.
- Log in to the phpMyAdmin account by entering your username and password.
- Go to the database section by clicking on the “Database” tab.

- Enter the database name and click on the Create button.
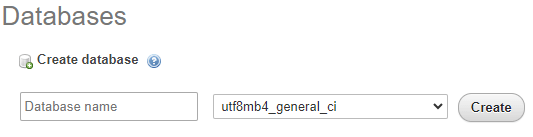
- Create a table, enter columns, and click the Go button.

The database is created successfully.
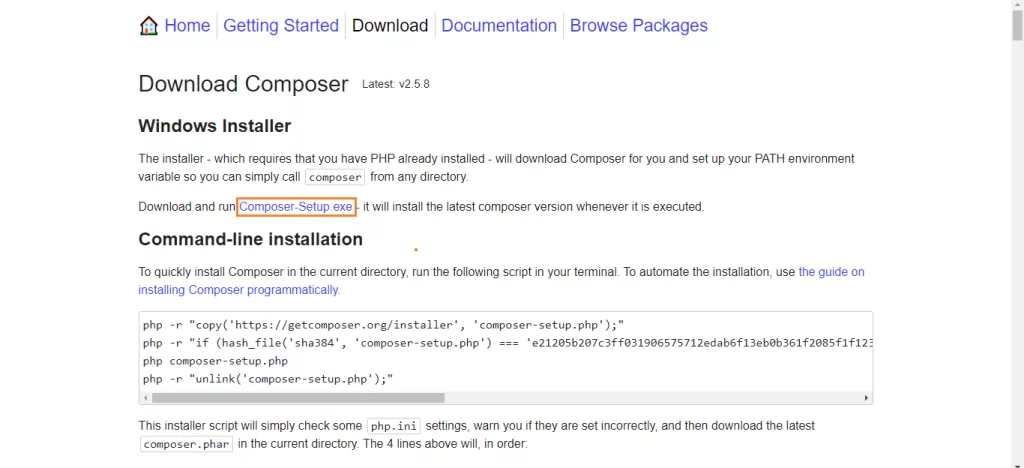
Download and Install Composer for Magento 2
- To download and install Composer for Magento 2, go to getcomposer.org and download it.

- Get the Composer – setup.exe file.
- Once the file is downloaded, double-click on it or run it.
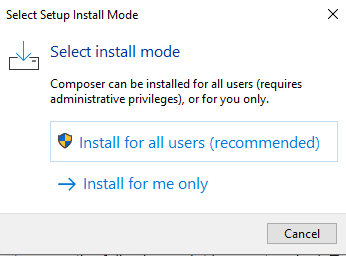
- Select a mode to install. “Install for all users” is recommended, so I chose it here.
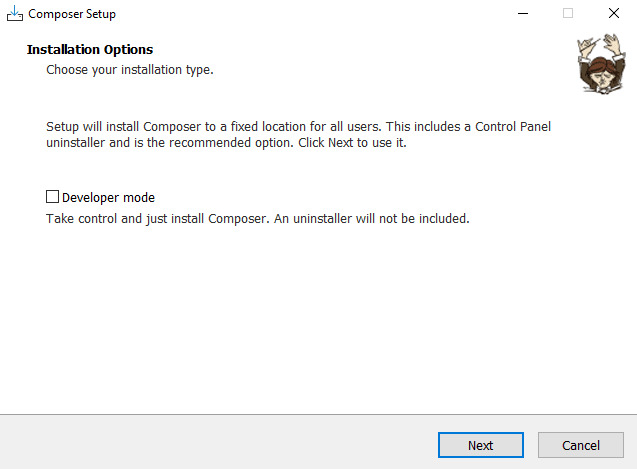
- Click on the Next.
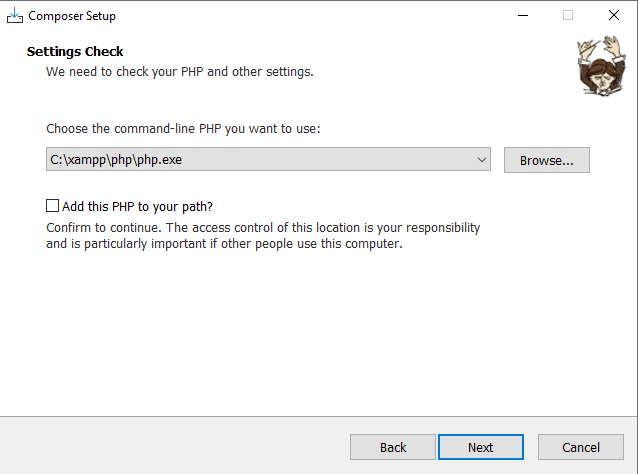
- Locate the PHP file address in the XAMPP folder and enter the location here. Then, check the “add this PHP to your path” box and click on the next.
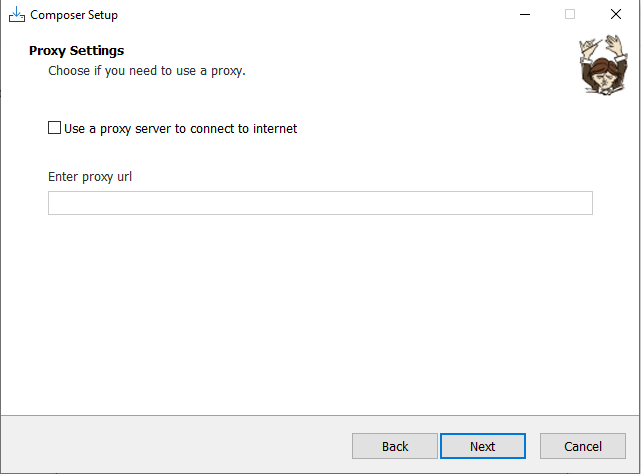
- It is optional to add a proxy URL so you can skip it and click on the next.
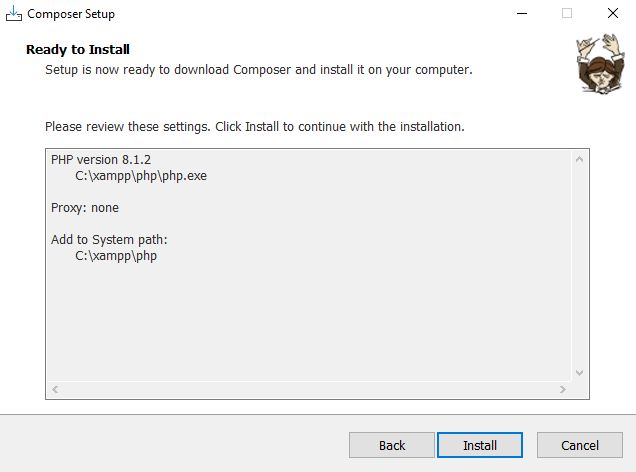
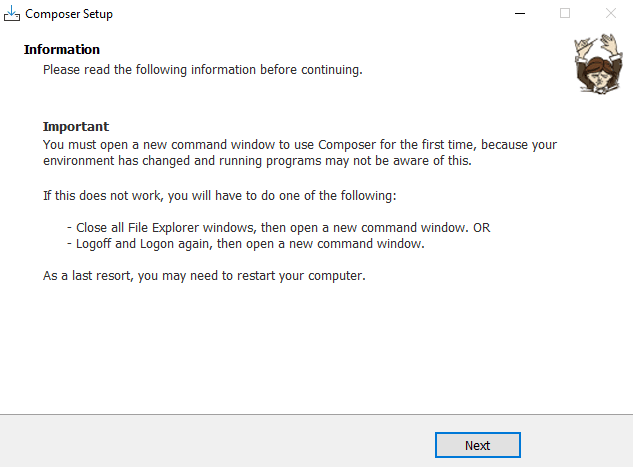
- Last but not least, click on the Install button to complete the final step of the installation process.
- Click on the next.
- Complete the installation by clicking on the Finish button.
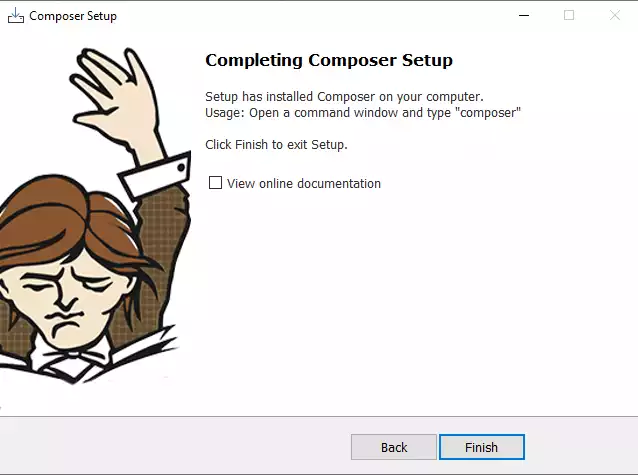
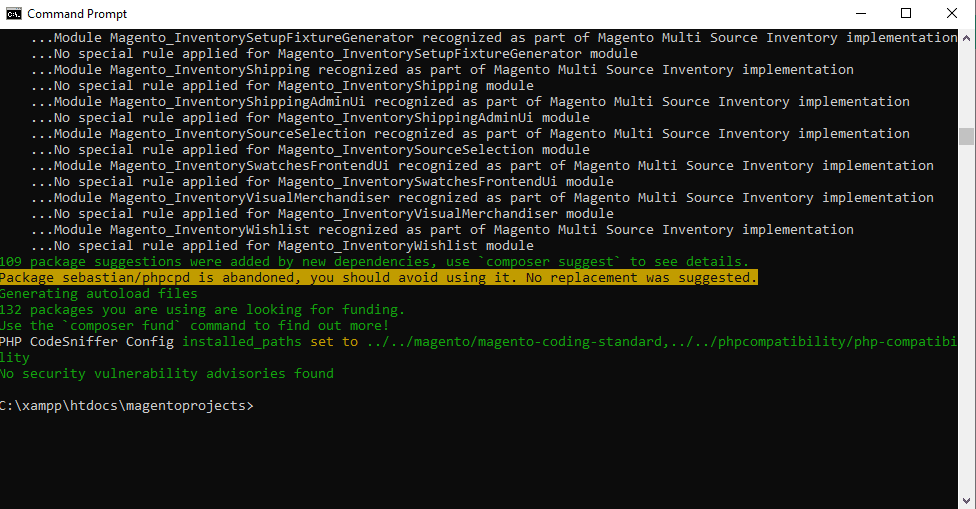
- To ensure that Composer has been installed correctly, launch the Command Prompt. (Learn how to use Magento 2 CLI terminal to manage your online stores.)
- Run the Composer command to verify the installation status and check for potential issues.
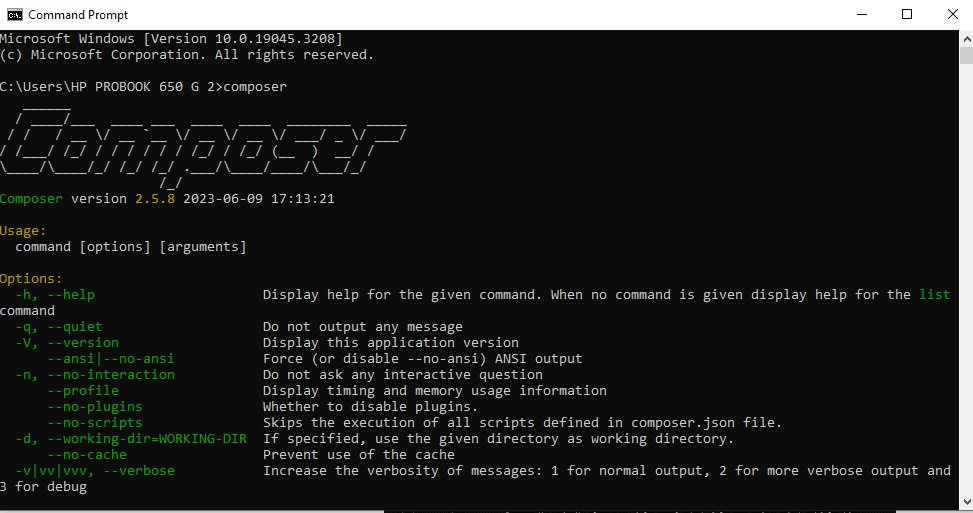
Here you go! We have successfully installed the Composer on our system.
Download and Install Elasticsearch for Magento 2
- As it is a prerequisite to installing Elasticsearch on your system for Magento 2 installation, go to https://www.elastic.co/downloads/past-releases/elasticsearch-7-6-0 and download it.
- Once you have downloaded the Elasticsearch package on your system, extract it.
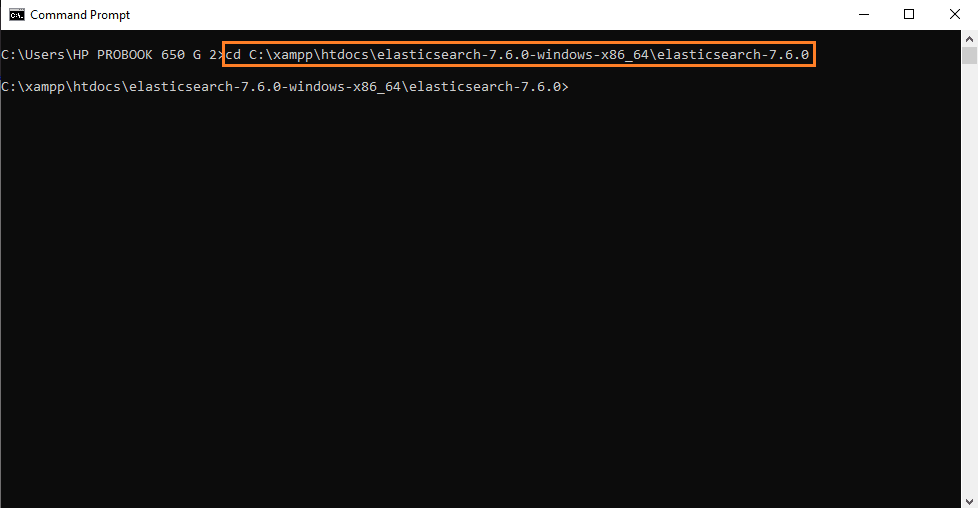
- Go to the command prompt and navigate to the folder where you have extracted the elastic search file by running the cd command.
cd directory-path
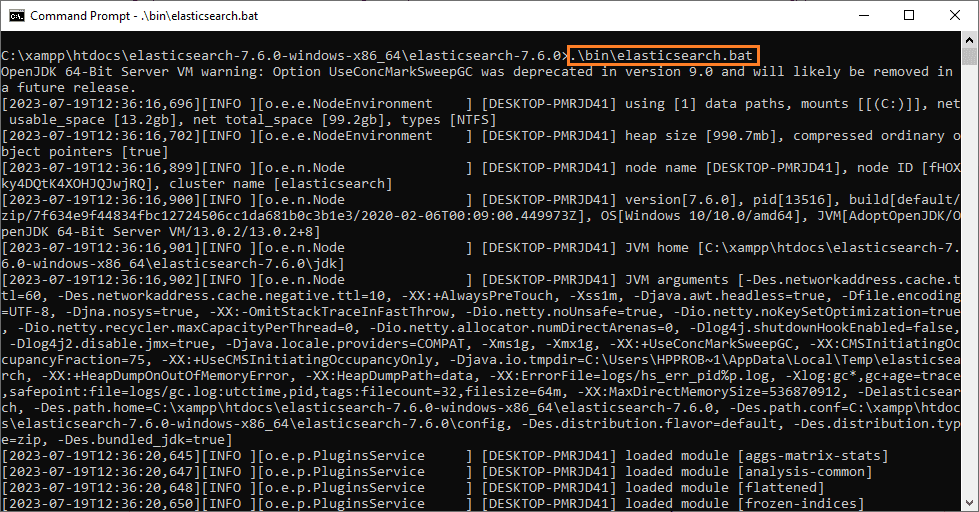
- Once you are in the Elasticsearch folder, execute this command to install Elasticsearch on your system.
.binelasticsearch.bat
- Once the execution is done, go to your browser and enter “local:9200” in the search bar to check the availability of Elasticsearch on port:9200.
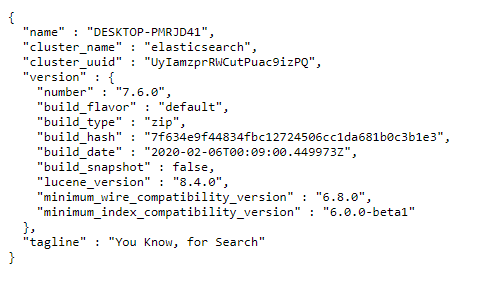
Congratulations! We have successfully installed Elasticsearch on our system.
Having trouble Managing your Magento hosting?
Let us handle your hosting— from security to performance and more so you can focus on development and eCommerce operations.

Download and Install Magento 2 using Composer
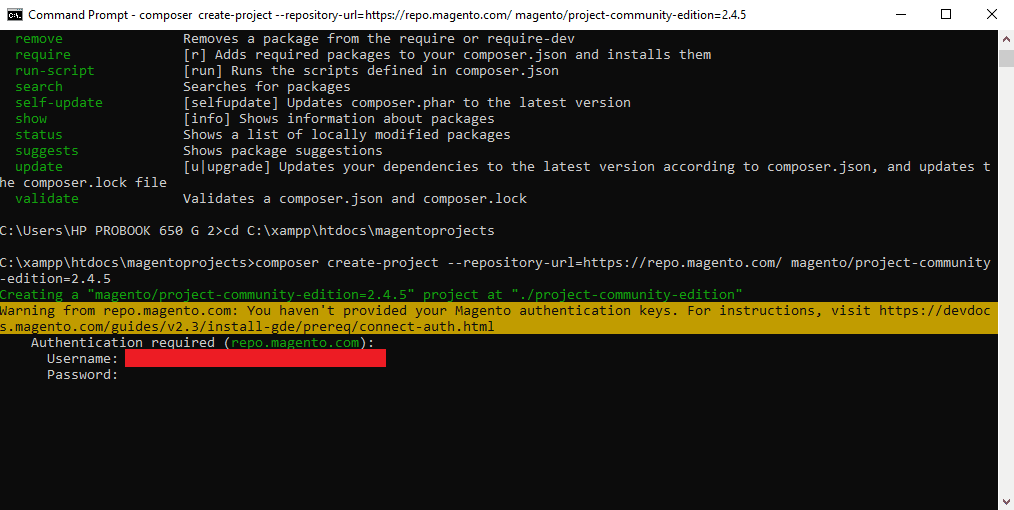
To download Magento 2 using Composer, open the command prompt and navigate to the directory where you want to download your Magento 2 application using the “cd” command. Run the below command to navigate to the desired directory:
cd directory-path
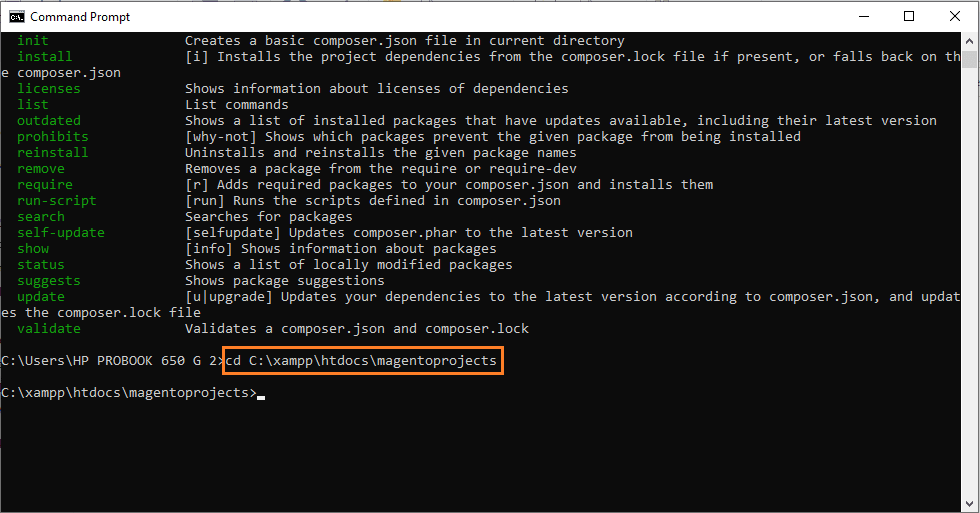
For example, I want to download the Magento 2 application in the htdocs > magentoprojects directory of the xampp folder, so I will run this command:
cd C:xampphtdocsmagentoprojects
- Now, run this command to install the Magento 2 application of your required version using Composer.
composer create-project --repository-url=https://repo.magento.com/ magento/project-community-edition=2.4.5
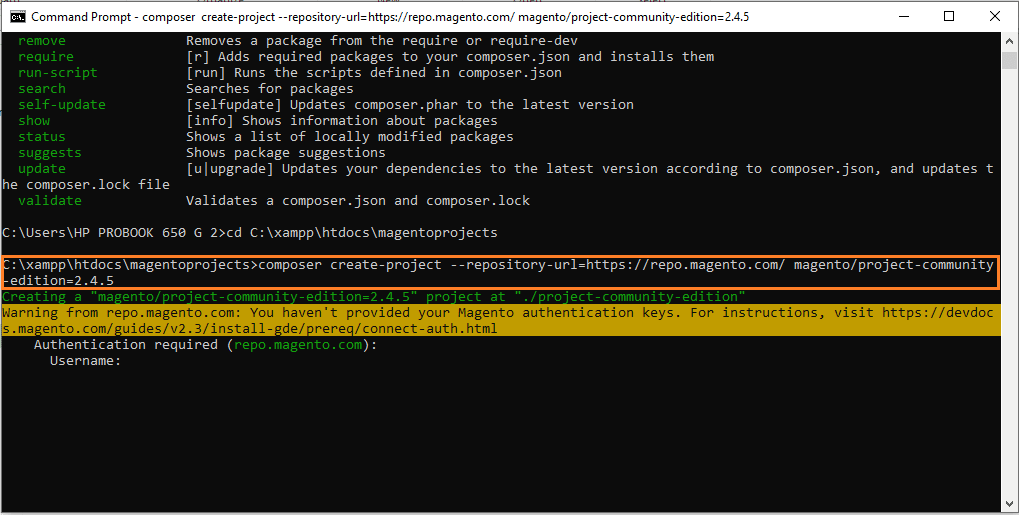
While running the above command, it will ask for Magento repository authentication, i.e. Username and Password.
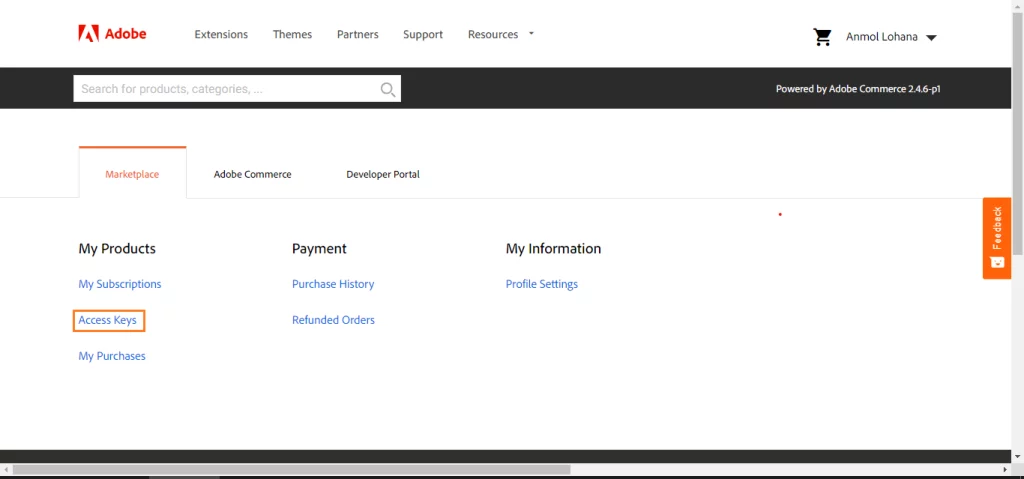
You must sign in to your Magento marketplace account and create an access key to get authentication credentials. If you do not have a Magento marketplace account, create one first.
Follow these steps to create an access key and get authentication credentials.
- Go to https://commercemarketplace.adobe.com/customer/account/ and navigate to the “Access Keys” page.
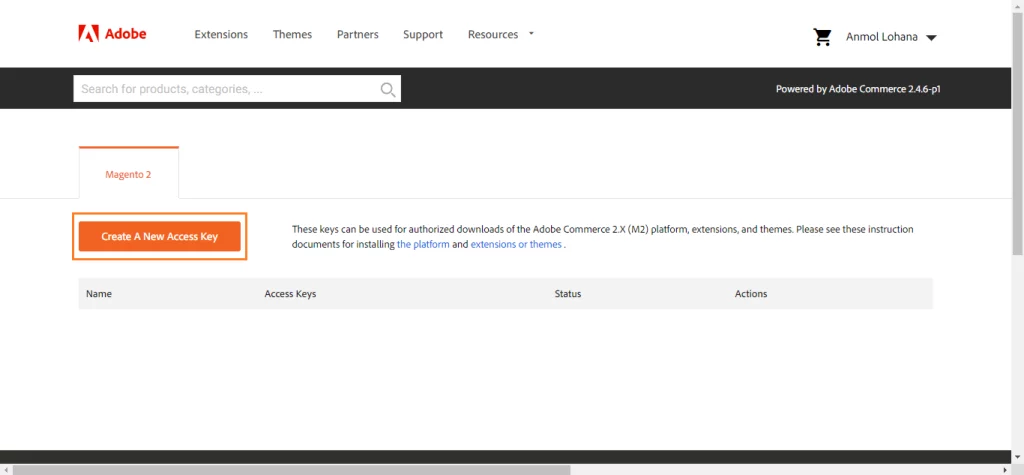
- Once on the access keys page, click the “Create A New Access Key” button.
- Enter a name for the Access Key and click on the “OK” button.
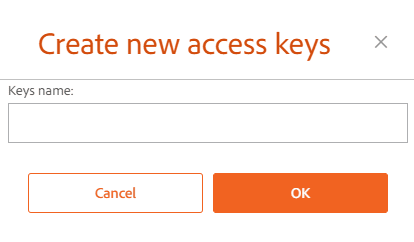
Here you go! The authentication credential has been created.
You can see two keys here “Public Key” and “Private Key.” The public key will be used as a username, and the private key will be used as a password.
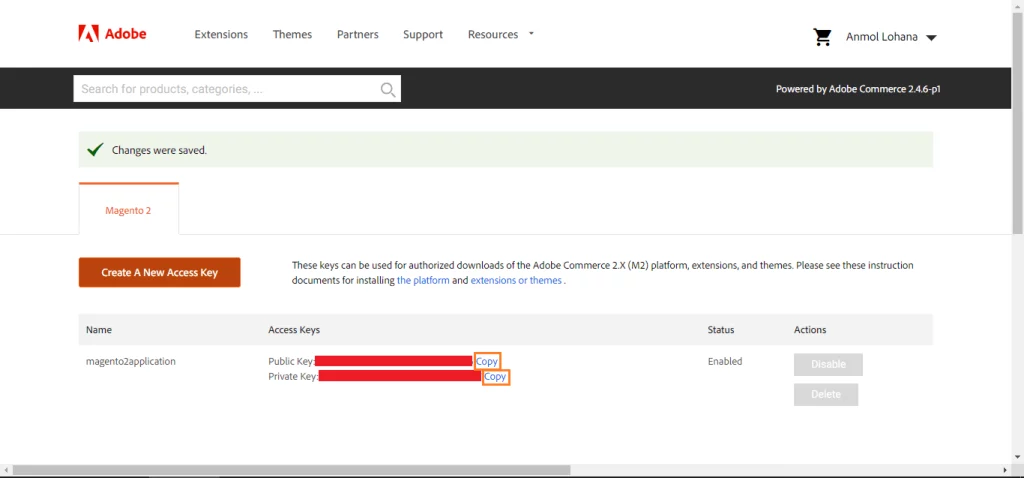
- Copy the public key and enter it into the terminal as a username.
- Copy the private key and enter it into the terminal as the password.
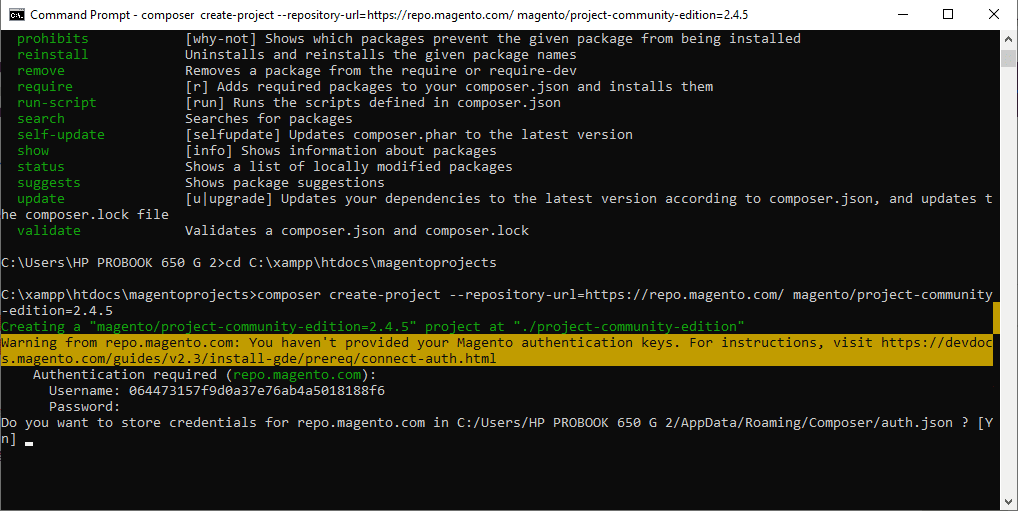
- It will ask you to store the credentials for the Magento repository in your system’s authentication file. So, if you want to save it for the future, enter “Y,” and if you do not want to save it, enter “N.”
- It will start processing the download Magento command.
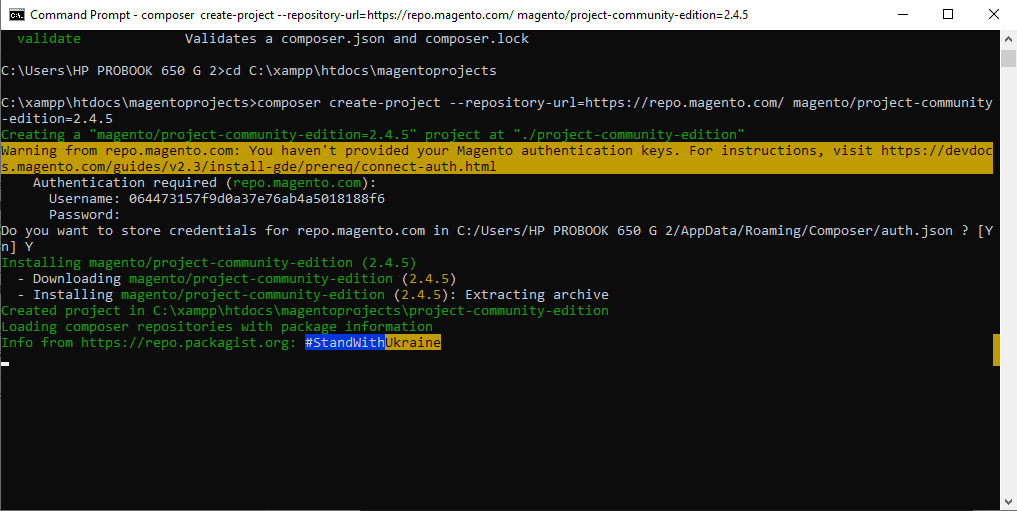
Congratulations! We have successfully downloaded the Magento application using Composer.
Install Magento 2 on localhost Using Command Line
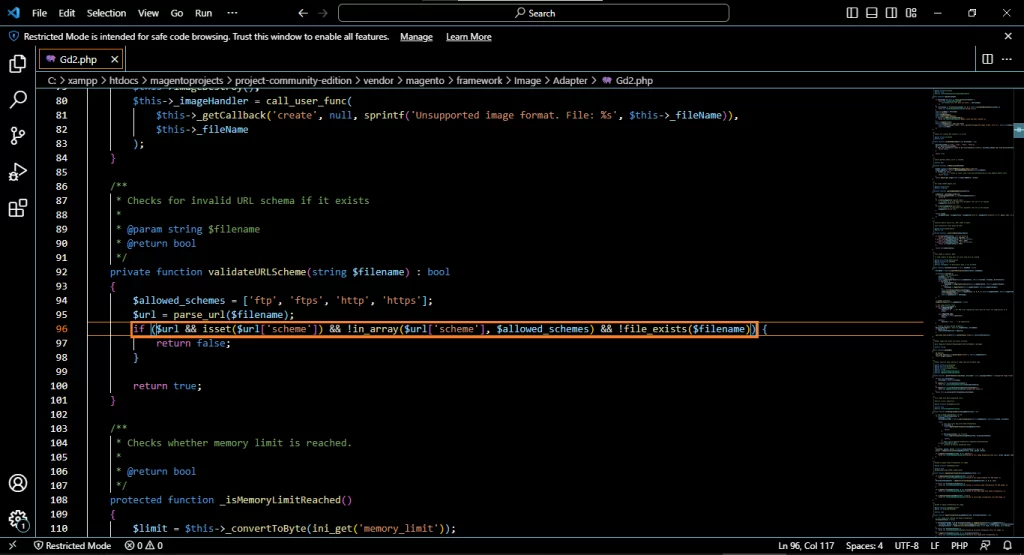
Before executing the Magento installation command, open the Gd2.php file. Go to vendormagentoframeworkImageAdapterGd2.php, which you can find in your project directory.
Replace this line of code:
if ($url && isset($url['scheme']) && !in_array($url['scheme'], $allowed_schemes))
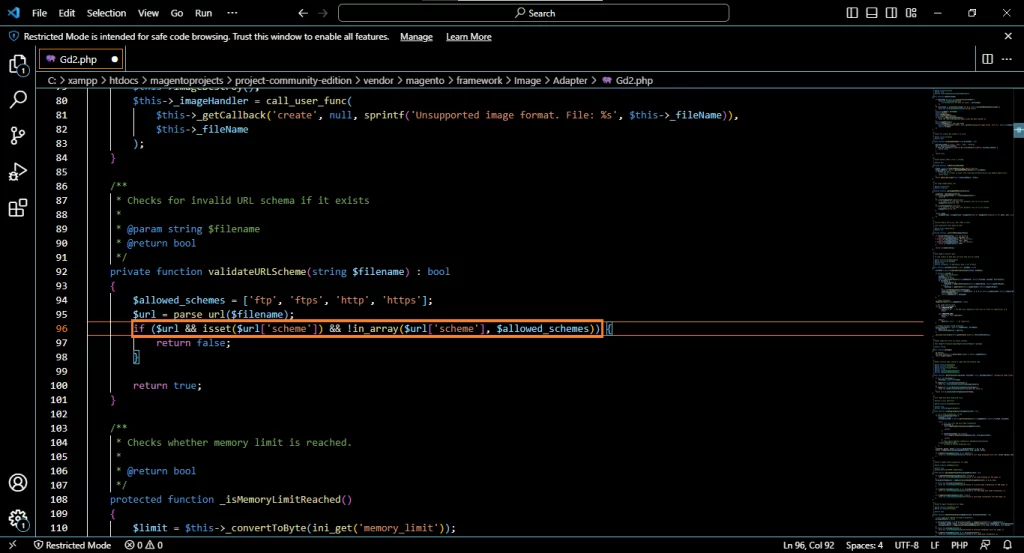
With this code:
if ($url && isset($url['scheme']) && !in_array($url['scheme'], $allowed_schemes) && !file_exists($filename))
unable to apply data patch magento\theme\setup\patch\data\registerthemes for module magento_theme. original exception message: wrong file
Note: If you do not change this line of code, you will get an error “Unable to apply data patch MagentoThemeSetupPatchDataRegisterThemes for module Magento_Theme. Original exception message: Wrong file.“

- Once you are done with these changes, open your command prompt and run this command:
php bin/magento setup:install --base-url="http://localhost/project-community-edition/" --db-host="localhost" --db-name="magento2app" --db-user="root" --admin-firstname="admin" --admin-lastname="panel" --admin-email="[email protected]" --admin-user="admin" --admin-password="admin123" --language="en_US" --currency="USD" --timezone="America/Chicago" --use-rewrites="1" --backend-frontname="admin" --search-engine=elasticsearch7 --elasticsearch-host="localhost" --elasticsearch-port=9200

Please note the following instructions to configure your Magento 2 installation properly:
- Assign the base URL according to your installation path.
- Make sure to record the admin username and password for future reference.
- Do not use the Elasticsearch port.
- Now, replace the default values with your specific information:
–base-url: Use your Magento 2 installation folder path.
–db-name: Enter your desired database name when creating the database.
–db-password: Set your preferred database password.
–db-user: Create a new database user with full permissions or use the default root user.
–db-password: Specify the password for your database user. If you use the ‘root’ database user, leave this field blank.
–admin-firstname: Provide the first name of the admin user.
–admin-lastname: Provide the last name of the admin user.
–admin-email: Enter the email address of the admin user.
–admin-user: Choose a username for logging into the Admin Panel.
–admin-password: Set the password for logging into the Admin Panel.
–language: Select the desired language for your Admin Panel and storefront. Use the language code, e.g., en_US.
–admin-email: Replace with your email address.
–currency: Set the default currency for your storefront. You can find a list of supported currencies and their codes by running php bin/magento info:currency:list.
–timezone: Change to your local timezone. Refer to the list of supported timezones for available options.
–url-rewrites: Set to 1 to enable Web Server Rewrites, which can help your site ranking.
–backend-frontname: Set your Admin URL. If you omit this parameter, Magento will generate a random URL for your Magento Admin path (e.g., admin_jkhgdfq).
–search-engine: Specify the version of Elasticsearch you want to use for this Magento installation. The default is Elasticsearch 7.
–elasticsearch-host: Provide the hostname or IP address where Elasticsearch runs. The default is localhost.
–elasticsearch-port: Specify the port number that Elasticsearch is listening to. The default is 9200.
Note that other values are optional and can be changed later.
- Once you have completed the configuration, Composer 2 will begin installing Magento 2. The installation process will take some time to be done.
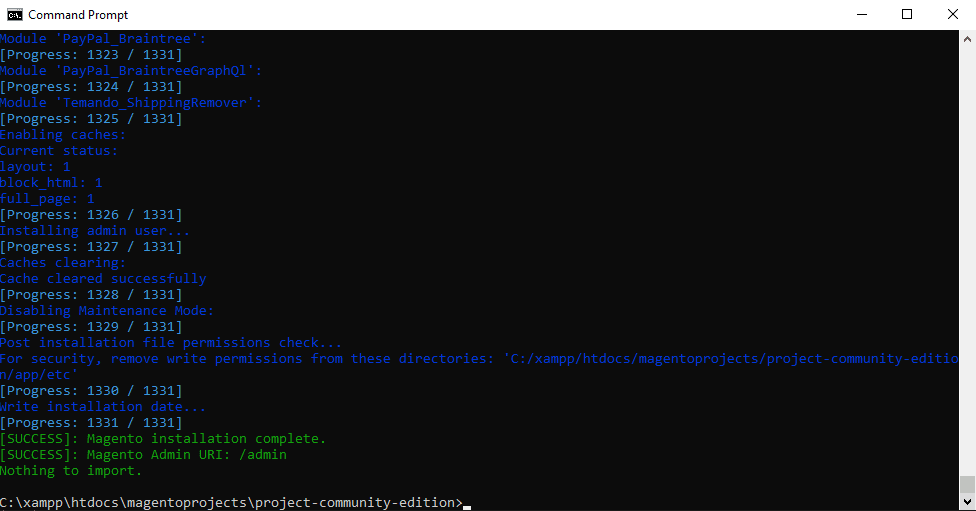
When you see the “SUCCESS” prompt on your screen, you have done the installation process correctly. We have successfully installed Magento 2 on localhost using the XAMPP Server.
Now, you are required to execute the following commands.
php bin/magento indexer:reindex

php bin/magento setup:upgrade

php bin/magento setup:static-content:deploy -f

php bin/magento cache:flush
You can make any changes to your Magento 2 store and customize it according to your needs or requirements.
To access your Magento store, enter this URL localhost/projectdirectoryname/pub/ or use the base URL you previously set for ‘base-url’ during the installation into the browser.
To access your Magento’s admin panel/dashboard, enter this URL http://localhost/projectdirectoryname/pub/admin into the browser.
Conclusion
You’ve successfully learned to set up Magento 2 on localhost using the XAMPP server and Composer. When you’re ready to launch your online store, you can count on Devrims Managed Magento Hosting to improve performance, increase sales, and handle all server-side management.
With Devrims handling the technical side, you can focus entirely on building your Magento 2 store. If you run into any issues during the installation, feel free to reach out for help.
Worried About How to Migrate your Hosting?
Stop worrying and enjoy seamless, free migration with no downtime. Plus, get 24/7 tech support to handle any hosting-related issues.

Related Topics:

Related Tutorials

10 Best Free Magento 2 Themes and Templates for a Responsive Online Store (2025)