WordPress is the most popular content management system for building websites that power many sites on the internet. With great power comes great responsibility; to effectively manage a WordPress site, you will require the right tools. This is where WP-CLI comes in.
WP-CLI stands for WordPress Command Line Interface. It allows you to control and manage your WordPress sites right from the terminal or command prompt. If you’ve ever built or managed a WordPress site before, you must know that everything from updating plugins to managing users is done through the graphical admin dashboard. However, these simple tasks can become tedious as your site grows.
Terminal simplifies WordPress management and performs any task, whether you want to update a plugin on ten different sites, update a theme across the sites, clone a site, or anything else. When you perform these tasks in the dashboard, it will take more time, but it can be automated and executed in seconds using WP-CLI.
In this blog post, we will cover everything you need to know to get started with WP-CLI. We will show you how to install and configure it on your machine and run basic commands for managing plugins, themes, and more. Also, advanced usage to take complete control of your WordPress sites through the command line. So, let’s dive in!
Why use WP-CLI?
WP-CLI makes managing WordPress sites much faster and easier. You can do many things effectively with WP-CLI without using the WordPress dashboard. You can perform multiple tasks simultaneously, save time, and increase productivity.
The commands give you more control over WordPress. You can easily manage plugins, themes, users, and anything else on your site. This helps developers fix issues and make their sites more secure. WP-CLI can automate everyday tasks like backups, updates, and optimization. Instead of doing these manually, WP-CLI handles them for you automatically. This saves time and avoids mistakes.
WP-CLI provides an easier way to control WordPress, whether you have one or multiple sites. You won’t return to the WordPress dashboard once you start using it.
Perquisites
Before getting started with WP-CLI, you must ensure your hosting environment is ready to use it. It will require access to the server through SSH, the secure gateway that allows you to advance the server’s potential.
Many shared hosts do not provide SSH, whereas popular WordPress Hosting providers like Devrims provide SSH. If you are not a Devrims user, double-check if your host provides it or not before you get started.
Once SSH access is secured, see if your server meets the requirements:
- PHP Version: 5.6 or higher (PHP 7+ is recommended)
- WordPress Version: 3.7 or the latest
- Operating System: Linux, macOS, Windows
If your server meets these requirements, you are ready to go for it. Some themes and plugins may require additional provisions, but WP-CLI will notify you.
WP-CLI Installation
You need to connect with the root directory using SSH and download WP-CLI on your server to install WP-CLI.
Connect with the root directory using SSH:
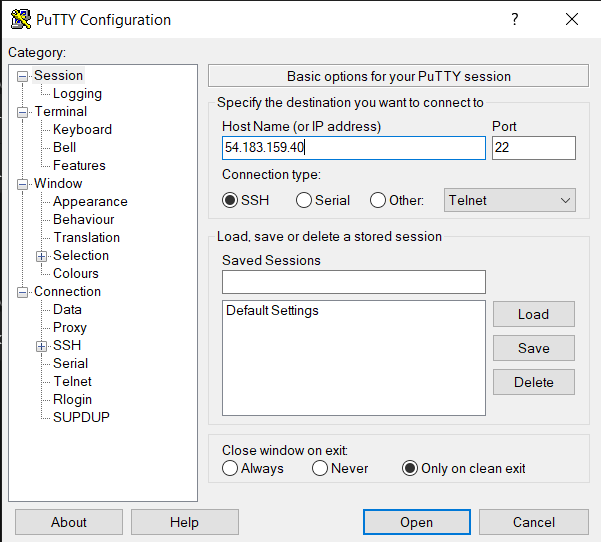
Connect to your server using SSH a terminal app like PuTTY (Windows), Termius (Mac), or Ubuntu (Linux). In my case, I am a Windows user, so I will go with PuTTY. You’ll need your server IP address, SSH port, and login credentials to connect the PuTTY terminal to your server.
Open PuTTY software and enter the Server IP and port, select SSH connection type, and click the “Open” button to enter the PuTTY command line interface.
You can see the command line. Now, enter the login credentials of your server to develop a connection. You can find the credentials inside of your Server Details section.
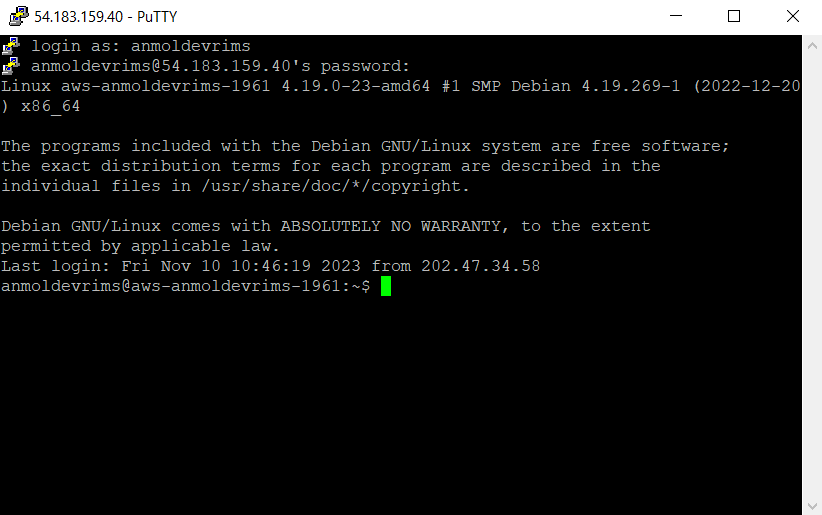
Here you go; we have built a connection successfully. Next, you need to download WP-CLI on your server.
Download the WP-CLI on your Server:
Download the wp-cli.phar file, which contains the executable WP-CLI by running this command to download it on your server:
curl -O https://raw.githubusercontent.com/wp-cli/builds/gh-pages/phar/wp-cli.phar

Next, make the wp-cli.phar file executable by running this command:
chmod +x wp-cli.phar
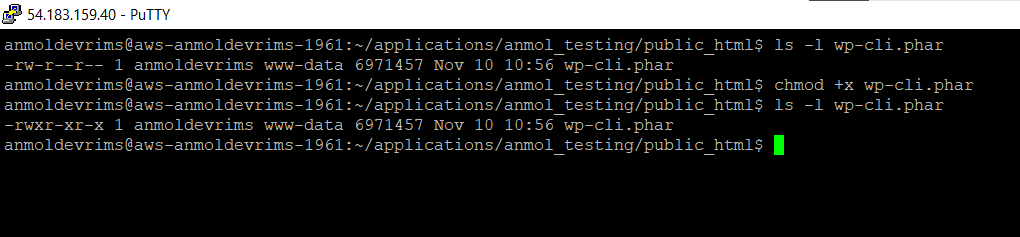
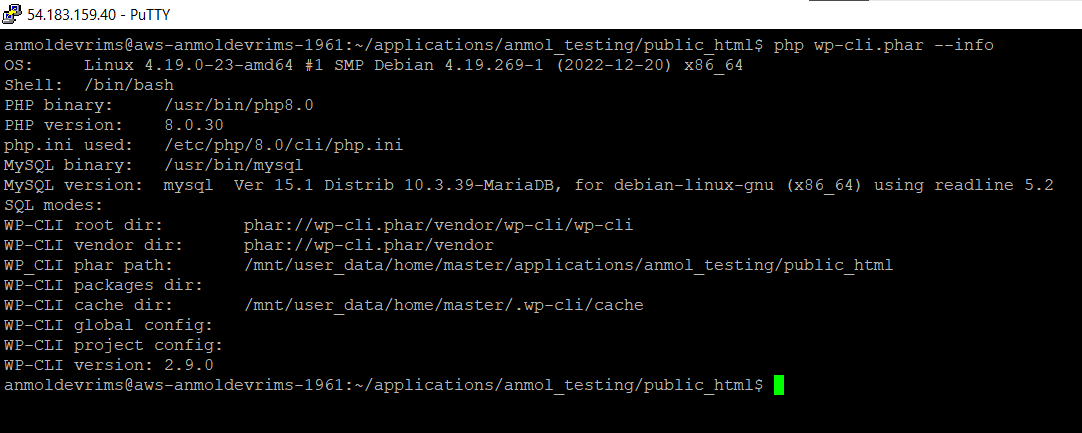
You can now confirm whether WP-CLI is installed and working or not by running this command:
php wp-cli.phar –-info
This will provide information about the installed version of WP-CLI if it is working correctly.
That’s it! WP-CLI is now downloaded, installed, and ready to use.
How to Use WP-CLI to Advance Your Workflow?
WP-CLI provides an extensive set of commands that allow you to manage and administer your WordPress site from the terminal. It will provide various possibilities for efficient WordPress management once it is installed.
Let’s perform different tasks and manage our WordPress site via WP-CLI:
- Manage WordPress, including updates, posts/pages, control comments/widgets, and more.
- Manage WordPress Themes, including installation, activation, editing files, and more.
- Manage WordPress Plugins, including installation, activation, deactivation, or deletion.
- Manage WordPress Core, including updates and versions.
- Manage WordPress Multisites simultaneously, controlling and performing actions on multiple sites.
- Search or Replace Strings automating complex data migrations.
- List All Supported Commands of WP-CLI, discover each and use them to advance your site and workflow.
Let’s see how we can use WP-CLI to perform the abovementioned tasks.
Manage WordPress
WP-CLI provides a simple way to install and configure WordPress through terminal command lines. Follow these steps to use WP-CLI’s power to get your WordPress site up and running smoothly:
Download WordPress Core
Run this command to download the latest version of WordPress Core.
wp core download

Create wp-config.php File
This file is essential as it stores the credentials for your WordPress install and main configuration settings. Run this command to create a wp-config.php file.
wp config create --dbname="anmol_db" --dbuser="user_db" --dbpass="Abcdefg123@"

Avoid saving passwords in history for security:
wp config create --dbname="anmol_db" --dbuser="user_db" --prompt=dbpass < password.txt

Create the Database
Create a fresh database with your wp-config complete:
wp db create

Install WordPress
Now, run this command to complete the WordPress installation:
wp core install --url=your_domain --title=Your_Blog_Title --admin_user=username --admin_password=password --admin_email=your_email.com

You have created a new WordPress site purely through WP-CLI’s terminal magic!
Managed WordPress Themes
WP-CLI allows you to manage your WordPress theme collection directly from the terminal. You can install, activate, and manage themes faster with WP-CLI commands. WP-CLI connects your server directly to the WordPress theme repositories. So, let’s perform various actions on the theme:
Install a theme on your WordPress website. i.e., to install the Astra theme on your site, run this command:
wp theme install astra
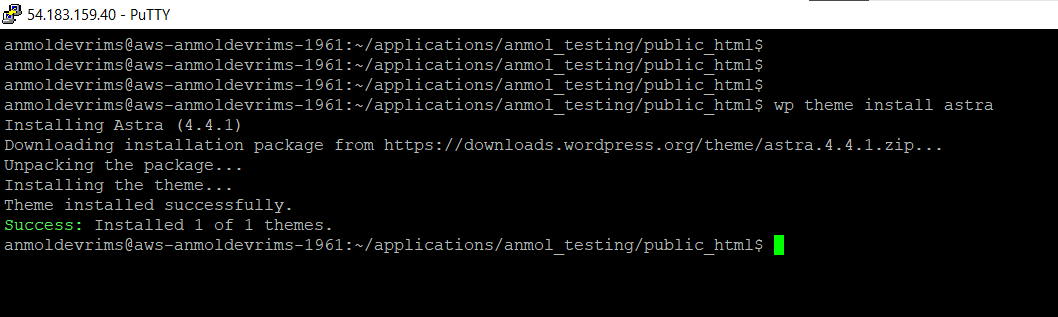
Be sure to use the exact theme name from the repository URL. WP-CLI will download and install the theme in seconds.
Now, activate the theme by running this command:
wp theme activate astra

Your WordPress site will switch over to the Astra theme using the command line. You do not need to use the admin dashboard!
WP-CLI makes it simple to update and delete a theme.
wp theme update astra
wp theme delete astra
WP-CLI lets you modify and show themes on your WordPress site with these robust theme management functionalities.
Manage WordPress Plugins
WP-CLI allows you to avail the complete power of plugins directly from the command line. You can install, activate, and manage plugins with simple terminal commands.
Install a new plugin on your site, i.e., to install the WooCommerce plugin on your WordPress site, run this command:
wp plugin install woocommerce
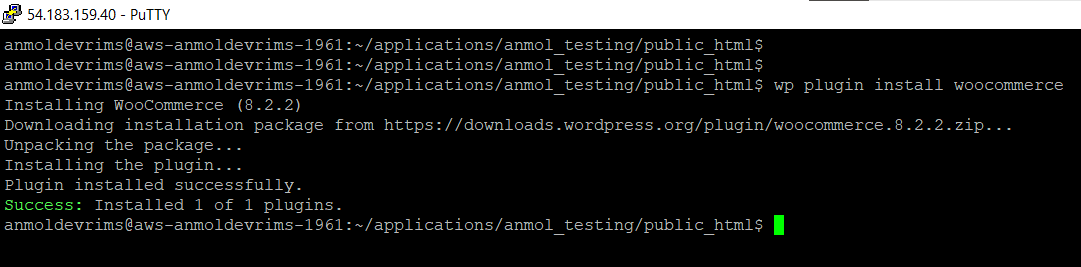
Make sure to use the exact plugin slug from the repository URL. WP-CLI will immediately download and install the plugin for you.
To activate the plugin, run this command:
wp plugin activate woocommerce

WP-CLI performs the whole activation process in seconds without using the admin dashboard.
You can also update, delete, and manage existing plugins by running these commands:
wp plugin update woocommerce
wp plugin delete woocomemerce
Manage WordPress Core
The central part of any WordPress site is the core software that powers it all. You can manage the WordPress core directly for the WP-CLI terminal.
Let’s run a few commands to see how it is working.
Check the current version of your WordPress software with this command:
wp core version

This will show the installed version of WordPress immediately. Run this command to update WordPress core files.
wp core update

WP-CLI will fetch the latest WordPress core files from WordPress.org and seamlessly handle the update. Core updates become a simple one-step process rather than a hectic task with WP-CLI.
Manage WordPress Multisite
WP-CLI is a valuable tool for controlling your entire server from one terminal for agencies managing multiple WordPress sites. WP-CLI integrates specialized commands for WordPress multisite environment. Include the –url parameter to target a specific site:
wp theme status astra --url=example.com
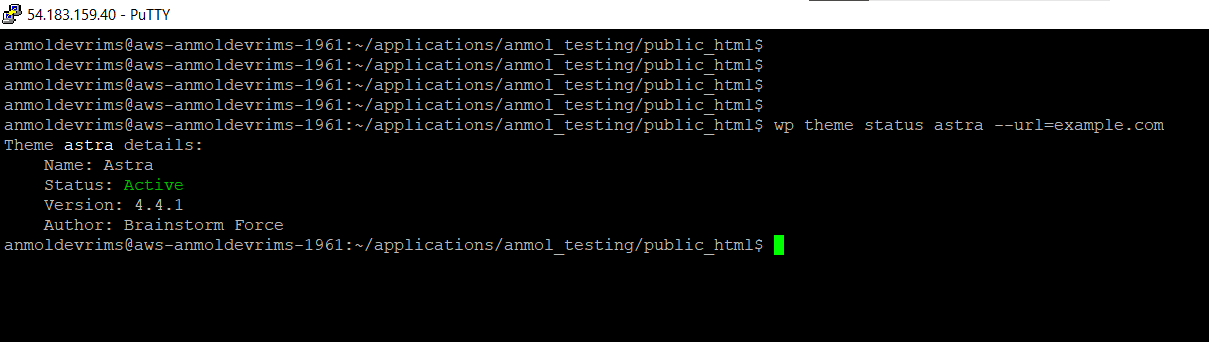
This allows you to check the theme status on the example.com site.
You can also loop commands over all sites:
wp site list --field=url | xargs -n 1 wp plugin update –all
This will update plugins on every site on your server with a single command.
WP-CLI even provides multisite reporting:
wp site list --field=url | xargs -n 1 wp plugin list --status=active
This will activate plugins on every site.
You get a central platform for controlling all your WordPress sites with WP-CLI’s robust multisite functionalities.
Search or Replace Strings
Migrating WordPress sites often require updating URLs and other strings across the database. WP-CLI makes these global find-and-replace operations easy and quick.
For example, run this command to replace an old URL with your new domain:
wp search-replace 'https://oldsite.com' 'https://newsite.com'
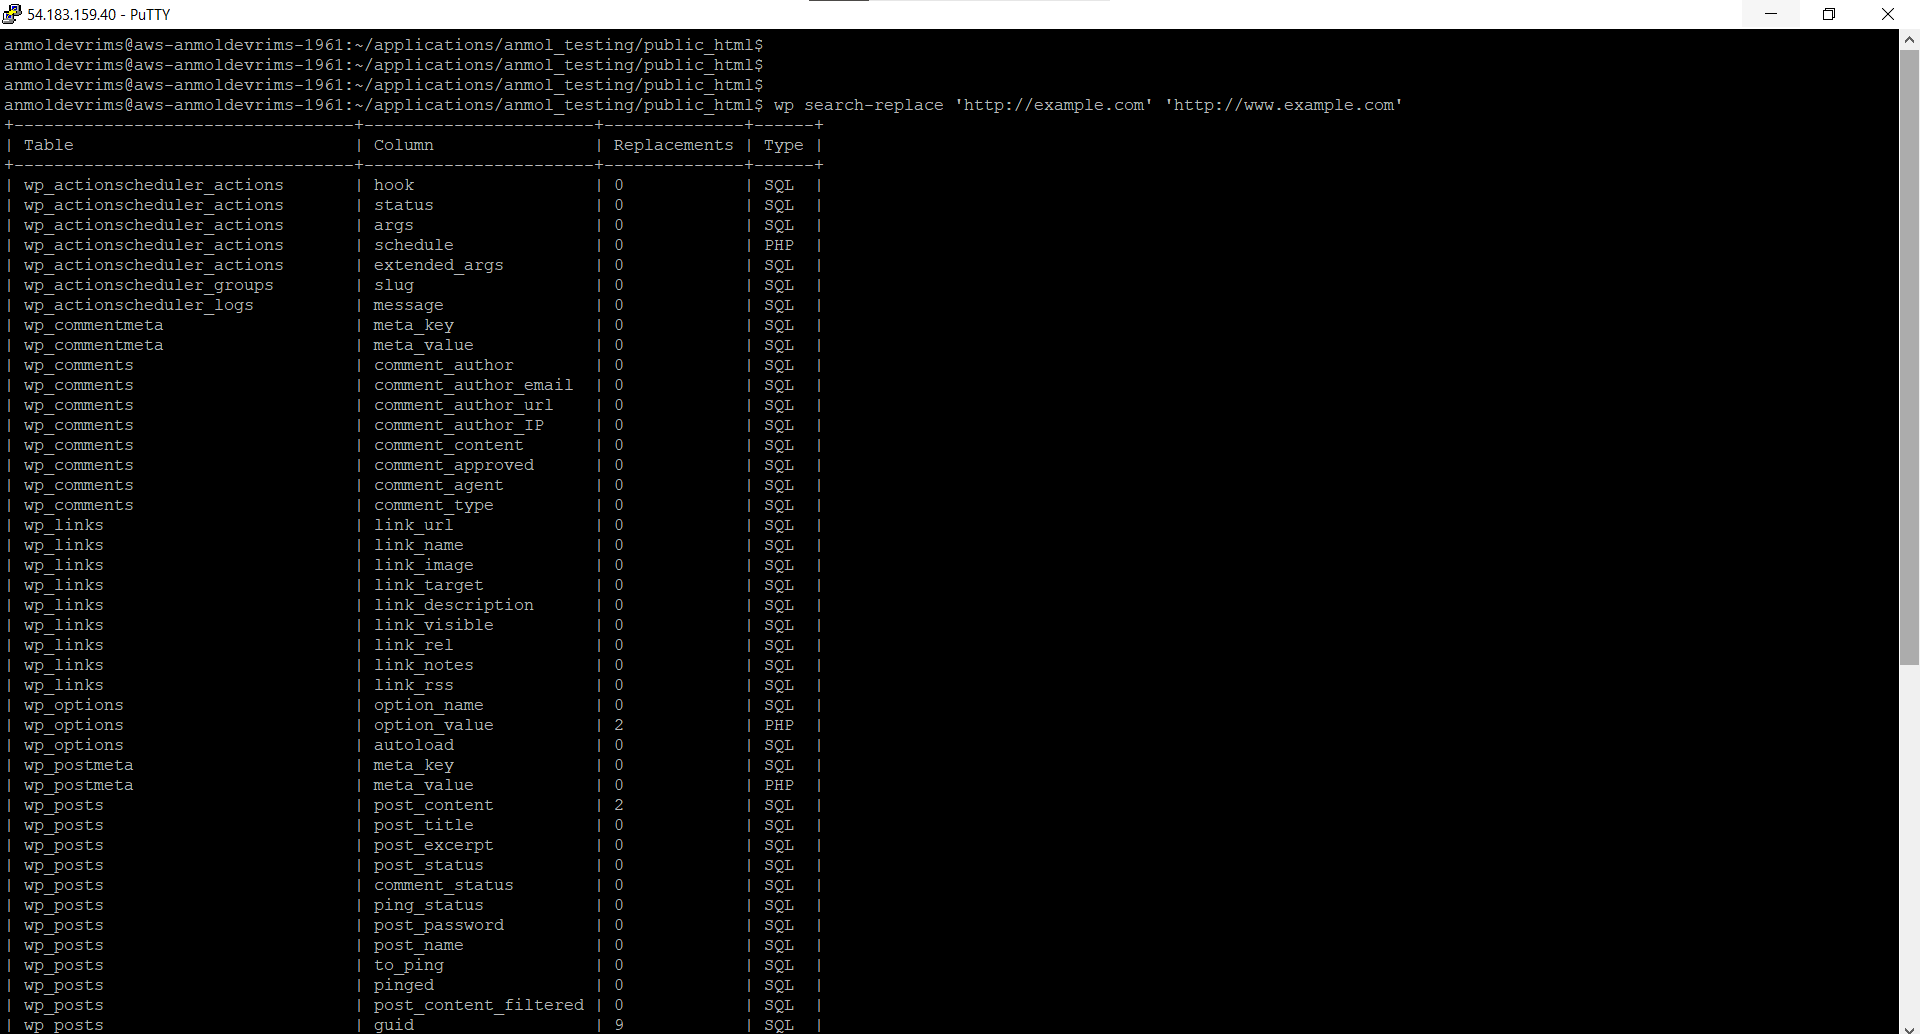
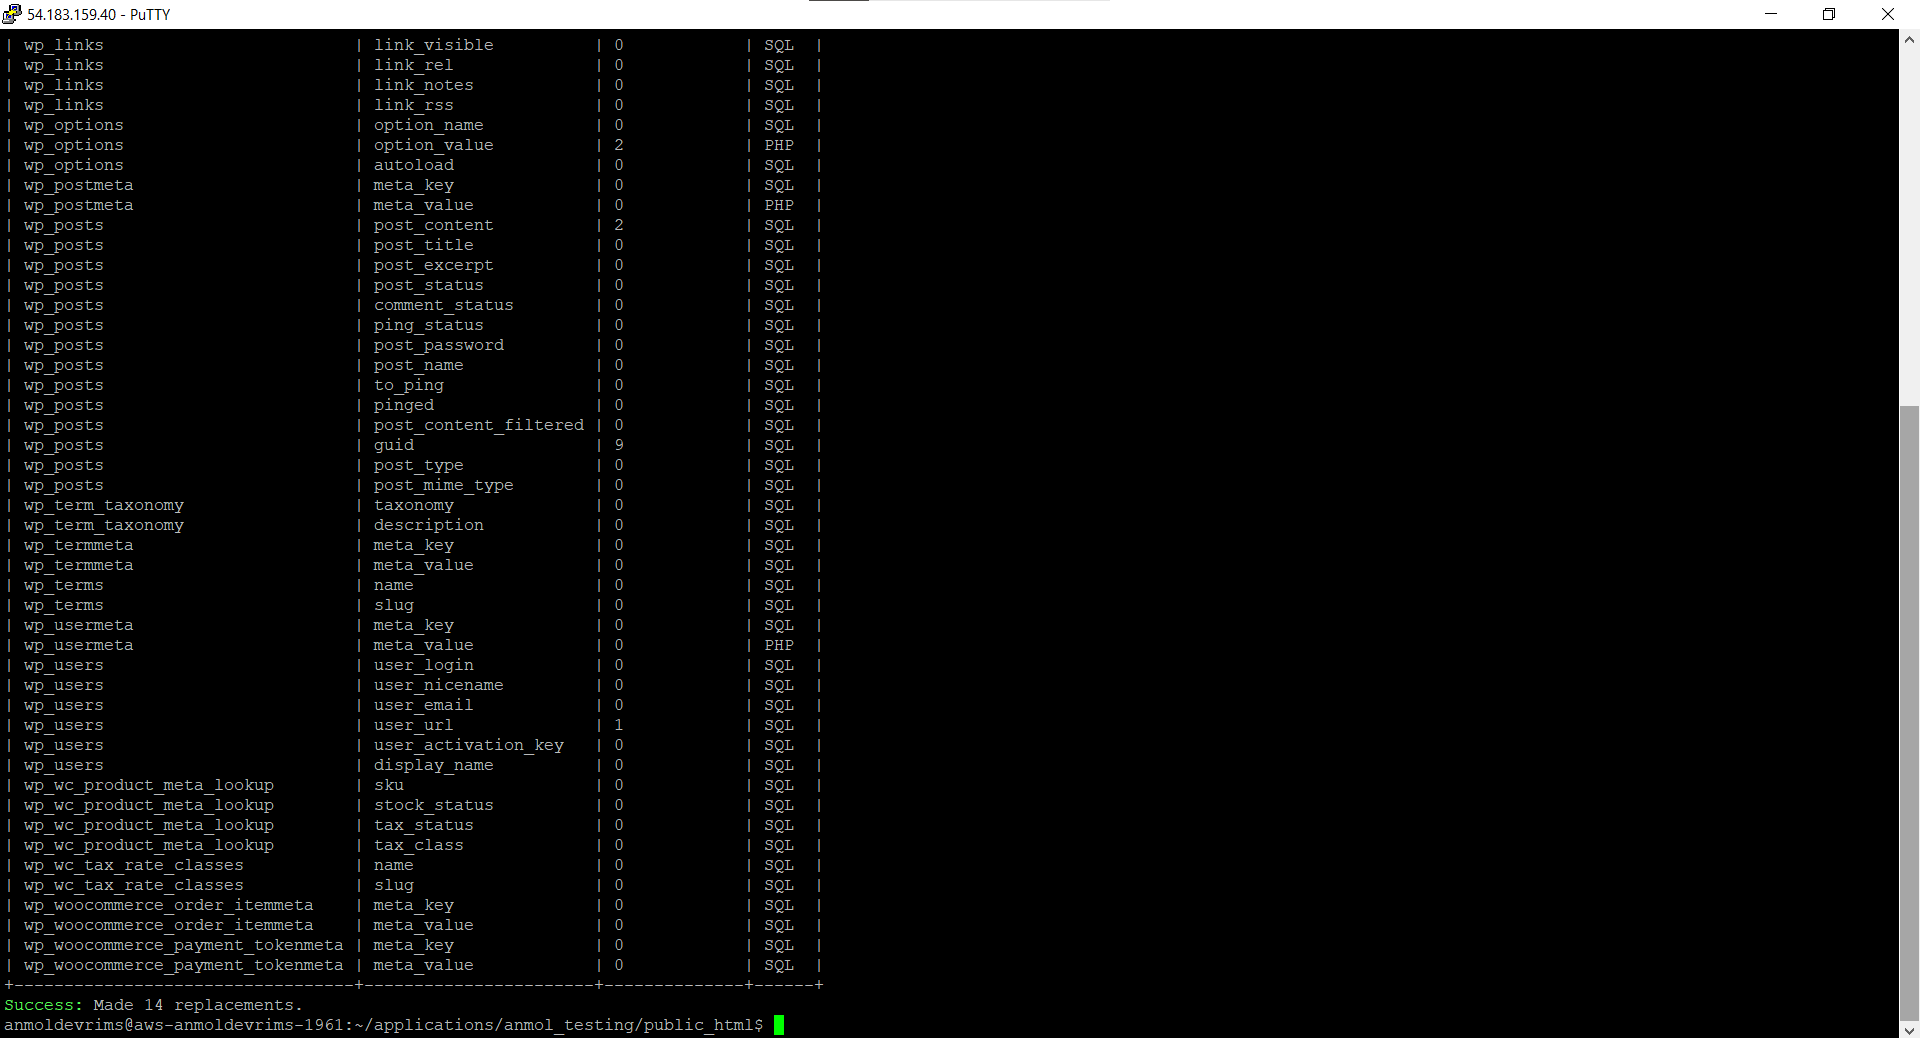
WP-CLI will explore the database, searching for the old URL and replacing every instance with the new one.
You can automate complex search and replace operations in seconds with WP-CLI’s robust tools.
List All Supported Commands
WP-CLI provides a huge command set that you can find by running this:
wp
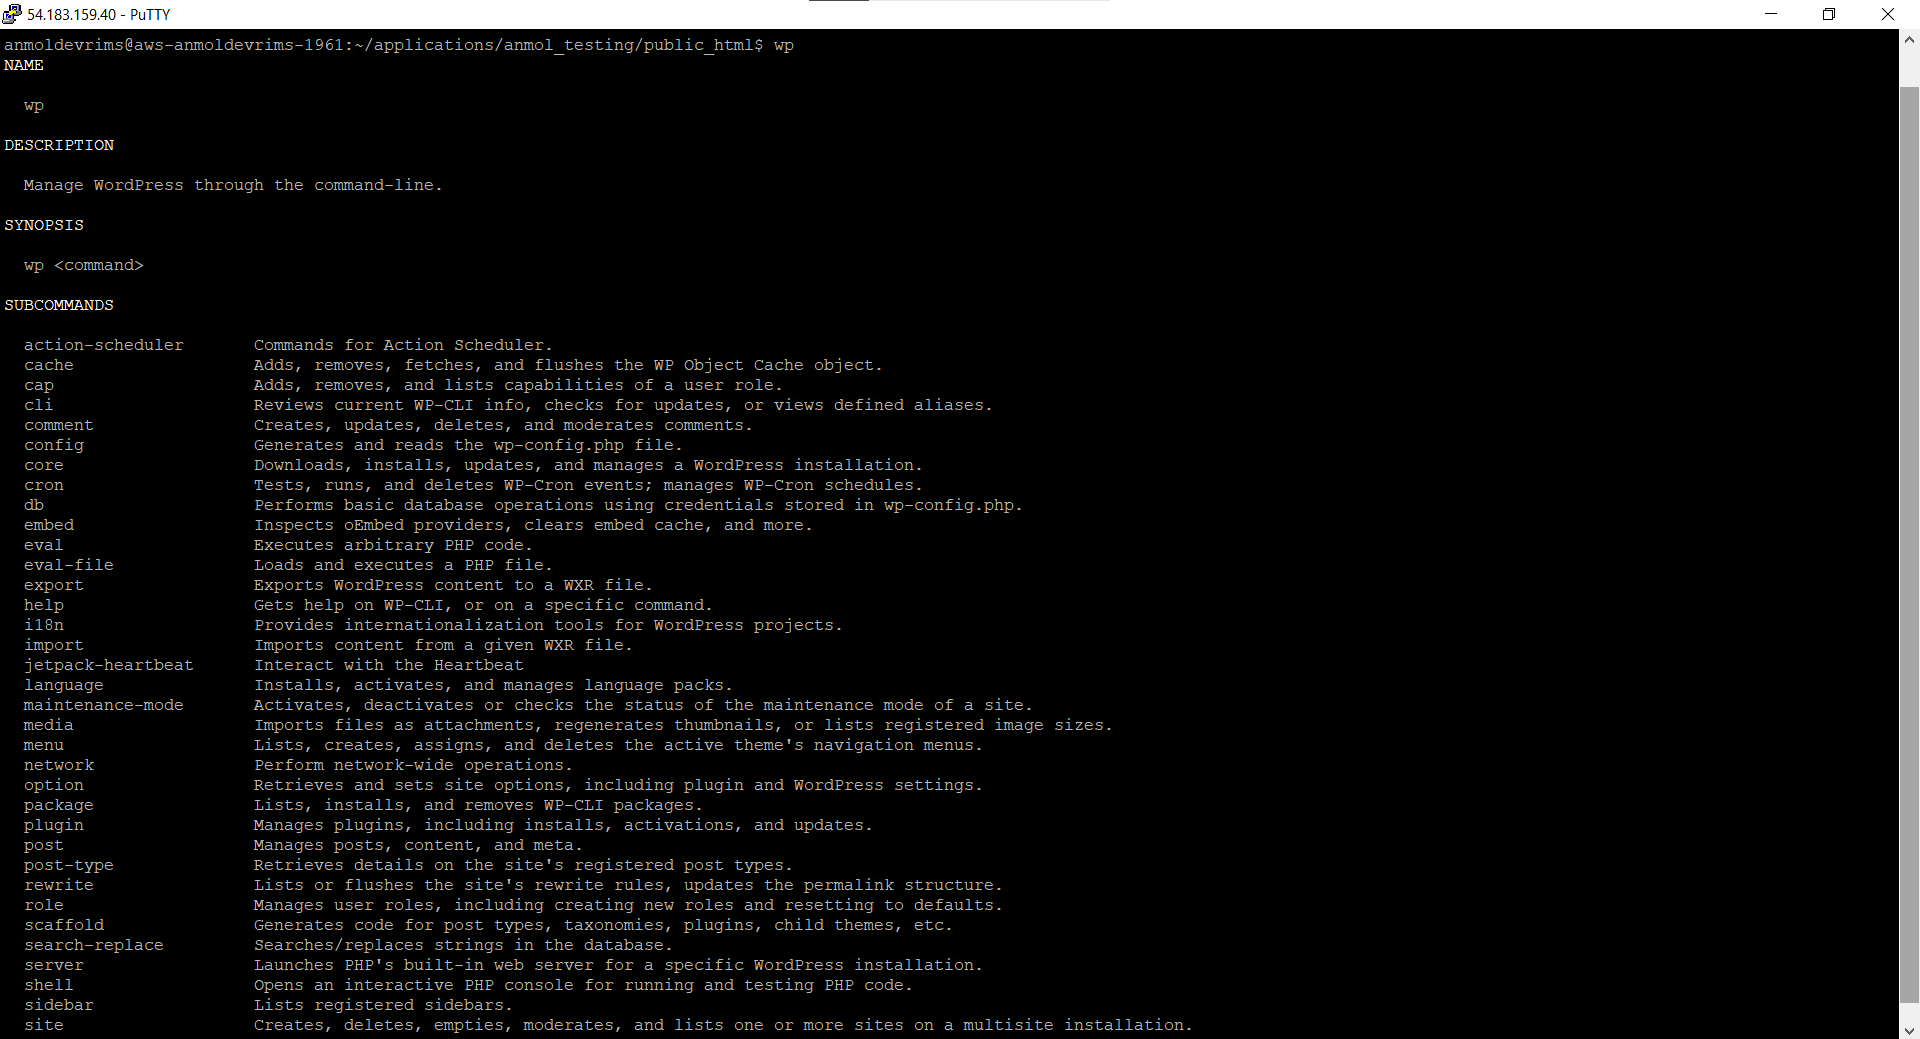
This will output the complete list of available WP-CLI commands and short descriptions.
To explore a specific command, run:
wp help <command>
For example:
wp help plugin
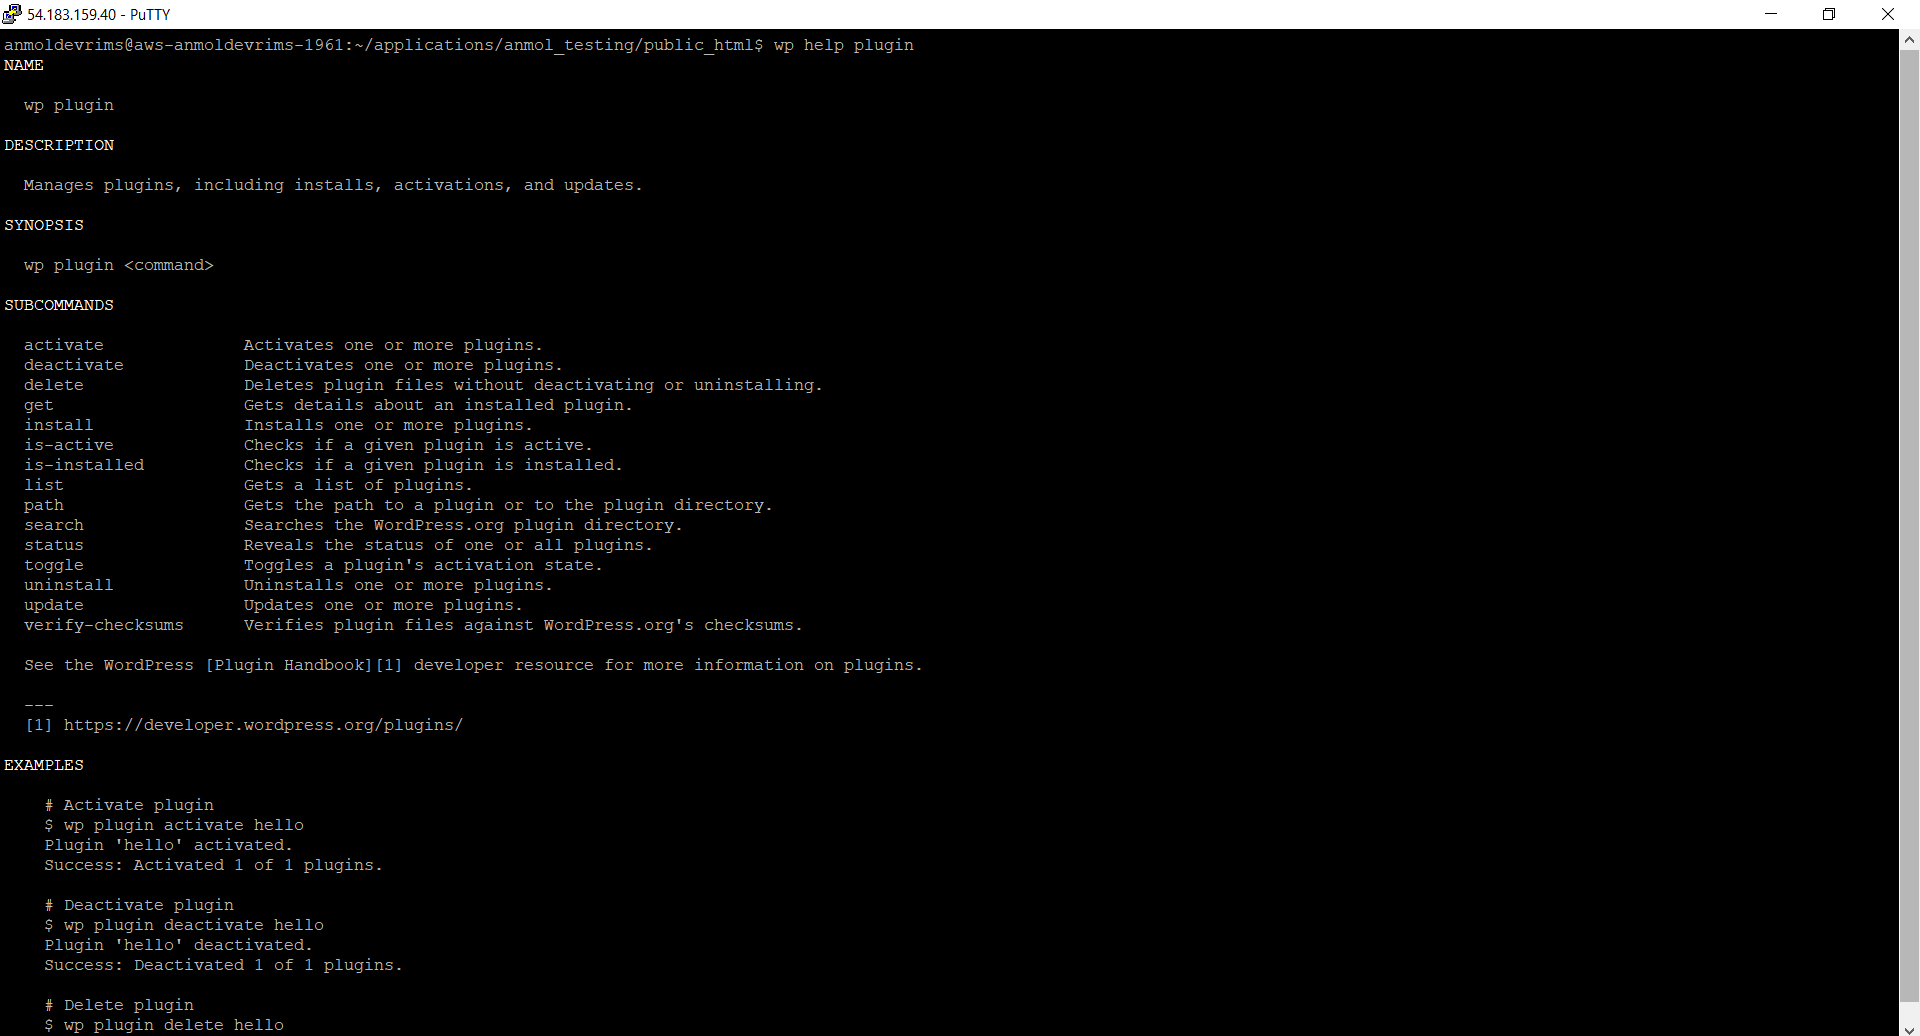
This will provide complete usage details and options for the plugin command.
You can even run subcommand documentation:
wp help plugin activate
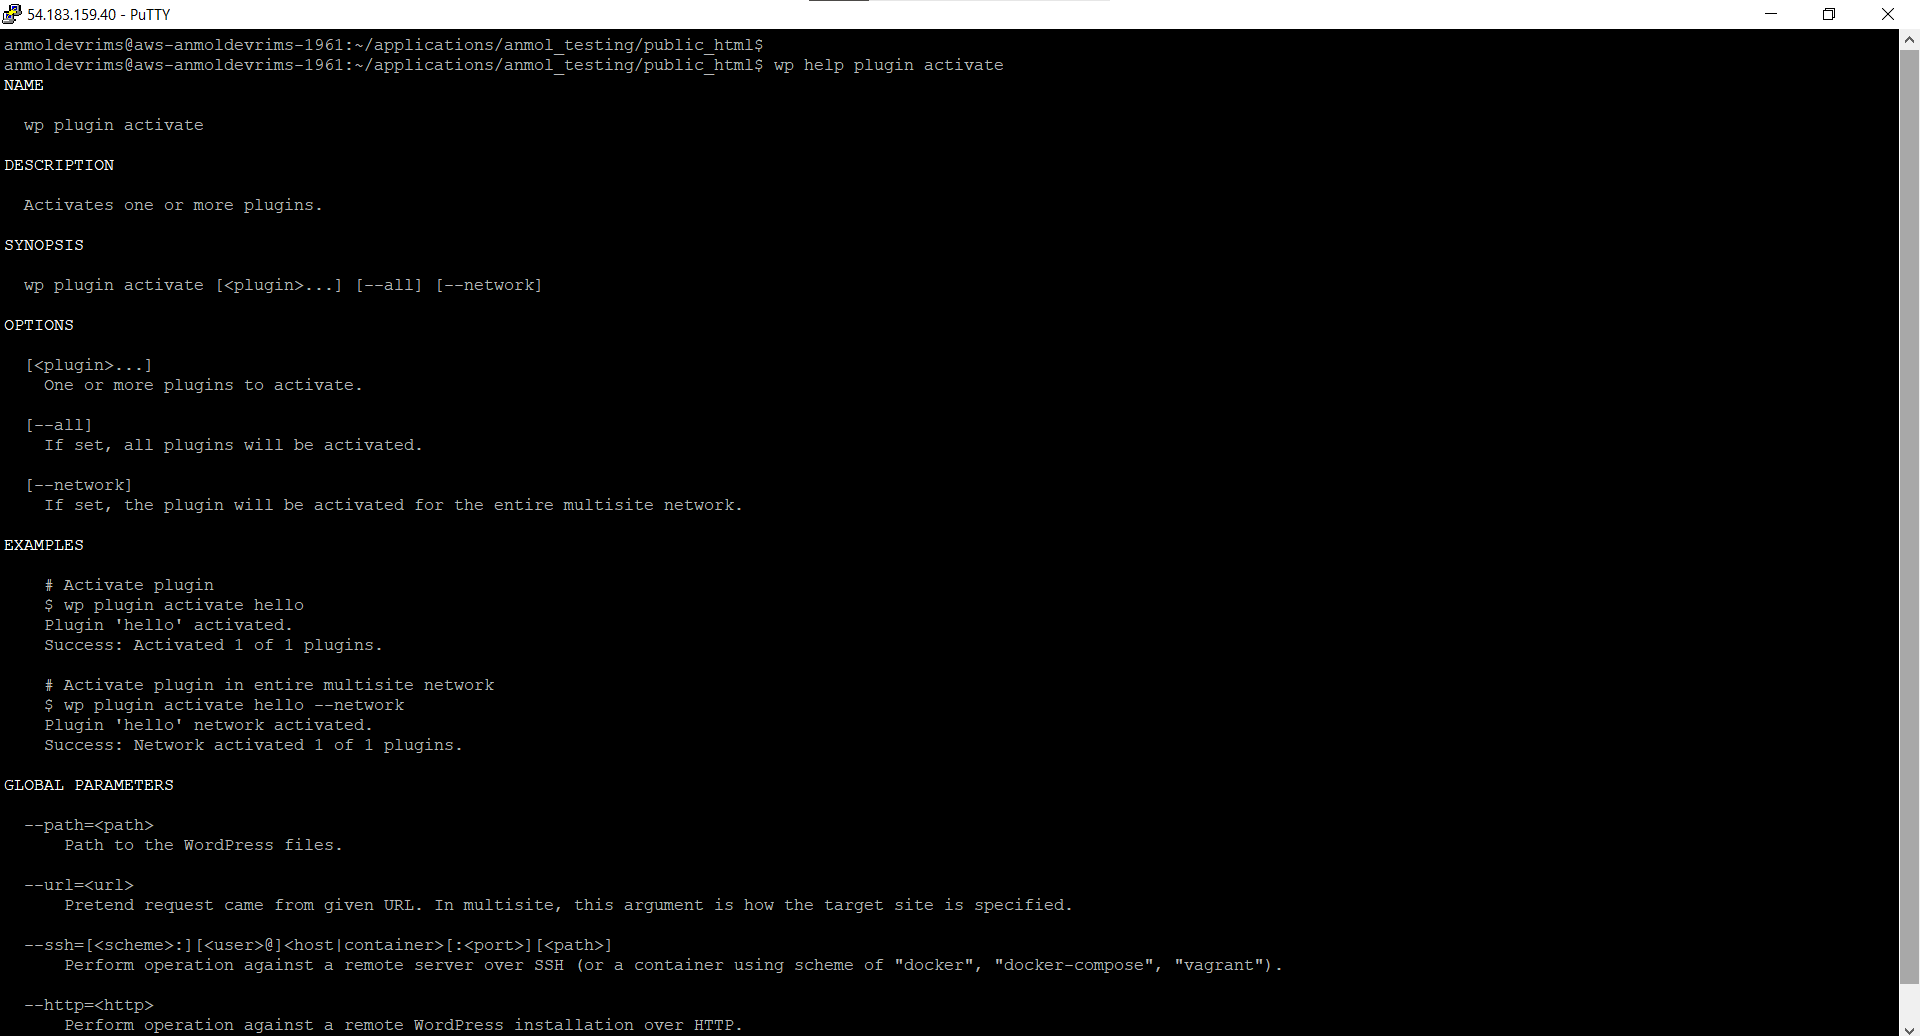
WP-CLI enables you to discover advanced management techniques and unlock their full potential with built-in command completion and referencing.
Conclusion
WP-CLI lets you control everything on your WordPress sites directly from the terminal. It allows you to get into advanced administration functionalities with simple commands from installation to configuration, plugins to themes, and posts to users. No matter if you are managing a single site or an expansive multisite network, WP-CLI provides an efficient path to streamline and scale your WordPress administration. You can use it to work smarter and faster and control your server.

Related Tutorials