Tables are a great way to present data clearly, making it easier for your audience to understand important information. If you’ve ever tried adding a table to a WordPress post, you might have found it a bit tricky. This guide will show you different methods—both with and without plugins—so you can easily create and customize tables on your WordPress pages or posts.
Why Add Tables in WordPress?
Tables are an effective way to present information in an organized, easy-to-read format. This makes them a popular choice for many websites aiming to deliver key details quickly and clearly.
In WordPress, you can use tables to display various types of structured content. For example, you can create tables to showcase pricing for products or services, list team members, clients, or partners along with their contact information, or even display sports team standings in a league.
Tables are especially useful when you have multiple product variations with different prices and features. They let visitors compare options easily, while also making your page look more professional and polished. A well-organized table can grab your visitors’ attention, potentially increasing engagement and time spent on your site.
Now that you understand how tables can enhance your site’s clarity and appearance, let’s explore how to create tables in WordPress.
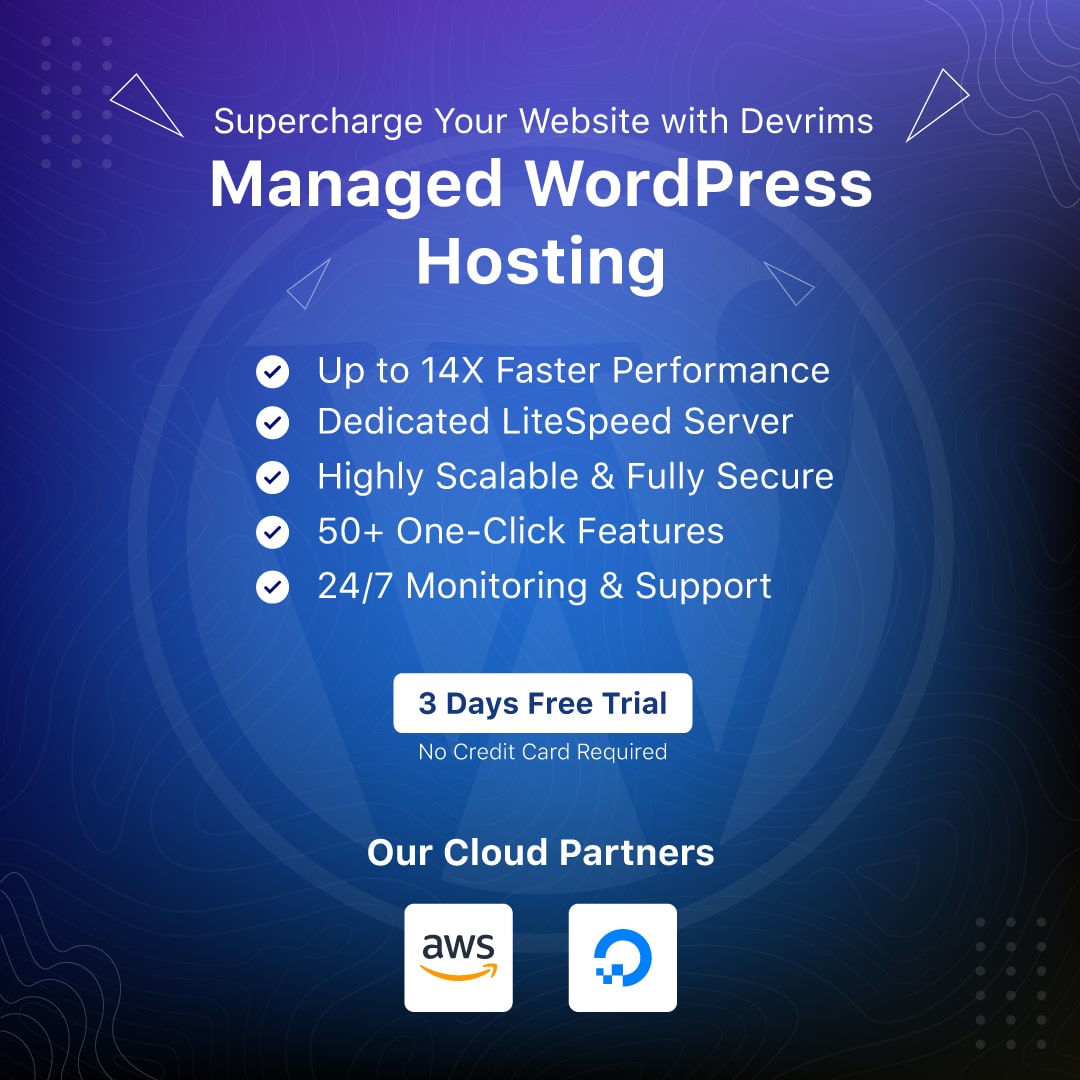
Turbocharge Your WordPress Site for Maximum Speed
Experience 14X faster speeds and the highest performance for your WordPress site with optimized stacks, server-level caching, and an ultra-fast network.

How to Create Tables in WordPress? (3 Easy Ways)
Creating a table in WordPress is easy and can be done in various ways.
- Manually with HTML Code
- With Block Editor
- With Plugins
Each method offers different levels of flexibility depending on what you need.
How to Create a Table in WordPress Manually (with HTML Code)
This method is a bit more technical and requires some basic knowledge of HTML and CSS, but it’s worth trying. If things don’t look quite right, you can always adjust the table’s design later.
Follow these steps to create it:
- Open existing or create a new page or post in WordPress where you want to add the table.
- Add Custom HTML block in the WordPress Editor.
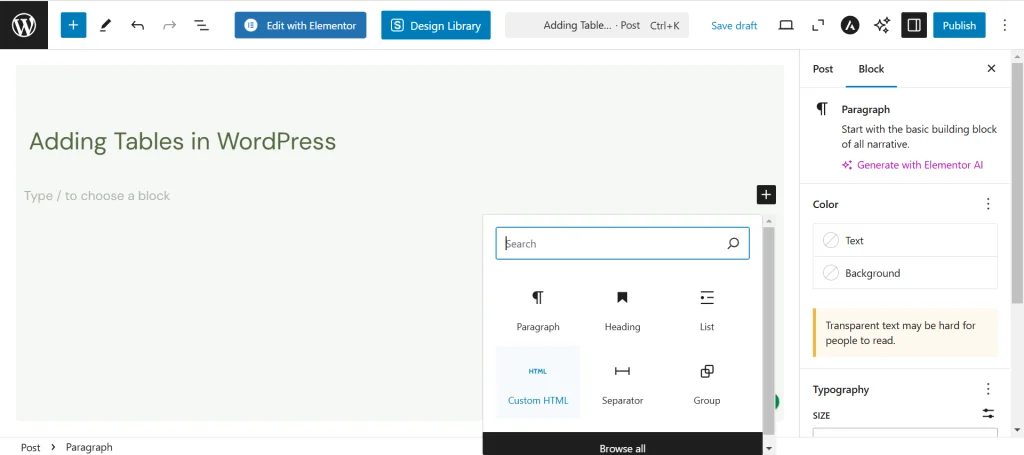
- Paste the following HTML code into the editor:
<table style="text-align: center; height: 152px;" border="1" cellspacing="0" cellpadding="0" width="390">

  <tbody>

    <tr style="background-color: #e9e9e9; font-weight: bold;">

      <td>Title 1</td>

      <td>Title 2</td>

      <td>Title 3</td>

      <td>Title 4</td>

    </tr>

    <tr>

      <td>Detail One</td>

      <td>Detail Two</td>

      <td>Detail Three</td>

      <td>Detail Four</td>

    </tr>

    <tr>

      <td>Detail One A</td>

      <td>Detail Two A</td>

      <td>Detail Three A</td>

      <td>Detail Four A</td>

    </tr>

  </tbody>

</table>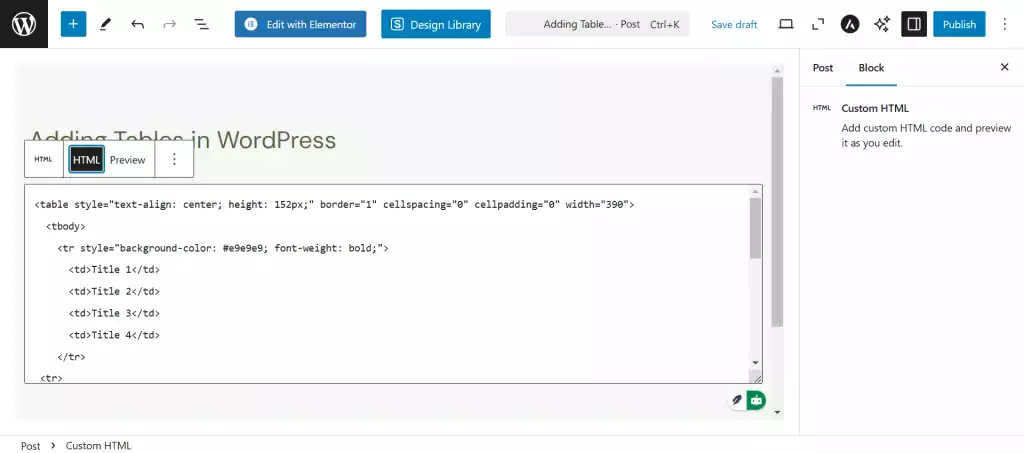
- Once you’ve added the code, click “Preview” to see how the table looks on your page.

- To add more columns: Duplicate the <td> tags and add your content inside. For example:
<td>Your Info</td>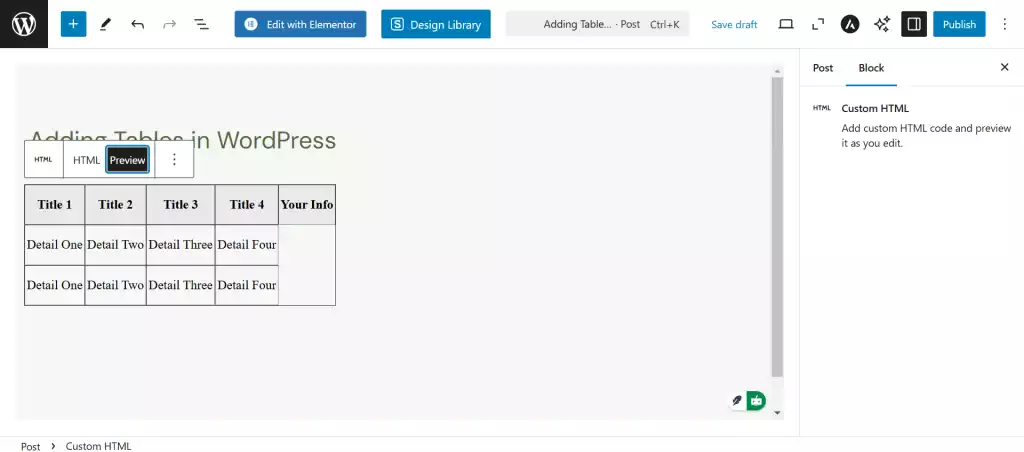
- To add more rows: Copy and paste a new <tr> block with the details you want to display:
<tr>

  <td>Detail One</td>

  <td>Detail Two</td>

  <td>Detail Three</td>

  <td>Detail Four</td>

</tr>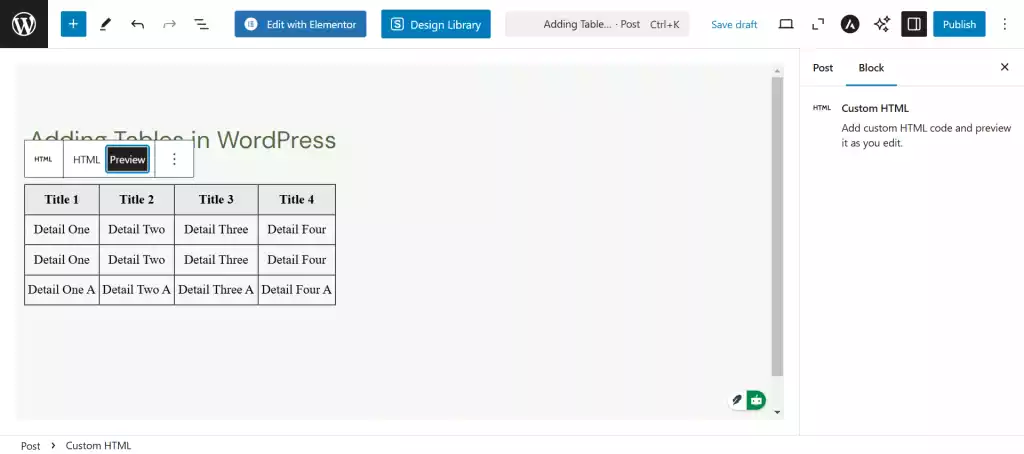
- With this method, you can customize the table layout exactly how you want. You can also adjust the design later with some extra styling if needed.
How to Add a Table in WordPress without Plugin using Block Editor
WordPress makes it easy to create and customize tables directly in the editor, without needing extra plugins or complex code. Thanks to the WordPress block editor, you can quickly build tables using a modular approach.
Follow these steps to add a table in WordPress without a plugin:
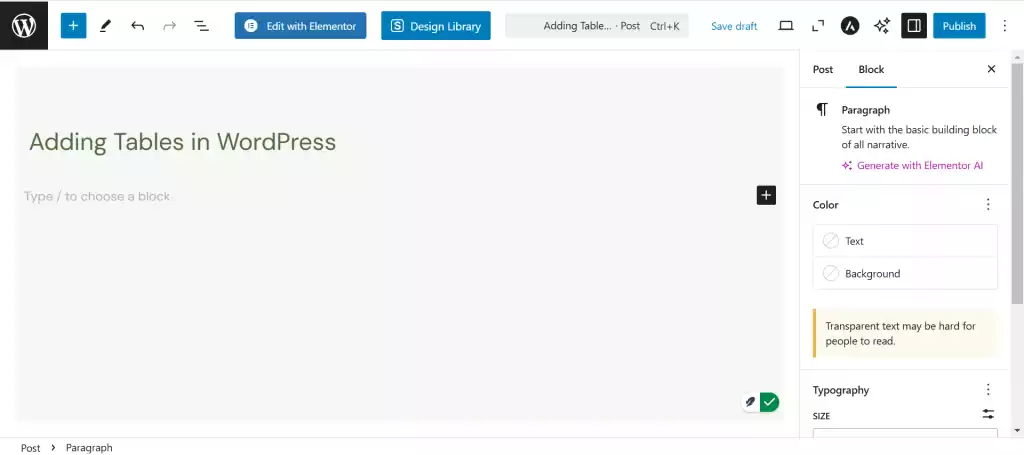
- Go to the post or page where you want to insert the table.

- Click the “+” button to add a new block, then search for and select the “Table” block.
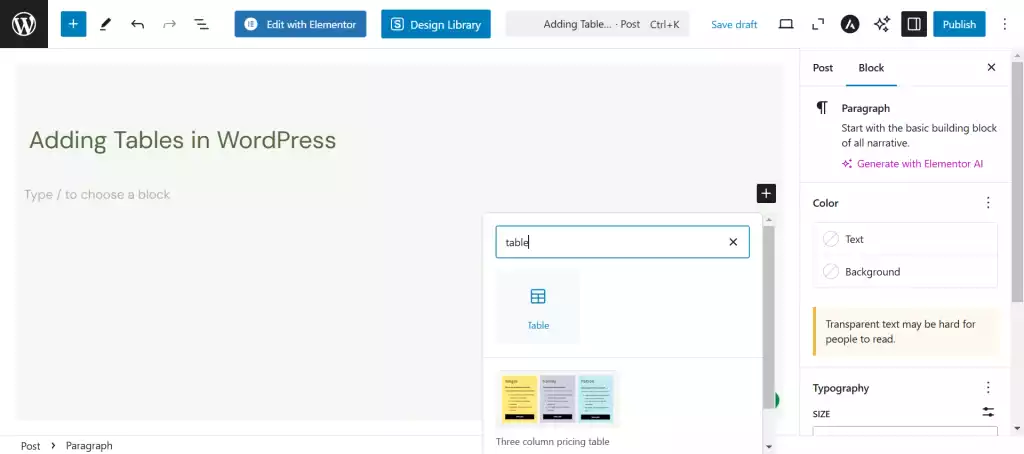
- You’ll be asked to choose how many rows and columns you need. Don’t worry—you can change this later if needed.
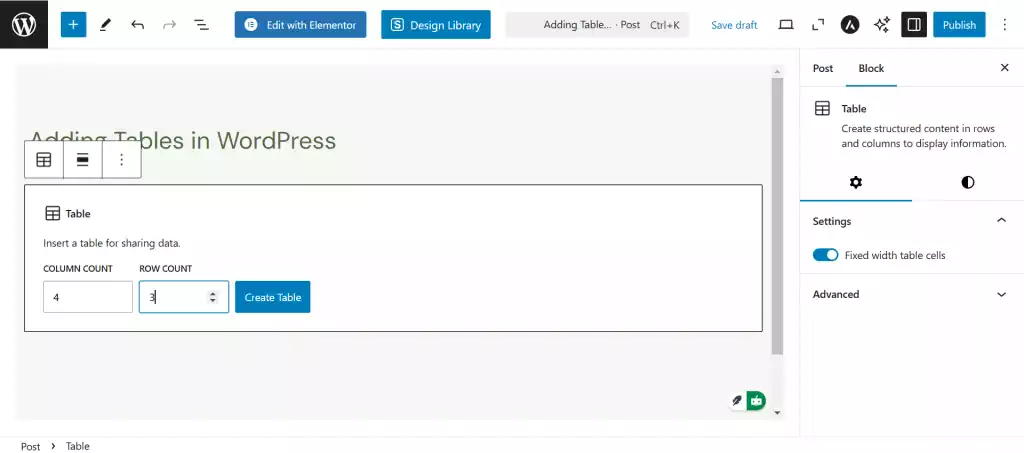
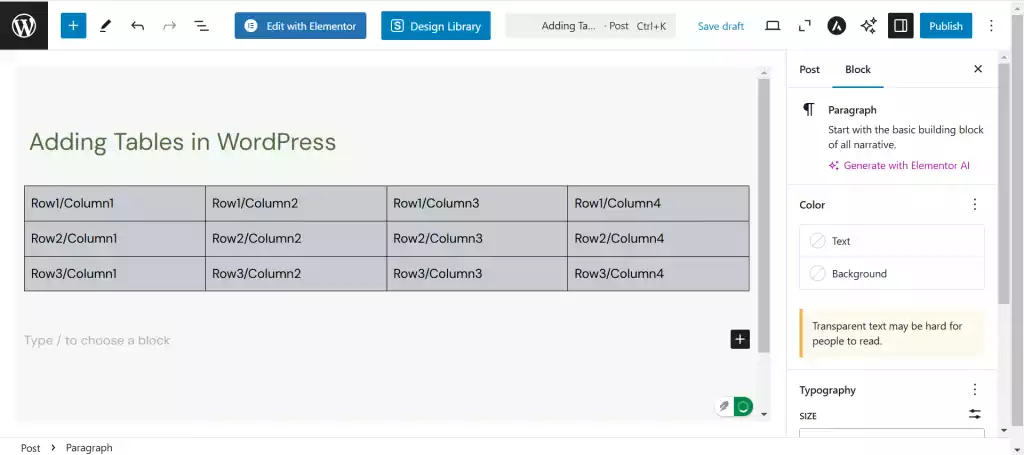
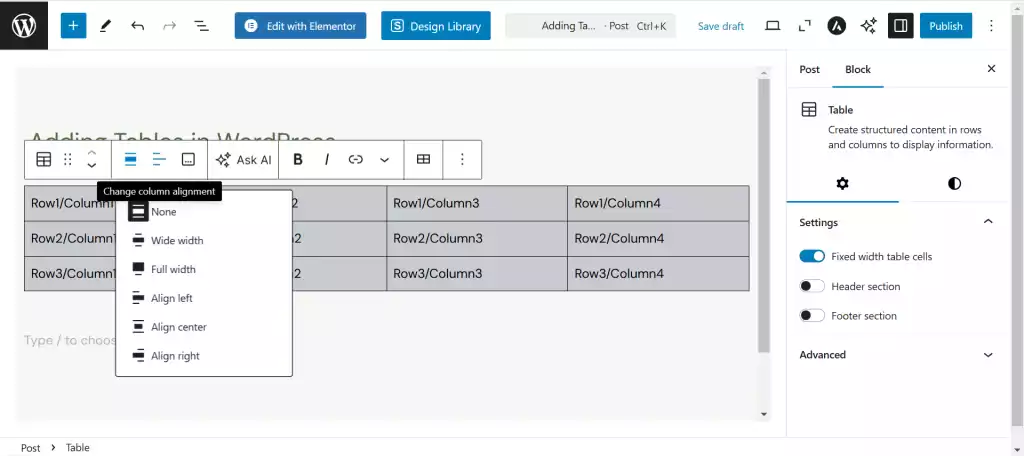
You can start with a basic table, like this one with three rows and four columns. As you add content to the cells, the table will automatically adjust its size. You can also manually set a fixed width for the table, add a header or footer, and customize the background color.
- To add more rows or columns, click on any cell and use the Edit Table options.
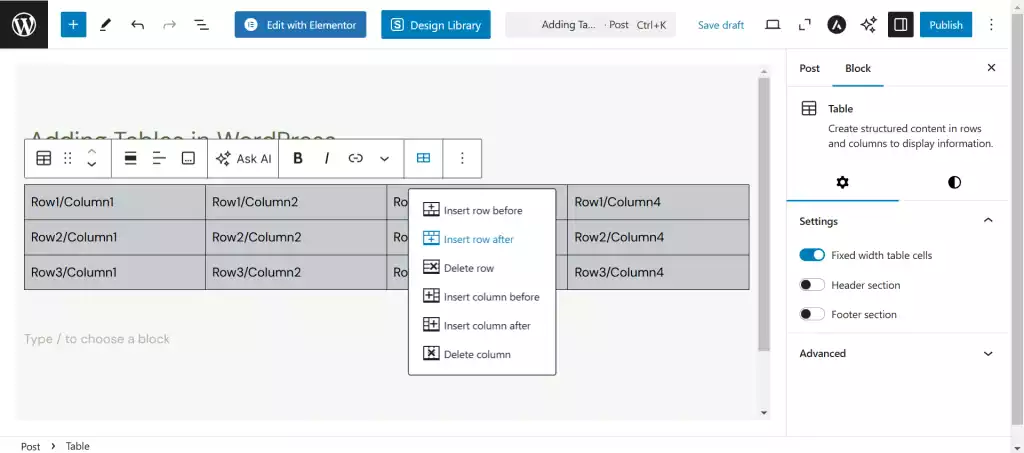
- To delete rows or columns, select a cell and choose Delete Row or Delete Column.
By default, table content is left-aligned, but you can change this by clicking on the Change Text Alignment option for each cell or the entire table. You can also adjust the table’s overall alignment using the Change Alignment tool.
The Block Editor’s table features provide an easy way to display information, making your content more accessible and visually appealing. For more advanced features like search filtering or custom sorting, you may need a plugin.
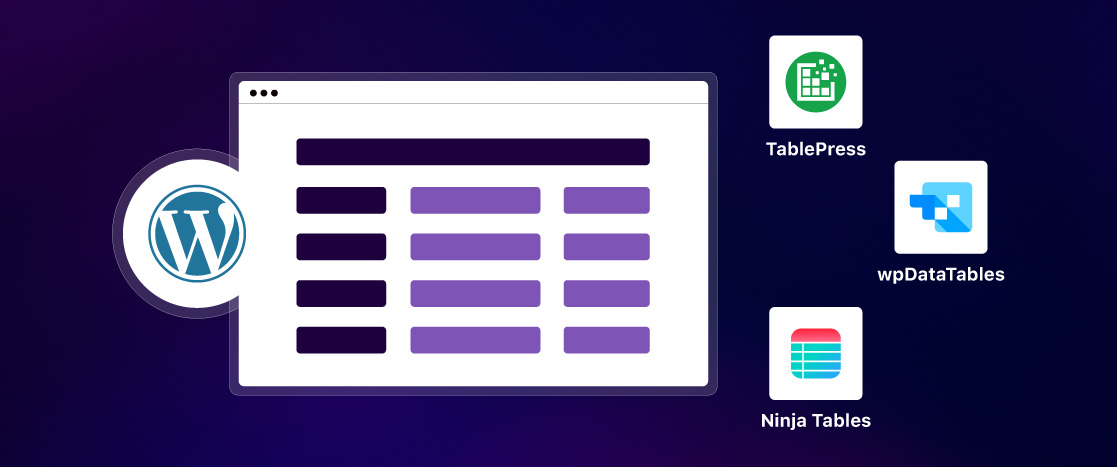
How to Add a Table in WordPress with Plugins?
Plugins offer powerful ways to create and manage tables in WordPress, providing more customization options compared to the default block editor. Let’s have a look at the process of using popular table plugins.
Managed WordPress Hosting with Seamless Scaling
Scale your hosting effortlessly with one-click vertical scaling—ensuring your website maintains high performance, even during traffic spikes.

TablePress

TablePress is one of the most popular and user-friendly table plugins. It’s ideal for creating and managing simple tables in WordPress.
First, you need to install and activate the TablePress plugin To create a table using it.
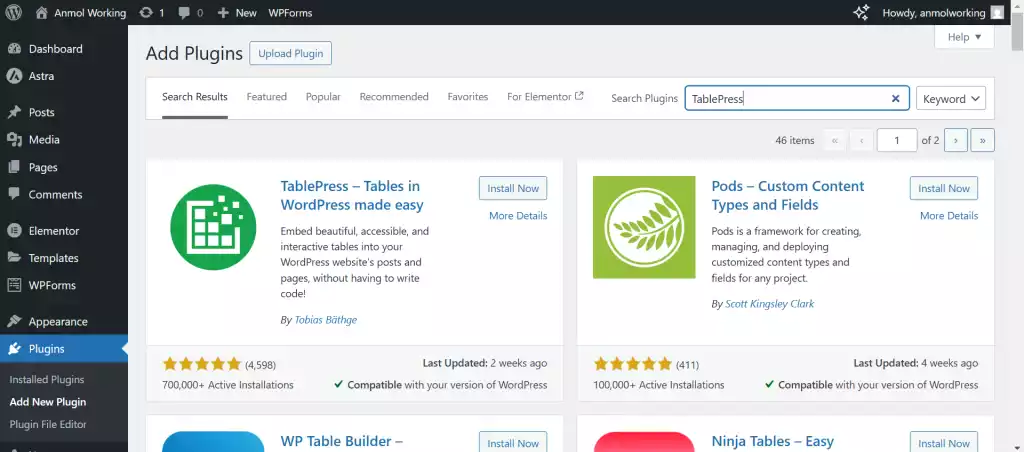
- Go to your WordPress dashboard and navigate to the Plugins > Add New Plugin section on the left sidebar.
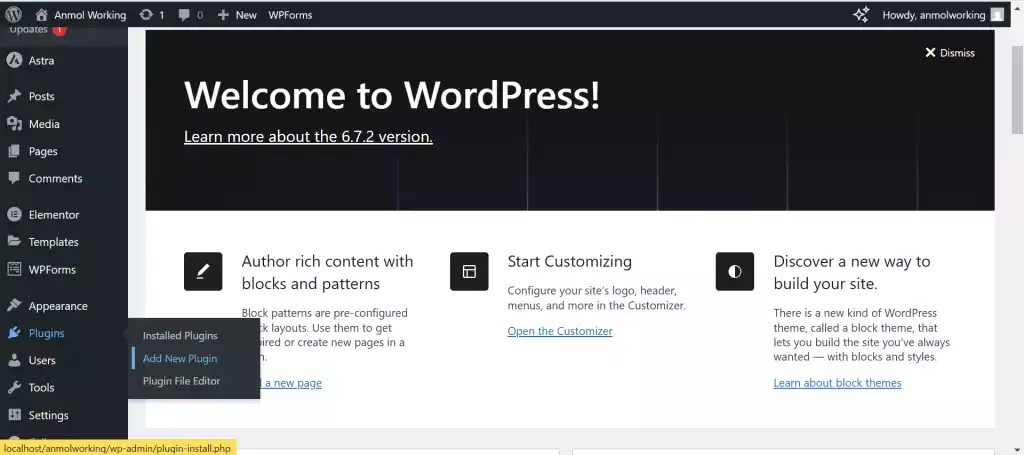
- Search for the TablePress plugin then install and activate it.
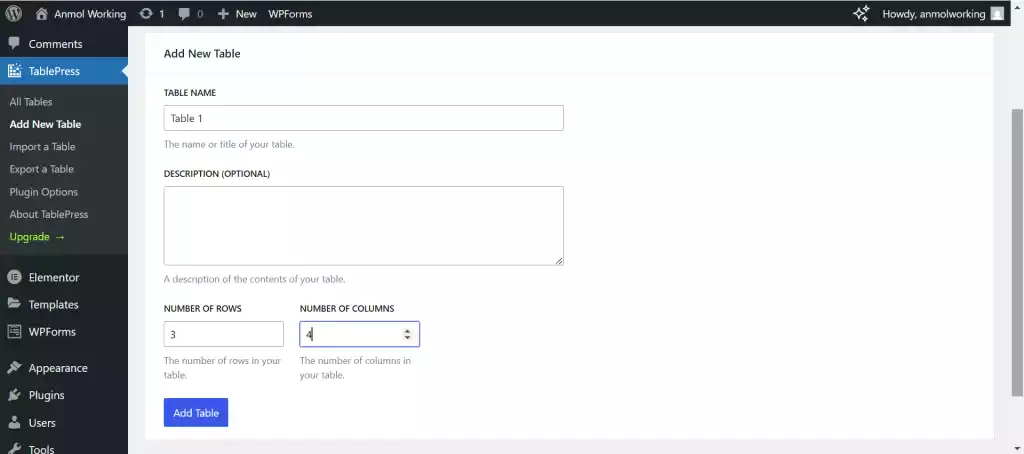
- Now, go to the TablePress > Add New Table section.
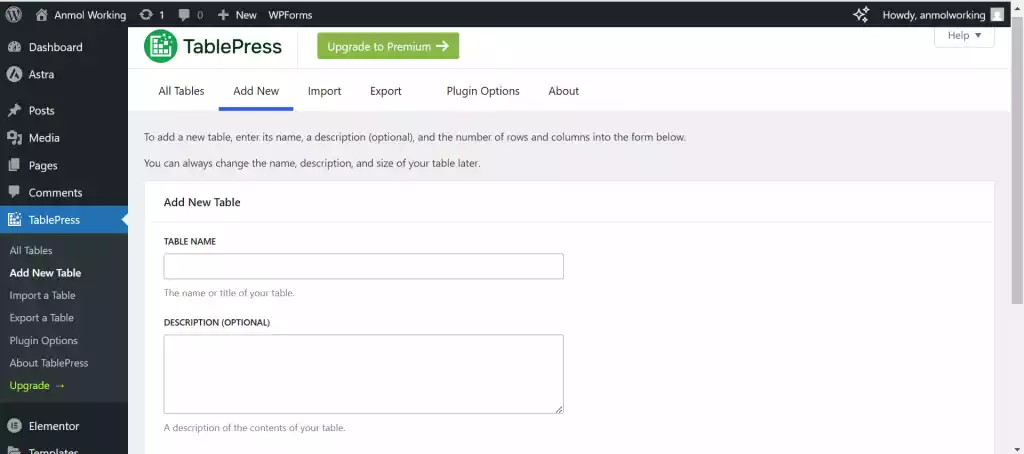
- Enter a table name, select the number of rows and columns, then click Add Table.
- Fill in the table’s cells with your data. You can easily rearrange rows and columns using drag-and-drop.
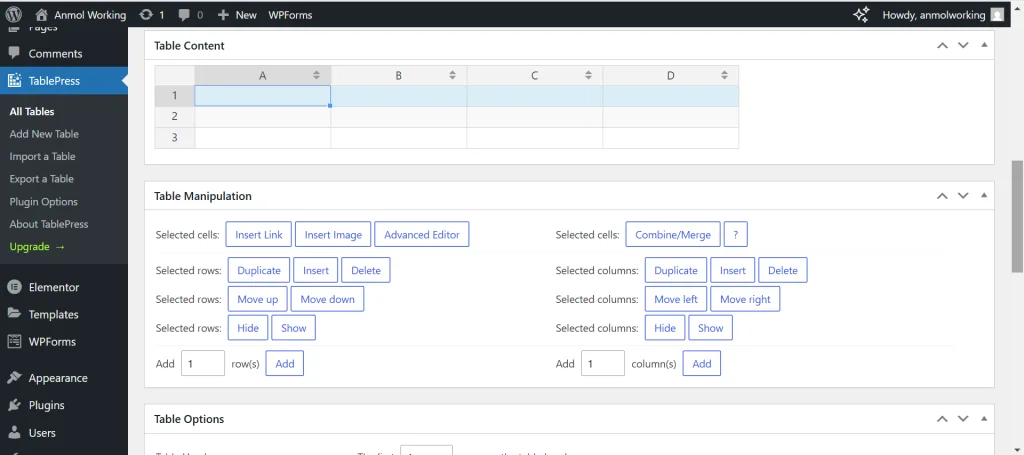
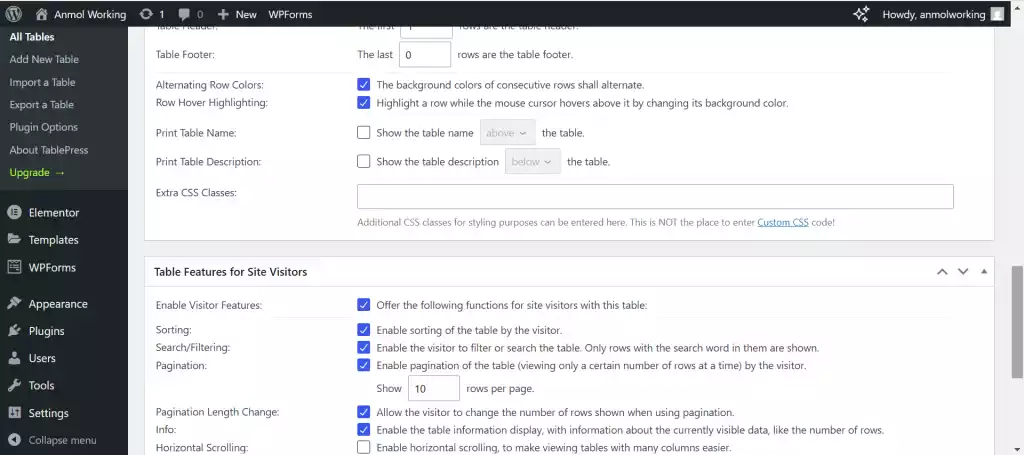
- Customize the table’s appearance, like adding CSS classes, setting up pagination, or enabling sorting features.
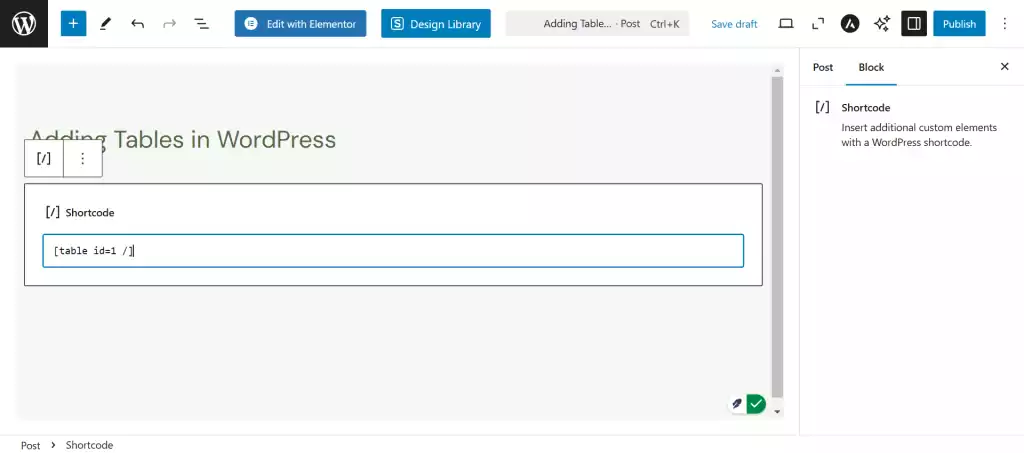
- Copy the generated shortcode and paste it into any post or page where you want the table to appear.
wpDataTables
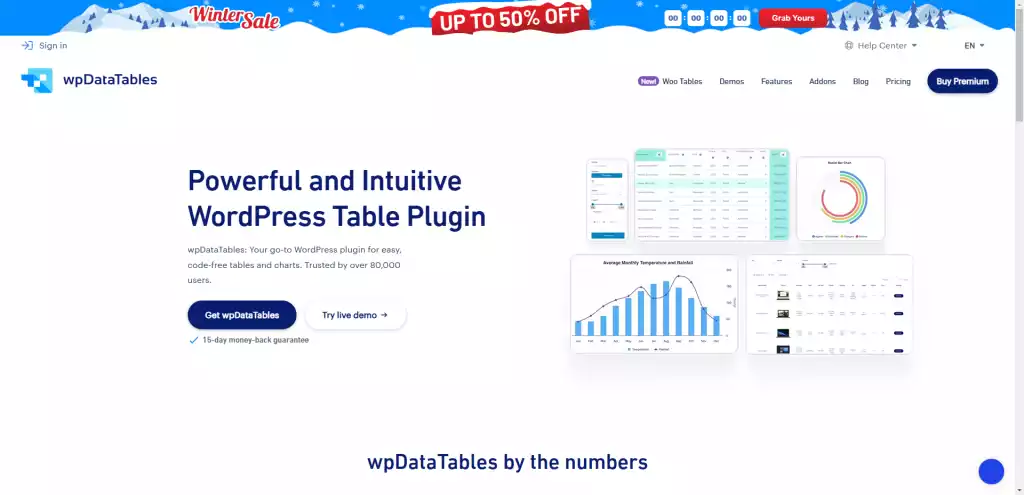
wpDataTables is an advanced plugin that allows you to create responsive tables and charts, perfect for large datasets.
- Go to your WordPress Dashboard and navigate to Plugins > Add New. Search for the wpDataTables plugin then install and activate it.
- After activation, navigate to wpDataTables > Create a Table.
- You can create a table from scratch, or import data from CSV, Excel, or Google Sheets.
- Define the number of columns and rows, set the table’s appearance, and customize options like sorting and pagination.
- Once the table is ready, use the shortcode provided to embed the table into any page or post.
Ninja Tables

Ninja Tables is a powerful plugin that offers great styling and customization options for creating tables in WordPress.
- Go to your WordPress Dashboard and navigate to Plugins > Add New. Search for the Ninja Tables plugin then install and activate it.
- Navigate to Ninja Tables > Add New.
- Define your table structure by adding rows and columns. Then, enter your content.
- Choose from various predefined table color schemes, or create your own custom color scheme using the built-in color picker.
- Enable features like column sorting and pagination if needed.
- Copy the shortcode and paste it into your post or page to display the table.
Data Tables Generator by Supsystic
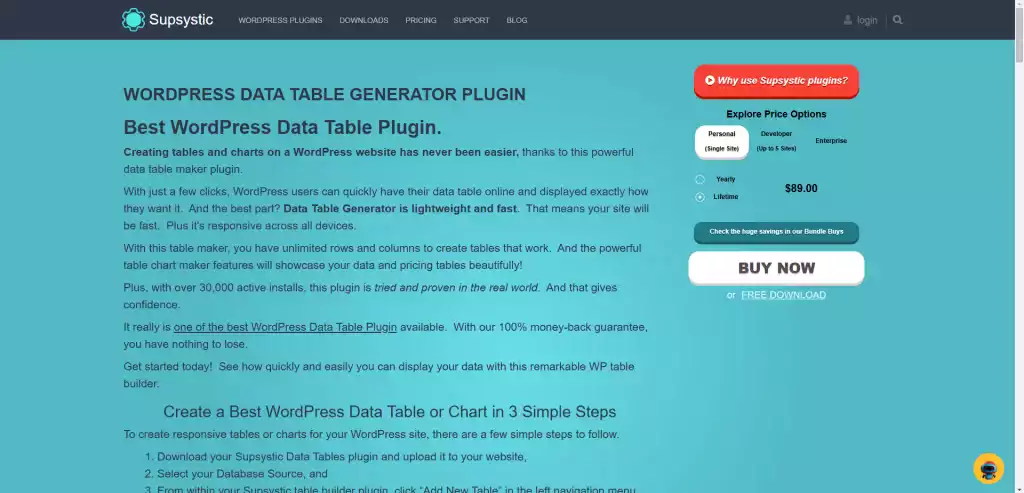
Data Tables Generator by Supsystic is a robust plugin with advanced features for creating and managing tables.
- Go to your WordPress Dashboard and navigate to Plugins > Add New. Search for the Data Tables Generator plugin then install and activate it.
- Once activated, go to Supsystic > Data Tables Generator > Add New Table.
- You can manually enter data, or import data from an external source. Customize the appearance of the table and apply filters, sorting, or conditional formatting.
- Add charts and diagrams, and even configure collapsible rows to enhance the table.
- Copy the shortcode and paste it into your post or page to display the table.
Conclusion
In this article, we’ve covered different ways to add and manage tables in WordPress, including using HTML code, the Block Editor, or plugins. Each method has its own benefits, so choose the one that works best for you. The Block Editor is a simple and flexible option, but if you need more advanced features, plugins are a great choice.
Host Unlimited Apps and Domains with One-Click Deployment
Easily deploy unlimited apps and domains with just one click, supported by our reliable infrastructure and expert support. Experience Unlimited Freedom!

Related Topics:


Related Tutorials