
When visitors visit your website, they notice everything, from how speedy your web pages are to how good your website looks.
The visual experience of your website affects its ranking and success by making visitors stay on your website. Enhancing the visual appearance of your WordPress site can be achieved in various ways, and one effective method is using good fonts.
However, the font choices available in WordPress can sometimes be limited and depend on your theme. You can add custom fonts in WordPress to use different fonts. Custom fonts allow you to integrate font styles, font families, typography types, and more to make your website look great.
In addition to these benefits, custom fonts can enhance readability, establish a unique brand image, and encourage users to spend more time on your WordPress site.
In this post, we will guide you on finding custom fonts and integrating them into your WordPress website using plugins and through manual implementation (without plugins).
What are Custom Fonts? Why Should you use them for your WordPress Website?
Custom fonts are not included in WordPress by default. They allow you to select and integrate unique typography styles, sizes, font families, and more into your WordPress website. Also, custom fonts enhance your website’s visual representation, readability, and overall user experience.
There are various reasons why you should use them for your WordPress website.
- Aesthetic enhancement
- Improved typography
- Brand consistency
- Stylistic compatibility
- Readability
- Enhanced user experience
- Differentiation from competitors, etc.
Using custom fonts in your WordPress website allows you to enhance its design, improve readability, strengthen brand identity, enhance user experience, and differentiate yourself from others in the online market.
Find and Download Fonts for WordPress
To find and download custom fonts for WordPress, you must first decide or identify which font you want to use. Once you have decided, go to the search engine of your choice and search for the desired font.
You will find many results; go to the top result and find the download option. Just download the font files.
You can also visit the most well-known font sites to explore and download different fonts. Some famous sites for fonts are Fonts.com, Google Fonts, Font Squirrel, Edge Web Fonts, and so on. Go to any site and download the font files you want.
Convert Fonts to a Web-Supporting Format
Fonts are available in different file formats on different sites to download. Formats may include TTF (TrueType Font), OTF (OpenType Font), EOF (Embedded OpenType Font), or WOFF (Web Open Font Format).
The WOFF format is widely used and is supported by modern browsers. So, it is recommended to download font files in WOFF format, or if they are not available in the required format, download them in any format and convert them to the desired format using any online converter tool.
How to Add Custom Fonts in WordPress with Plugins
Follow these steps to add custom fonts to your WordPress website using plugins.
- First, you need to search for a suitable font plugin. There are many plugins available for custom fonts for WordPress. WP Google Fonts, Easy Google Fonts, and Use Any Font are the most well-known options. Choose any plugin and follow the steps to add custom fonts in WordPress.
- Go to your WordPress dashboard and navigate to the “Add Plugins” tab inside the Plugins section.
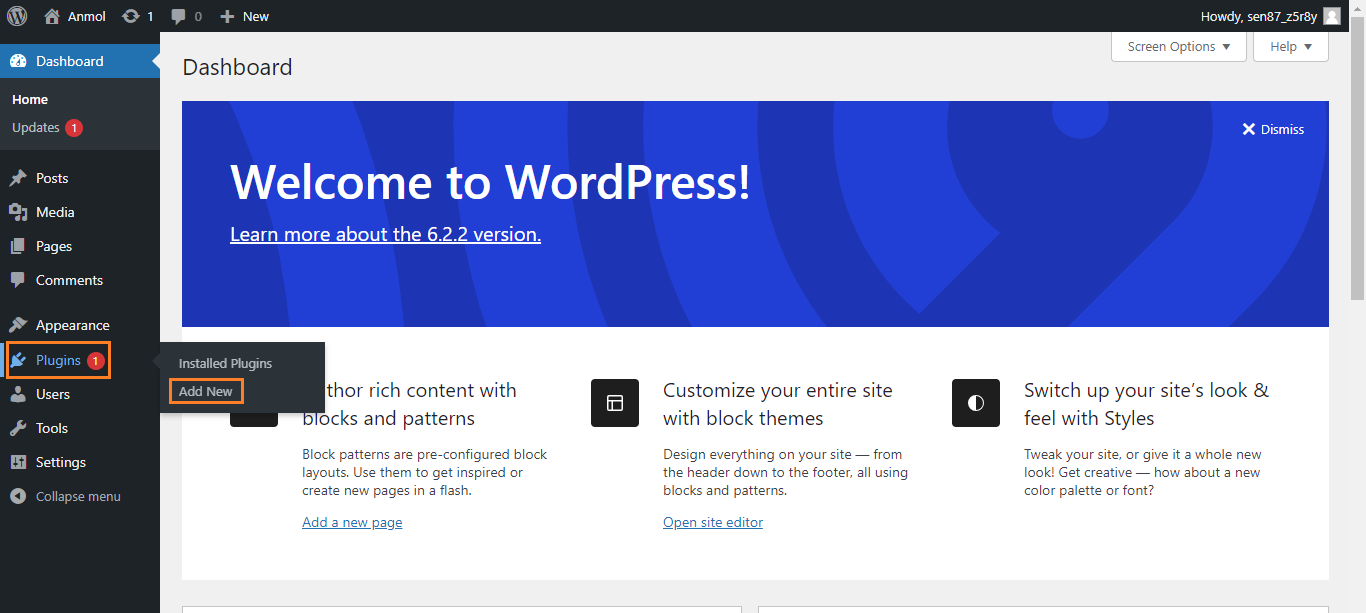
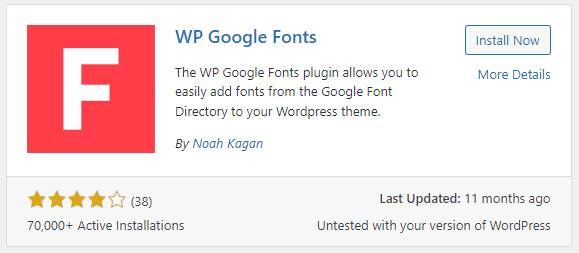
- Write the plugin name in the search bar and hit the Enter button. I am showing you how to add custom fonts using the “WP Google Fonts” plugin. You will see the available results once you search for the plugin name. Install the required plugin by clicking on the install button.
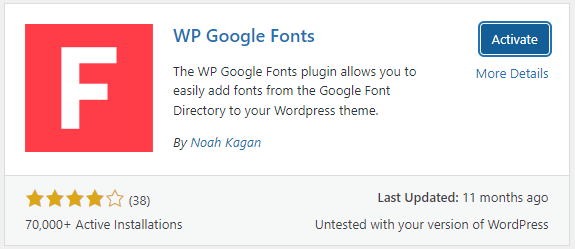
- It will take a while to install. Click the “Activate” button to activate this plugin on your WordPress.
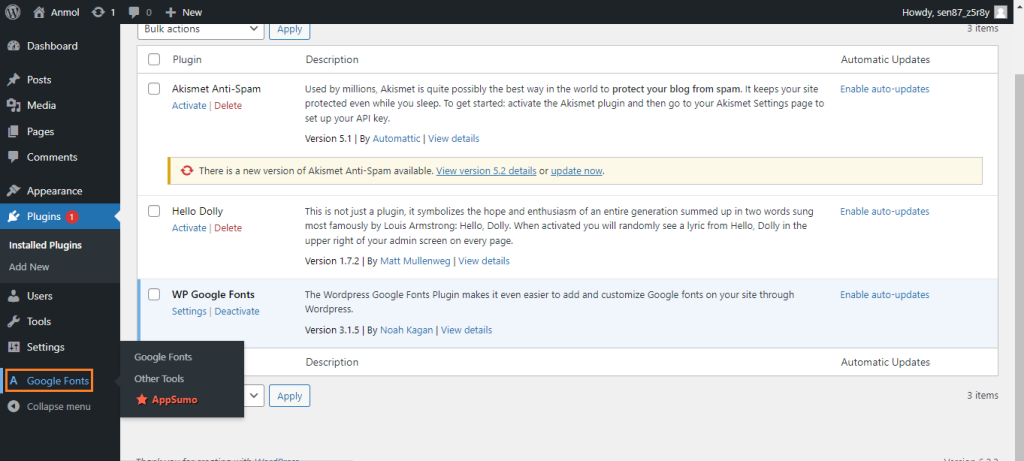
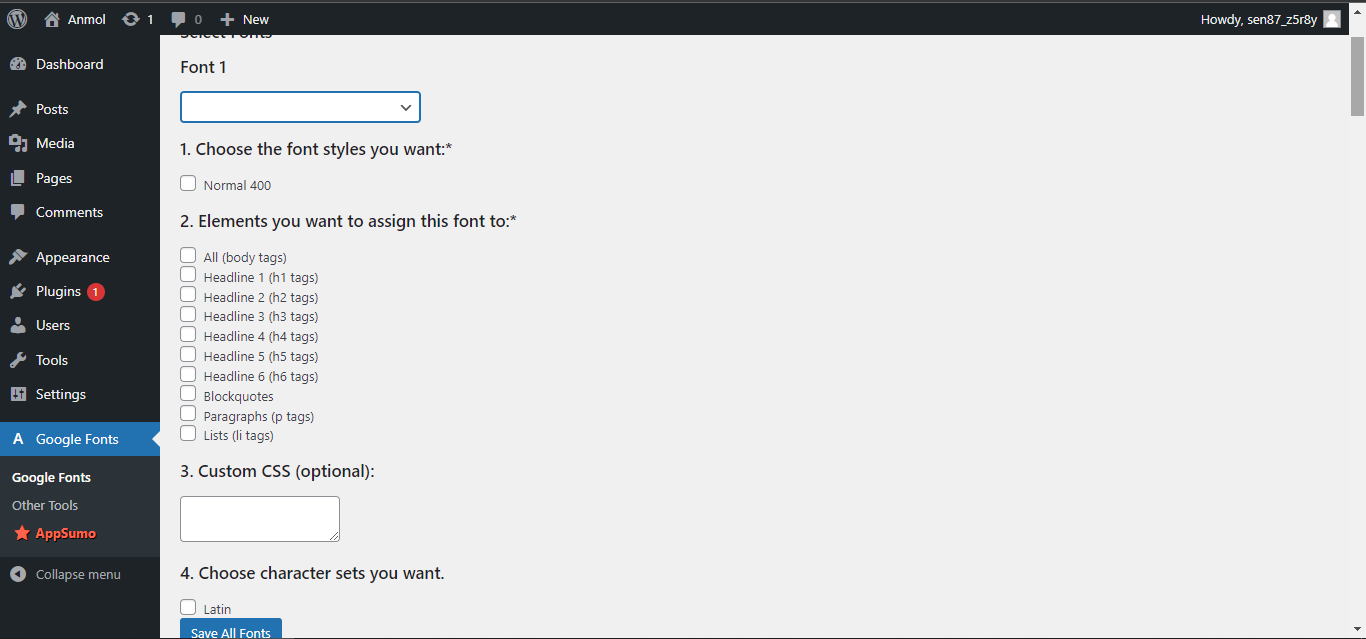
- After activation is complete, go to the Google Fonts Control Panel.
- Now, set the fonts you want to add to your WordPress website. Choose font family, add font style, add custom CSS and font size, and select the element you want to assign the font. Once you are done, click the “Save all Fonts” button.
Add as many fonts as you want to. Save the changes and refresh your website to check if the custom font has been added successfully or not.

Here you go; we successfully added a custom font to our WordPress website.
Many plugins offer font families, styles, sizes, and more options. Experiment with combinations to find the best fit for your site’s design.
After selecting the desired fonts, you can customize their appearance and application. Experiment with the settings for headings, paragraphs, navigation menus, widget titles, and more. Adjust the settings according to your preferences.
Once you have customized the font settings, save your changes. Then, preview your website to see the custom fonts in action. Ensure that the fonts are displaying correctly.
Following these steps and using a font plugin allows you to easily add and manage custom fonts in your WordPress website without manual coding or file uploads. The plugins simplify the process and provide a user-friendly interface for selecting, customizing, and applying the fonts throughout your site.
How to Add Custom Fonts in WordPress Without Plugin (Manually)
Follow these guidelines to add custom fonts to wordpress without a plugin:
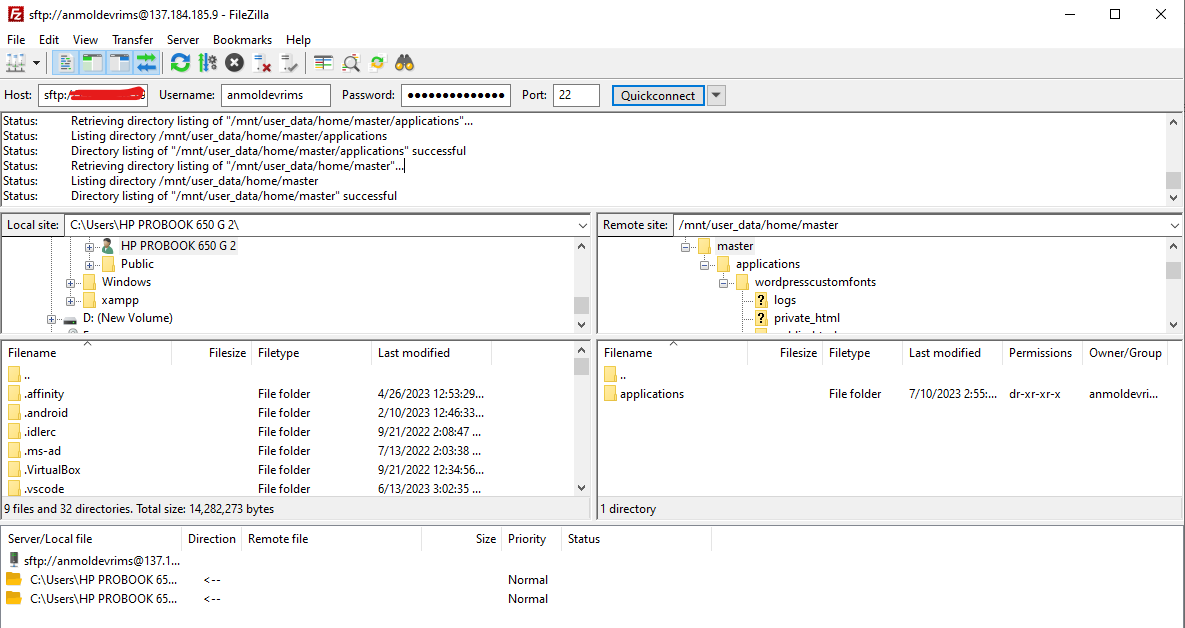
- Connect your WordPress site using FTP or File Manager to access directories and files on your website. In cPanel, you have a partition for File Management where you can find all the files and folders. Here, we are going to connect the WordPress website using FTP FileZilla. Open FileZilla, connect to your server and access your WordPress application.
- Inside the application folder, navigate to public_html>wp-content>themes>currenttheme. Create a new directory inside of this folder and name it as custom fonts or something like that. Upload the downloaded custom font files inside this directory.
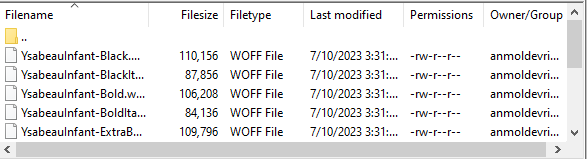
Note: Ensure that the files you upload must be in WOFF format.
- Return to the current theme directory, where you will find the style.css file, or create a new CSS file in the custom font’s directory. Open the file using a text editor or code editor.
- Inside the CSS file, write the CSS code to define and apply the custom fonts to specific elements of your website. Use the @font-face rule to declare the font and specify its source file. Like this:
@font-face {

  font-family: 'CustomFontName';

  src: url('fonts/custom-font.woff') format('woff');

}
Replace ‘CustomFontName’ with the desired name for your custom font and ‘fonts/custom-font.woff’ with the path to the font file relative to your CSS file.

- In the same CSS file, use CSS selectors to apply the custom fonts to specific elements on your website. Like this:
h1 {

  font-family: 'CustomFontName', sans-serif;

}
Replace ‘CustomFontName’ with the name you specified in the @font-face rule, and adjust the CSS selectors and properties according to your specific requirements.

Save the CSS file once you have written the CSS code to apply the custom fonts.
If you have added the code in the style.css file inside of the current theme directory, it is good, but if you have created a new CSS file and added the code inside of that, then upload the CSS file you created (e.g., “custom-fonts.css”) to the root of your theme directory, along with other theme files like “style.css.”
To make WordPress load the custom fonts CSS file, enqueue it in your theme’s functions.php file. Open the functions.php file located in your theme directory and add the following code:
function enqueue_custom_fonts() {

  wp_enqueue_style( 'custom-fonts', get_template_directory_uri() . '/custom-fonts.css', array(), '1.0', 'all' );

}

add_action( 'wp_enqueue_scripts', 'enqueue_custom_fonts' );

Save the functions.php file after adding this code.
Save all the modified files and upload them to your WordPress theme directory using FTP or a file manager. Then, preview your website to see the custom fonts in action. Ensure the fonts are displaying correctly and applied to the intended elements.
Following these steps, you can manually add custom fonts in WordPress without a plugin. This method allows you more control over the fonts and their integration, but it requires technical knowledge and understanding of CSS and file management.
Conclusion
Adding custom fonts to your WordPress website can significantly enhance its visual appearance and align it with your desired style. With the knowledge of downloading and converting fonts into a web-friendly format, as well as familiarity with two approaches to incorporating custom fonts in WordPress – uploading the font file to your theme’s folder or using a WordPress custom font plugin – you have the flexibility to choose the method that best suits your needs.
While ensuring that the selected font complements your site’s theme and style, it is also essential to consider factors like readability and user accessibility. By exploring the wide range of free and paid font options, you can find the perfect match that enhances the overall look and resonates with your website’s target audience.
Related Topics:


Related Tutorials