Are you struggling to track your website’s performance or understand user behavior? If you’re still using Universal Analytics (UA), you’re missing out on the powerful features and insights Google Analytics 4 (GA4) has to offer. Switching to GA4 can seem overwhelming, especially if you’re unsure how to set it up on your WordPress site. But don’t worry—it’s easier than you think!
In this guide, we’ll walk you through simple steps to add Google Analytics 4 to your WordPress website, so you can start tracking key data like a pro. We’ll cover everything from setting up GA4 to smoothly integrating it with your site.
Keep reading to learn how simple it can be to gather insights that will help you grow your website and improve your marketing efforts. Let’s get started!
Why should I Add GA4 to WordPress?
Adding Google Analytics 4 (GA4) to your WordPress website is essential to stay up-to-date with your data tracking. Nowadays, having detailed insights into how users interact with your site is key to growing and optimizing your business. GA4 offers several important upgrades over Universal Analytics, which can help you get more value from your website data.
Here’s why you should switch to GA4:
- Smarter Insights: GA4 uses machine learning to provide advanced insights, including predictive analytics, helping you better understand and predict user behavior.
- Better Integration with Google Ads: GA4 works seamlessly with Google Ads, making it easier to track the impact of your ads and create more effective campaigns.
- Focus on User-Centered Data: Unlike Universal Analytics, GA4 focuses on users and events. This means you can track specific actions across websites, mobile apps, and other digital platforms.
- Improved Data Control: GA4 gives you more control over how your data is collected, making it easier to comply with privacy regulations and offering more options for data retention.
By switching to GA4, you’ll unlock powerful features that will improve your website’s marketing and performance. It’s a smart choice for anyone looking to make data-driven decisions and optimize their WordPress site. Additionally, improving your site’s speed can significantly enhance user experience, making it even more crucial to focus on performance alongside analytics.
Prerequisite: Create a Google Analytics Account
Before you begin, ensure that you have a Google Analytics account. If you don’t already have one, you can create one by following these steps:
- Visit analytics.google.com.
- If you have a Google account, log in. If not, create a new account by clicking Create Account. Fill in the necessary details, including your name, email address, password, date of birth, and mobile number.
Once your account is set up, proceed to create a new Google Analytics 4 (GA4) property by following the setup instructions provided by Google.
How to Add GA4 to Your WordPress Site? (With or Without Plugin)
There are two main methods to add GA4 to WordPress: with a plugin and without a plugin. Let’s explore both options to find the best solution for integrating Google Analytics 4 with WordPress.
1. Install GA4 on WordPress Without a Plugin
Follow these simple steps to install Google Analytics 4 on WordPress without using a plugin:
Step 1: Create a GA4 Property
- Go to your Google Analytics account and log in.
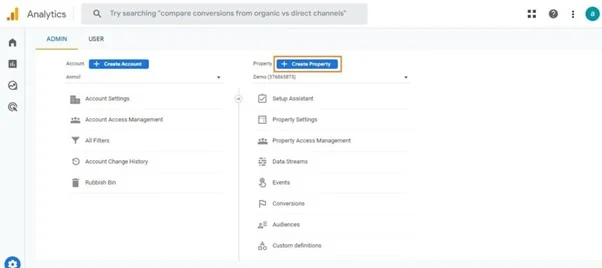
- In the Admin panel (bottom left), under the Account column, click Create Property.
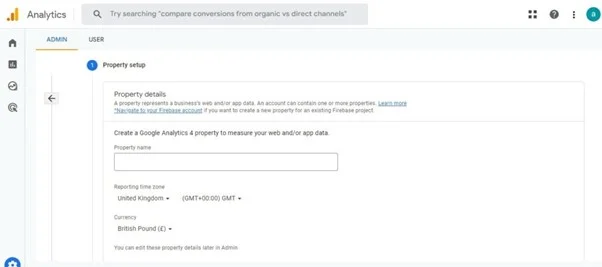
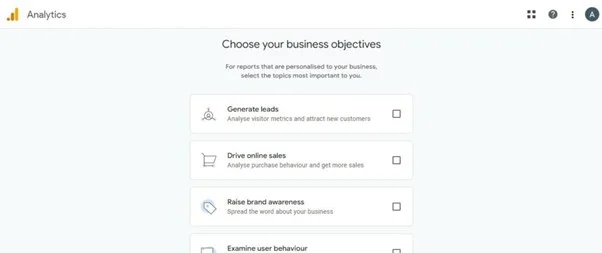
- Fill in the property details, including the property name, time zone, and currency. Click Next.

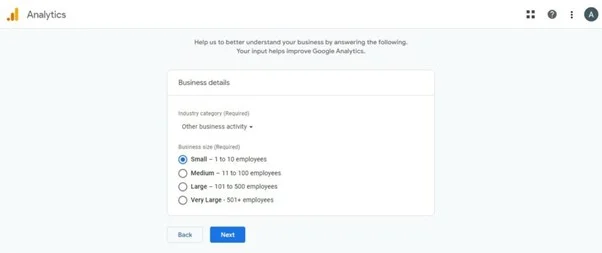
· You’ll now need to fill in a few more details, such as the number of questions and the size of your company. Feel free to complete this section as you like. Once you’re done, click the “Next” button to continue. When you’re finished, click the “Create” button at the bottom of the page.
Step 2: Create a Data Stream
- After creating the property, you’ll be directed to the Data Streams section. Choose Web as your platform.
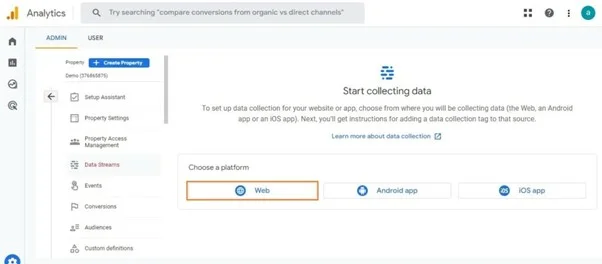
- Enter your website URL and name your data stream (e.g., “Website Analytics”).

- Click Create Stream.
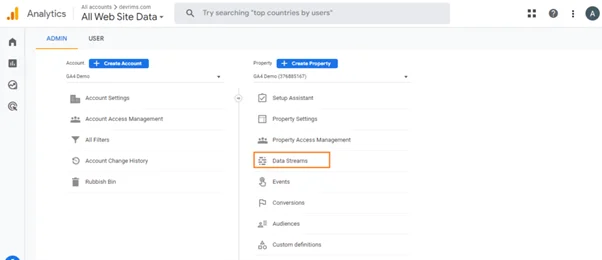
Step 3: Get the Tracking Code
- Go to the admin panel and click on “Data Streams” under the property options.
- This will take you to the data streams page. From there, click on the GA4 demo data stream.
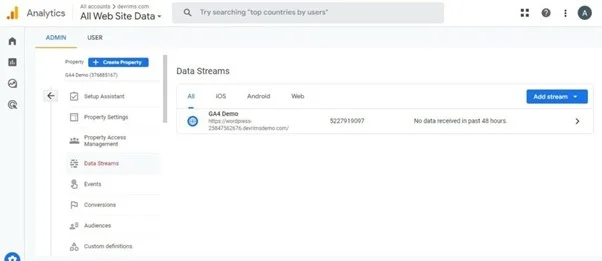
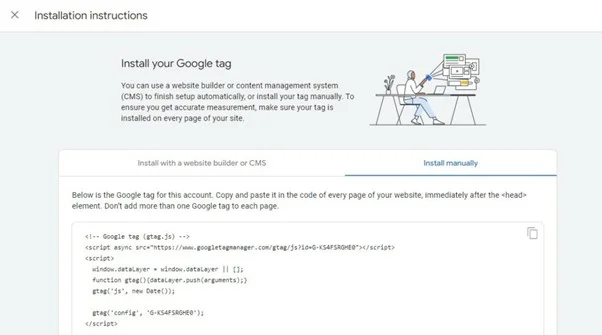
- In the Web Stream Details section, click View Tag Instructions.
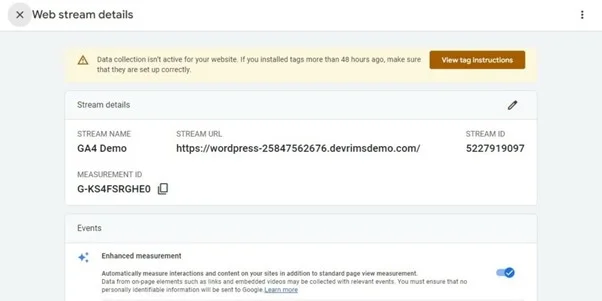
- Copy the tracking code or Measurement ID that Google provides.
Step 4: Add the Tracking Code to Your WordPress Site
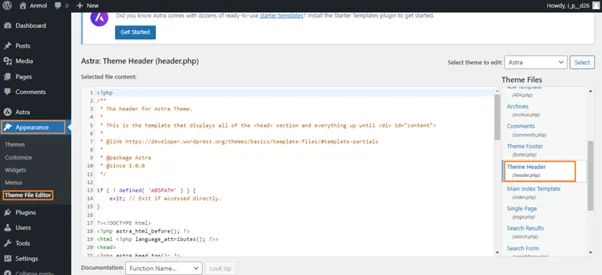
- In your WordPress dashboard, go to Appearance > Theme Editor.
- Open the header.php file for your active theme.
- Paste the tracking code just before the closing </head> tag.
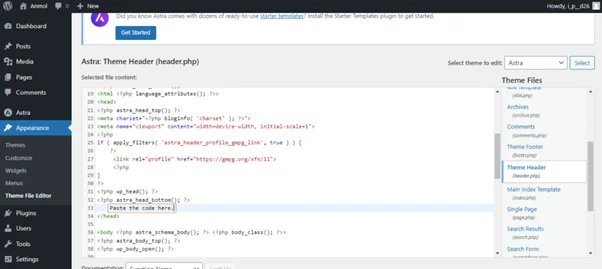
- Save the changes to the file.
Step 5: Test the Integration
- Visit your website and right-click to select View Page Source. Ensure the tracking code appears in the header section of your website.
- Alternatively, you can use browser extensions like Google Tag Assistant to confirm the setup is working correctly.
This method of adding Google Analytics to WordPress without a plugin is a simple option for users who prefer a more hands-on approach without relying on third-party plugins.
2. Install Google Analytics 4 on WordPress Using a Plugin
Using a plugin is an easier way to add Google Analytics 4 to WordPress. Here’s how you can do it:
Step 1: Choose a Plugin
- There are several plugins to help add GA4 to WordPress. Some of the best options include:
- Google Site Kit (official plugin from Google)
- GA Google Analytics
- MonsterInsights
For this guide, we will use GA Google Analytics.

Step 2: Install the Plugin
- In your WordPress dashboard, go to Plugins > Add New.
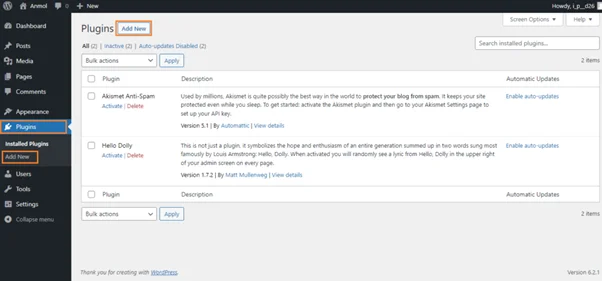
- Search for GA Google Analytics in the search bar.
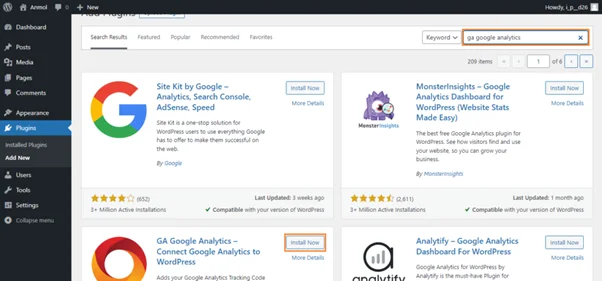
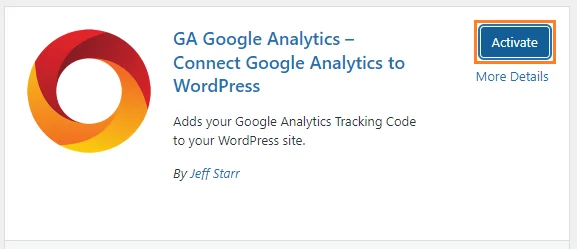
- Click Install Now and then Activate the plugin once the installation is complete.
Step 3: Configure the Plugin
- Once the plugin is activated, go to Settings > Google Analytics from your WordPress dashboard.
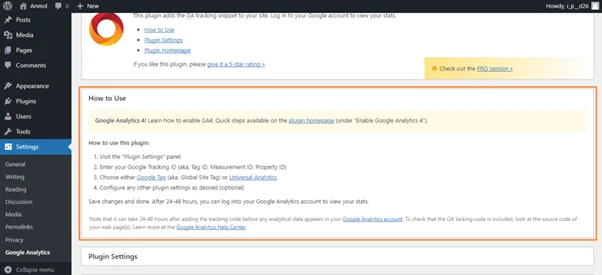
- In the plugin settings, paste your GA4 Measurement ID (this can be found under Data Stream Details in your GA4 account).
- Check the box for Include Tracking Code in Page Head (via wp_head) to ensure the plugin adds the tracking code to your website.
Step 4: Save Changes and Test
- Save your settings by clicking Save Changes.
- Visit your website and check if data is being collected in Real-Time in Google Analytics.
- You can also use browser extensions like Google Tag Assistant to verify the installation.
Final Verification: How to Test GA4 on Your WordPress Site
After you have set up Google Analytics 4 using either method, it’s important to verify that it’s correctly tracking data.
Step 1: Visit Your Website
- Go to Google Analytics and click on Realtime Overview.

- Then, visit any page on your WordPress website.
Step 2: Check for Data
- If Google Analytics is properly installed, you will see a real-time user bar indicating that data is flowing into your Google Analytics dashboard.
If you’re concerned about performance issues when tracking data, especially for eCommerce stores, you can speed up your site by setting Redis Cache.
Frequently Asked Questions
Is Google Analytics free?
Yes, Google Analytics is free for most websites. The standard version includes all the features you need to track your website’s performance and user behavior. There’s also a premium version called Google Analytics 360, which offers extra features and support for larger businesses, but the free version is enough for most users.
How do I know if GA4 is installed on my website?
To check if GA4 is installed correctly:
- Visit your website and right-click on the page, then select “View Page Source.”
- Look for your Google Analytics tracking code in the section.
- Alternatively, you can use the Google Tag Assistant browser extension to check if the GA4 tag is active and tracking properly.
Is the Google Analytics API free?
Yes, the Google Analytics API is free to use with your account. It allows you to access your website data and integrate it with other applications. However, there are some usage limits for the free API access.
How to install Google Analytics 4 on WordPress?
There are two main ways to install GA4 on WordPress:
- Without a Plugin: Add the GA4 tracking code manually to your website’s header.
- With a Plugin: Use a plugin like Google Site Kit or GA Google Analytics to easily integrate GA4 into your site.
Can I use GA4 alongside Universal Analytics?
Yes, you can use both GA4 and Universal Analytics on your website at the same time. This is a great way to transition from Universal Analytics to GA4 while collecting data from both platforms.
How do I set up GA4 goals or conversions?
In GA4, goals are now called “Conversions.” To set them up:
- Go to the “Events” section in your GA4 property.
- Mark specific events, like form submissions or button clicks, as conversions.
This helps you track important actions that support your business goals.
Can GA4 track eCommerce data on WordPress?
Yes, GA4 supports enhanced eCommerce tracking. You can set this up on your WordPress site using plugins like WooCommerce and Google Tag Manager. This lets you track product views, add-to-cart actions, and completed transactions.
If you haven’t set up your eCommerce store yet, set it up with Elementor and WooCommerce and integrate GA4 for enhanced tracking.
Conclusion
Setting up Google Analytics 4 (GA4) on your WordPress website is an easy and effective way to gain better insights into how users interact with your site and improve its performance. Whether you choose to use a plugin or manually add the tracking code, the process is simple and will give you access to advanced features that Universal Analytics doesn’t provide. By tracking important actions and understanding your audience, you can make smarter decisions to help your website grow.


Related Tutorials