When visitors come to your website, they expect it to load faster. If your site takes too long to load, they might leave, leading to a higher bounce rate and a poor user experience. Slow page loading can be caused by render-blocking resources, such as JavaScript and CSS, which delay the rendering of essential content. But don’t worry—this is a common issue, and there are ways to fix it.
In this article, we’ll explain what render-blocking resources are, why they matter, and how to eliminate them from your WordPress site to improve speed and performance.
What Are Render-Blocking Resources?
When we talk about render-blocking resources, we’re usually referring to CSS and JavaScript files. However, not all CSS and JavaScript files are render-blocking.
For example, it’s crucial to load critical CSS files first to avoid a flash of unstyled content (FOUC) when the page is loading.
When a website loads in a browser, the browser processes scripts in a specific order. Ideally, this script queue should be empty before the website starts rendering.
Render-blocking resources are those JavaScript and CSS files in the queue that prevent the website from fully displaying on the visitor’s screen. If the queue is too long, it can delay the website’s load time, which is why these resources are considered a major cause of slow performance.
Many scripts aren’t essential for the initial page display, and this is where the issue lies. These non-essential scripts, often referred to as “above the fold” elements, should be delayed until the main content is fully loaded on the screen. This approach ensures that the website loads faster and the user sees the most important content first.
Why Is It Important to Eliminate Render-Blocking Resources in WordPress?
Website speed is one of the top priorities for any successful site. It directly affects user experience, retention, and engagement. When visitors come to your website, they expect it to load quickly and smoothly.
If your site takes too long to load, users are more likely to leave and look for a faster alternative. In today’s fast-paced online world, people don’t have the patience to wait for slow-loading websites. In fact, they can judge a website’s performance in just a few seconds, and that quick assessment could determine whether they stay or leave.
Speed doesn’t just affect user retention but it also plays a major role in search engine rankings. Search engines like Google prioritize fast-loading websites and reward them with higher rankings. So, improving your site’s speed is important for both user experience and SEO.
Eliminating render-blocking resources (like JavaScript and CSS) in WordPress can greatly improve your website’s load times. These resources can delay the rendering of your page, slowing things down. By optimizing or deferring the loading of these files, you can speed up your website and create a better experience for your visitors.
How to Identify Render-Blocking Resources
To identify render-blocking resources on your WordPress site, the first step is identifying which files are causing the delay. Various tools can help you find these resources and provide actionable recommendations for improvement.
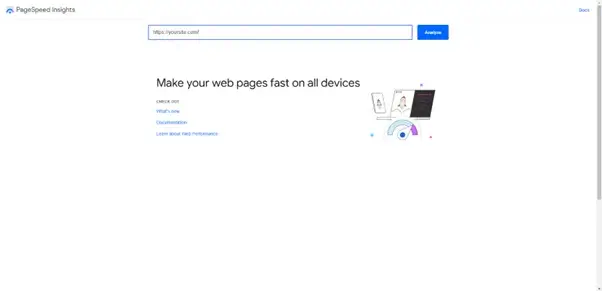
1. Using Google PageSpeed Insights
One of the most popular tools for identifying render-blocking resources is Google PageSpeed Insights. This tool offers a comprehensive performance report, including specific recommendations on how to speed up your site by eliminating render-blocking resources.
How to use PageSpeed Insights:
- Step 1: Visit PageSpeed Insights.
- Step 2: Enter your website URL and click “Analyze.”
- Step 3: After the analysis is completed, scroll down to the Diagnostics section.
- Step 4: Look for the “Eliminate render-blocking resources” recommendation, which will list the CSS and JavaScript files that are causing delays in page rendering.
By reviewing this list, you’ll know exactly which resources to address to improve your site’s speed.
2. Other Tools for Identifying Render-Blocking Resources
While PageSpeed Insights is a great starting point, there are other tools you can use to further analyze and identify render-blocking resources.
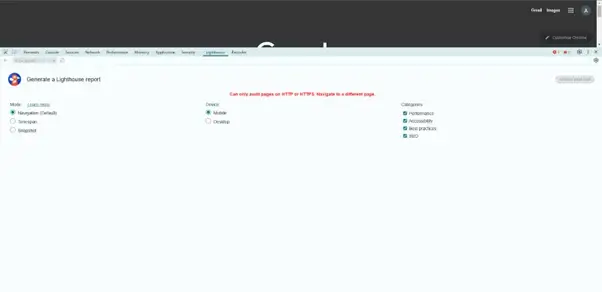
- Lighthouse (Chrome DevTools): Integrated into Chrome’s developer tools, Lighthouse runs a performance audit that includes an “Eliminate render-blocking resources” section. This highlights CSS and JavaScript files causing delays. To use it, simply open Chrome DevTools, go to the Lighthouse tab and run an audit.
- GTmetrix: GTmetrix provides detailed insights into your site’s performance, including render-blocking resources. It displays these in the Waterfall Chart and Structure tab after running a test on your website.

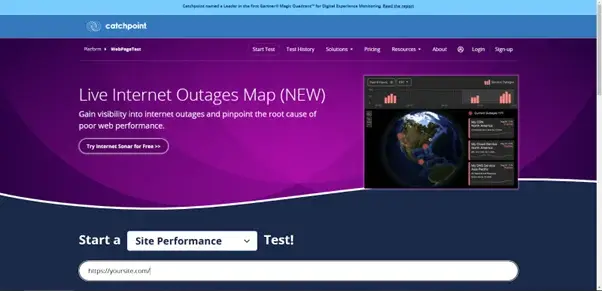
- WebPageTest: This tool allows you to test your website’s performance from multiple locations. It provides a detailed Waterfall Chart and Opportunities & Experiments section, where you can spot render-blocking CSS and JavaScript files.
By using these tools, you can easily identify which files are slowing down your WordPress site and take the right steps to eliminate render-blocking resources, improving your site’s overall performance.
How to Eliminate Render-Blocking Resources in WordPress (With and Without a Plugin)
To remove render-blocking resources in WordPress, you can either optimize your site‘s code manually or use plugins for a faster solution. Both approaches help improve site speed and enhance the user experience by reducing delays in page loading.
How to Eliminate Render-Blocking CSS in WordPress Without Plugins?
One of the crucial steps to speed up your WordPress site performance is to eliminate render-blocking CSS. Render-blocking CSS delays your page from loading, which can hurt both your SEO and user experience. Let’s look at the strategies for how you can optimize CSS delivery and reduce or eliminate render-blocking CSS.
- Avoid the @import Rule
- Remove Unused CSS
- Inline Critical CSS
- Split CSS Files for Better Loading
Avoid the @import Rule
A simple step you can take is to avoid using the @import rule in your CSS files. While @import lets you reference other CSS files within your stylesheet, it causes a problem: it creates a render-blocking request chain.
When a browser sees the @import rule, it will first load the referenced CSS file, delaying the page load. Instead, link to your CSS files separately in the <head> section of your HTML document.
For example, instead of:
@import url("styles.css");Use this:
<link rel="stylesheet" href="styles.css">To prioritize important stylesheets, you can use the rel=”preload” attribute to tell the browser to load them earlier:
<link rel="preload" href="important.css" as="style">Remove Unused CSS
Over time, websites often accumulate unused CSS. Some styles are loaded even though they aren’t needed for certain pages or elements, wasting bandwidth and slowing down your site. To find unused CSS, use the Coverage tab in your browser’s Developer Tools. This feature shows which CSS rules are loaded but not used.
After identifying the unused code, you can safely remove it. This reduces the amount of CSS the browser has to process and speeds up your site.
Inline Critical CSS
One effective way to speed up your site is to inline critical CSS. Critical CSS includes the styles needed for rendering the above-the-fold content (the part of the page visible without scrolling). By inlining this CSS directly in the <head> section, the browser can apply these styles right away, without waiting for external CSS files to load.
Here’s how you can do this:
- Extract the critical CSS (the styles needed for the initial view of the page). Tools like Sitelocity or PurgeCSS can help automate this.
- Once you have the critical CSS, add it directly in your HTML <head> like this:
<!DOCTYPE HTML>

<html>

  <head>

<title>Your Website Title</title>

<meta name="description" content="Website description" />

<meta http-equiv="content-type" content="text/html; charset=UTF-8" />

<!-- Inline Critical CSS -->

<style>

   article, footer, header, main, nav {

     display: block;

   }

   html {

     font-family: sans-serif;

     -ms-text-size-adjust: 100%;

     -webkit-text-size-adjust: 100%;

   }

</style>

<!-- Link to the main CSS file -->

<link rel="stylesheet" href="style/style.css" title="style">

  </head>

</html>
Split CSS Files for Better Loading
Another way to optimize CSS delivery is to split your CSS files into smaller parts and load them only when needed. This is especially useful for responsive designs. For example, you could have different CSS files for different screen sizes, like:
- main.css – common styles for all devices
- small.css – for mobile devices
- medium.css – for tablets
- large.css – for desktops
You can load only the relevant CSS files using media queries based on the screen size:
<link rel="stylesheet" href="main.css" media="all">

<link rel="stylesheet" href="small.css" media="(min-width: 320px)">

<link rel="stylesheet" href="medium.css" media="(min-width: 768px)">

<link rel="stylesheet" href="large.css" media="(min-width: 1200px)">
How to Eliminate Render-Blocking JavaScript in WordPress Without Plugins?
Render-blocking JavaScript can slow down your WordPress site’s load time. If scripts are loaded incorrectly, it can negatively affect user experience and SEO. There are several ways to prevent this issue. Let’s look at the best methods for optimizing JavaScript delivery on your WordPress site.
- Use async and defer Attributes
- Split JavaScript Files for Faster Loading
Use async and defer Attributes
Two effective attributes for preventing JavaScript from blocking page rendering are async and defer. These tell the browser how to handle JavaScript files, helping speed up the page load process.
Both async and defer allow JavaScript to load in the background while the page continues rendering, but they work differently:
async:
- Downloads the script in the background.
- Executes it as soon as it finishes, regardless of its position in the HTML.
- Best for independent scripts (e.g., analytics or tracking).
Example:
<script async src="important.js"></script>defer:
- Downloads the script in the background but executes it only after the page is fully parsed.
- Executes scripts in the order they appear, which is useful for dependent scripts like jQuery.
Example:
<script defer src="important-library.js"></script>When to Use async vs. defer:
- Use async for independent scripts (e.g., analytics, ads, or social widgets).
- Use defer for scripts that rely on others, like jQuery or libraries that need to load in sequence.
Example:
<!-- Async for independent scripts -->

<script async src="tracking.js"></script>

<!-- Defer for dependent scripts -->

<script defer src="jquery.js"></script>

<script defer src="custom-script.js"></script>
Split JavaScript Files for Faster Loading
Just like CSS, splitting large JavaScript files into smaller ones can improve load speed. Instead of loading one large script, break it into smaller bundles that load only when needed. This reduces the initial load time and speeds up rendering.
Example of Bundling:
// Main entry point

import { loadHeader } from './header.js';

import { loadFooter } from './footer.js';

// Load only what's needed based on screen size

if (window.innerWidth > 1024) {

  import('./desktop.js').then(module => {

module.loadDesktopFeatures();

  });

} else {

  import('./mobile.js').then(module => {

module.loadMobileFeatures();

  });

}
How to Eliminate Render-Blocking Resources with Plugins?
WordPress plugins are the easiest way to block render-blocking JavaScript and CSS files. The following four plugins can help reduce render-blocking resources:
- WP Rocket
- Autoptimize
- W3 Total Cache
- Speed Booster Pack
Eliminate render-blocking resources with WP Rocket
Wp Rocket is one of the best WordPress cache plugins that helps us quickly improve our website’s performance without any technical skill requirements.
It will reduce the load time of your website and provide you with high-performance websites.
You need to install and activate the WP Rocket plugin on your WordPress. It will automatically turn on the optimal settings for caching when you do so. But, it does not turn on JavaScript and CSS optimization options by default.
Follow the steps below to fix render-blocking resources JavaScript and CSS in WordPress using the WP Rocket plugin.
- Click on the settings tab and go to the WP Rocket page on your WordPress dashboard. (Navigate to Settings >> WP Rocket)
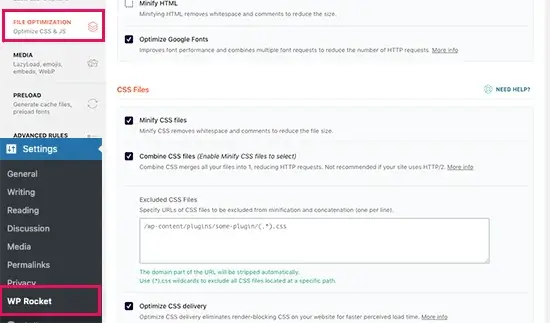
- Now, scroll to the CSS files section inside the “File Optimization” tab.
- Then, check the Minify CSS, Combine CSS Files, and Optimize CSS Delivery
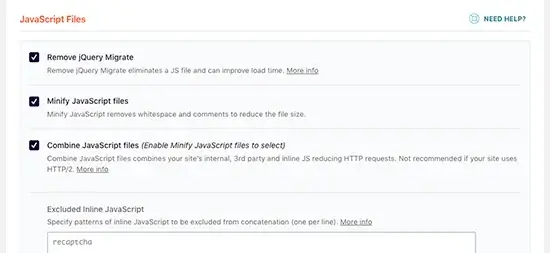
- Now, scroll to the JavaScript files section inside the “File Optimization” tab.
- Then, check the boxes Remove JQuerry Migrate, Minify JavaScript Files, and Combine JavaScript Files options.
- Now, scroll down and check the boxes ‘Load JavaScript Defered’ and ‘Safe Mode for jQuery’ options.
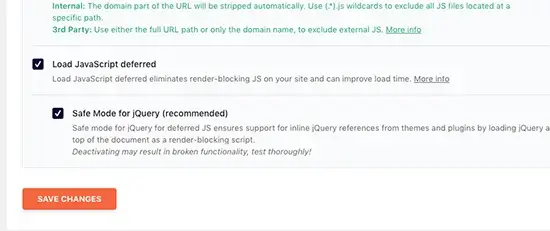
- After you are done with all these steps, do not forget to save changes.
Note: While checking the boxes of the files, have an eye on your themes, plugins, and design. It may harm your website’s functionality, design, or anything else. So, be careful while following any new process.
Eliminate render-blocking Resources with Autoptimize
The Autoptimize plugin is specifically used to manage CSS and JavaScript files. It does not have extra features like the previous WP Rocket plugin.
It makes optimizing your website more accessible and removes render-blocking resources from your website in WordPress.
Go, install and activate the Autoptimize plugin on your WordPress. Follow the steps below to fix render-blocking resources JavaScript and CSS in WordPress using the Autoptimize plugin.
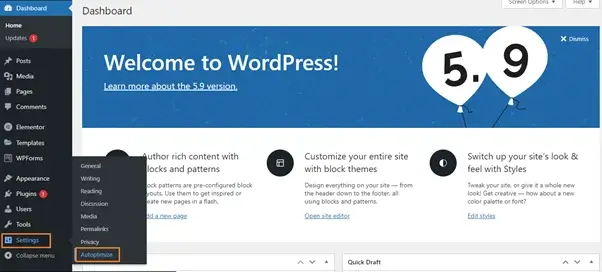
- Go to the ”Settings“ section and select the ”Autoptimize“ plugin page. (Settings >> Autoptimize)
- Click on JS, CSS & HTML tab and check the “Optimize JavaScript Code” box in JavaScript options and uncheck the “Aggregate JS-files” box.
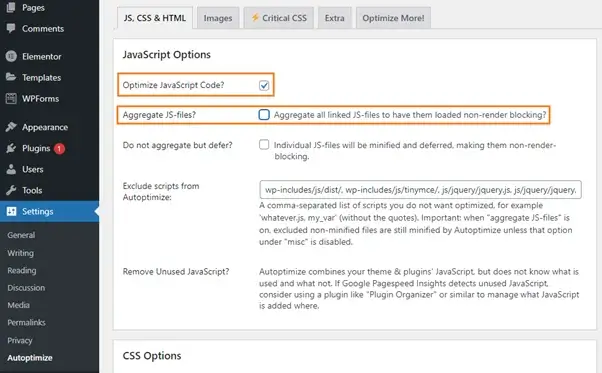
- Now, scroll down to the CSS options, check the “Optimize CSS Code” box, and uncheck the “Aggregate CSS-files” box.

- Once you are done with these settings, click on the “Save changes and empty cache” button to save the changes.
Eliminate render-blocking resources with W3 Total Cache
W3 Total Cache WordPress plugin is one of many users’ most liked WordPress plugins. It helps us in many ways, including cache problems, render-blocking resources, etc.
It provides SEO factors and helps to improve website performance. It also helps to decrease the load time of your website.
So, install and activate the W3 Total Cache plugin on your WordPress, and follow the steps mentioned below.
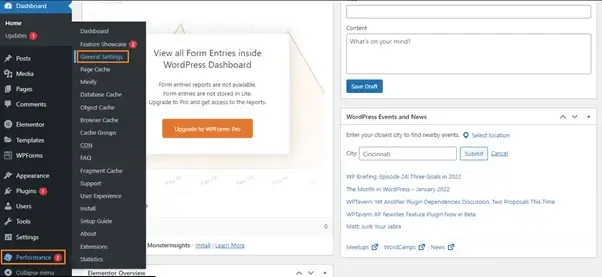
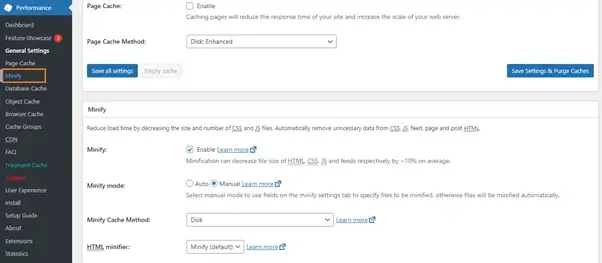
- Select the “Performance” tab and go to your WordPress dashboard’s “General settings” section. (Performance >> General settings)
- Scroll down and go to the Minify section. In this section, check the “Enable” box of the “Minify” option. Then, choose the “Manual” option of the “Minify Mode.”
- Once you are done with all these settings, click on the “Save all settings” button to save the changes.
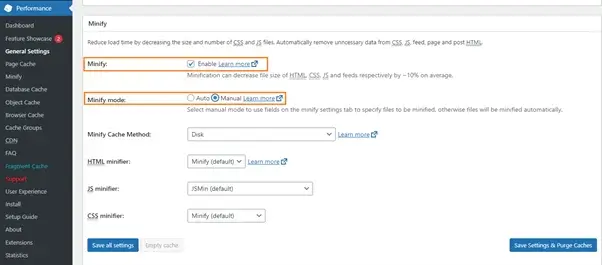
- Now, go to the “Minify” option of the “Performance” tab on the dashboard. (Performance >> Minify)
- Scroll down to the JS section for JavaScript optimization. Check the “Enable” box of the “JS Minify settings” option. Then, in the “Operations in areas” box, select the “Embed Type” of the “Before” option as Non-blocking using “defer.”

- Now, click on the “Add a script” tag and add the JS files causing issues.
- Finally, scroll down to the “CSS” section, enable the minify option similar to what we did in the JS section, and add Style Sheets that are causing issues.
- Once you are done with all settings, click on the “Save all settings” button to save the changes.
Note:
It could be challenging to fix all render-blocking JavaScript and CSS issues completely. It all depends on how your plugins and themes use JavaScript and CSS.
While the above tools can help, your WordPress plugins may need specific scripts to work correctly at a different priority level. In such a case, they could behave unexpectedly and break the functionalities of the plugins.
Why Are Render-Blocking Resources (JavaScript and CSS) Bad for Web Pages?
Site speed plays a key role in your website’s ranking, performance, and user experience. Render-blocking resources, like JavaScript and CSS, slow down page loading. When multiple resources are loaded, especially large ones, they increase download times.
To improve speed, your website should use lighter scripts. A clean and minimal codebase is essential because, by default, browsers try to load everything at once, including render-blocking scripts.
It’s important to prioritize loading the scripts that make your site look correct when a user first lands on the page, and then load the rest afterward.
To boost your website’s speed and performance, keep the code clean, simple, and minimal.
Conclusion
In conclusion, render-blocking JavaScript and CSS can significantly slow down your website’s load time, affecting both user experience and SEO. You can improve your site’s performance and reduce loading delays by optimizing these resources, either manually or with plugins. While plugins like WP Rocket, Autoptimize, and W3 Total Cache make it easy to resolve these issues, you can also implement manual solutions like deferring scripts and inlining critical CSS.
Ultimately, a faster, smoother website will keep visitors engaged and improve your search engine rankings. We hope this guide has helped you understand how to eliminate render-blocking resources on your WordPress site!


Related Tutorials